**This is a legacy article
Editor’s Note: For owners of the Plugable Windows Transfer Cable, we no longer recommend using the Microsoft Windows Easy Transfer Software mentioned in this post. Instead, we recommend using the Bravura Easy Computer Sync software that comes with the Plugable Windows Transfer cable. It works between all Windows versions XP and higher, both 32- and 64-bit and has a wider range of features. If you have any questions, please contact us at support@plugable.com
Although Microsoft has removed support in Windows 8.1 for upgrading to a new computer using a Windows transfer cable with the Windows Easy Transfer software, that software still offers the easiest and most automated method for upgrading to a Windows 7 or 8 computer. This blog post gives instructions for doing that.
Microsoft’s Windows Easy Transfer software is built into Windows 7 and Windows 8 and is available as a free download when using a Windows XP (SP2 or higher required) or Windows Vista computer as the source. It provides a step-by-step interface for migrating Windows user account settings and files from an old PC to a Windows 7 or 8 computer. With Plugable’s Windows transfer cable and Microsoft’s Windows Easy Transfer software, you can migrate in the following scenarios:
- From a Windows XP SP2 (or higher) or Windows Vista PC to a Windows 7 or Windows 8 PC
- From one Windows 7 PC to another
- From a Windows 7 PC to a Windows 8 PC
- From one Windows 8 PC to another
Please note that the Windows Easy Transfer software does not support using the Windows transfer cable in Windows 8.1, or upgrading from a 64-bit version of Windows to a 32-bit version of Windows. It also does not work if the target computer has Windows XP or Vista. For instructions on using the Bravura Easy Computer Sync software to upgrade in these scenarios, see this Article.
1.Before getting started with the cable, install the latest drivers for the older PC if it is running Windows XP or Vista. Go to http://windows.microsoft.com/en-US/windows7/products/features/windows-easy-transfer and download the drivers for your edition of XP or Vista. Run Windows Update on the target computer, and also on the source computer if it uses Windows 7 or 8.
2. Plug the Windows transfer cable into a free USB port on each of the PCs (use a USB 2.0 port if possible to ensure the best connection speeds). Windows will attempt to recognize the cable. If you experience any errors at this point, email us at support@plugable.com. If all goes well, continue to the next step.
3. Now you need to open Microsoft’s Windows Easy Transfer software.
If you’re running Windows XP SP2 (or higher) or Windows Vista, an autorun option will give you the opportunity to launch the Windows Easy Transfer software if it’s installed. If it’s not, you’ll install it on the PC in a later step.
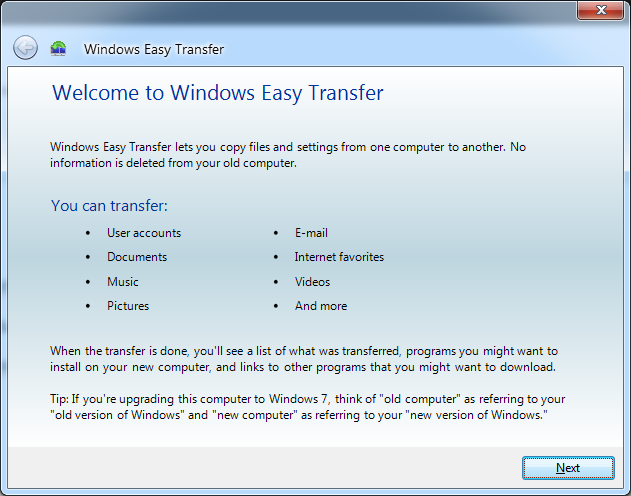
If you’re running Windows 7 or 8, Microsoft’s Windows Easy Transfer will open on screen when your Windows transfer cable is plugged in:
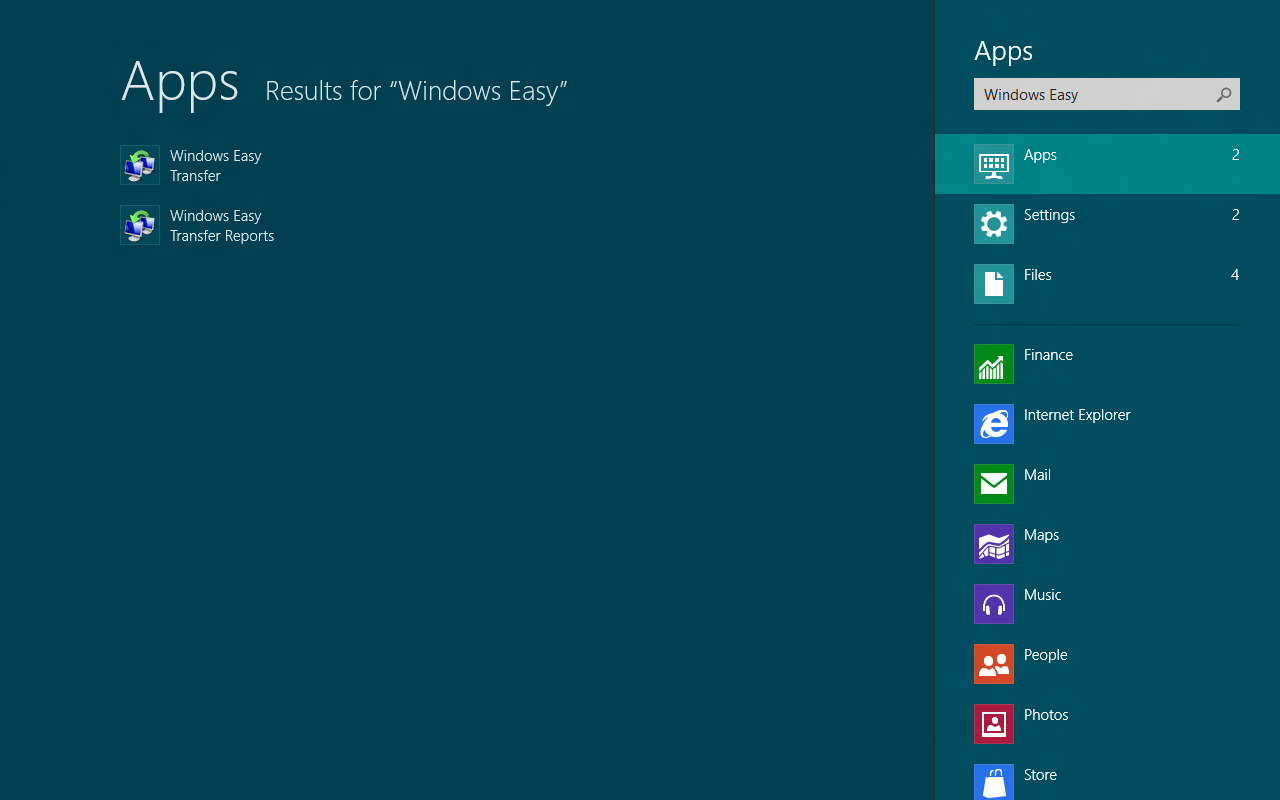
If you’re running Windows 8, you may need type Windows Easy Transfer into your Start screen, then click the Windows Easy Transfer icon to launch it.
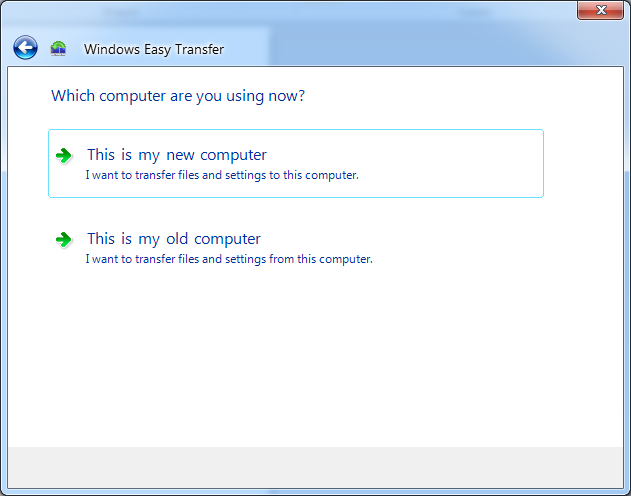
4. On the new PC, you’ll select whether this is the new or old computer. Select New and continue.
5. On the new computer, you’ll be asked if you’re going to need to install Windows Easy Transfer on the old computer. You should already have addressed this in step No. 1, so select the appropriate answer from “I already installed it” or “My old computer is running Windows 7.”
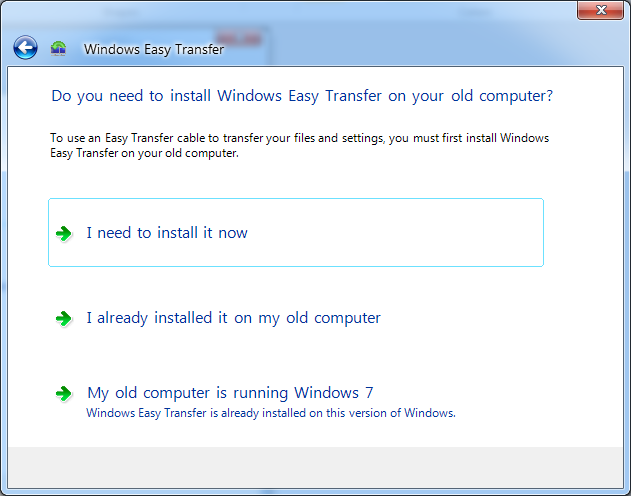
6. On the old computer, make sure Windows Easy Transfer is running and select that you already installed in on the old computer.
7. At this stage, the Windows Easy Transfer software will connect the computers.
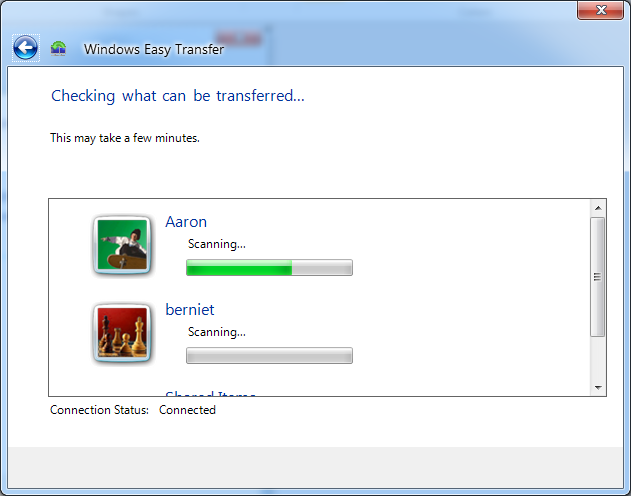
From this point forward, you will make all your decisions on the new computer.
8. On the new PC, the Windows Easy Transfer software lets you choose what you want to pull from the old computer and how you want the synchronization to occur.
The “Customize” option lets you select which file folders and settings to synchronize onto the new PC.
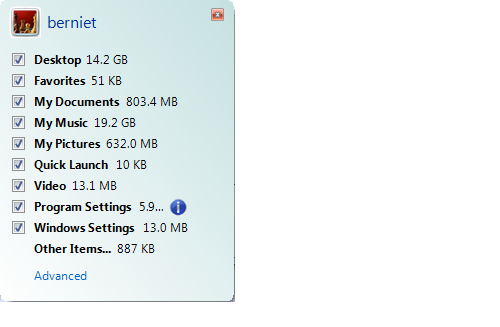
Choosing “Advanced” from this menu allows you to select specific files to transfer rather than the whole folder.
Back in the main window, the “Advanced Options…” link lets you decide whether to pull the whole user account associated with the files and settings from the old PC to the new PC or to merge it into an account already on the new PC.
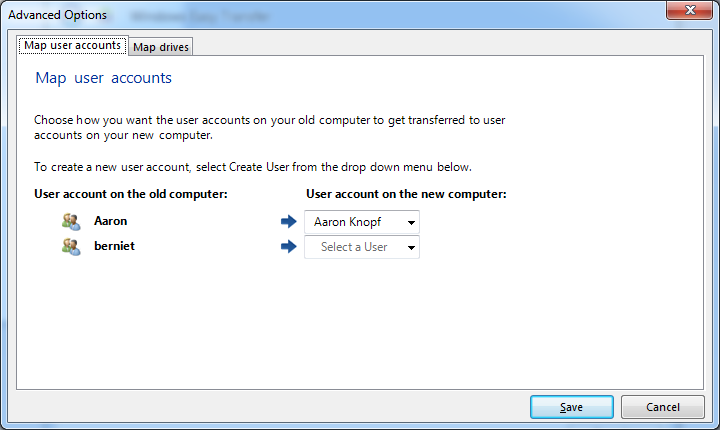
From the “Map drives” tab in this window you can determine where on the new PC the files will be transferred, if you don’t want them to be placed in the same file path as they had on the old PC. Occasionally, Windows Easy Transfer mistakes a computer’s recovery partition for its main drive and issues an error that not enough space is available on the target drive. If this happens, use the Map drives tab to set the correct target partition.
9. Once you decide what you want to copy from the old computer to the new computer, choose “Transfer” and watch the progress as the data is migrated. When it’s finished, you’ll get the chance to see what was transferred. This may take several hours, depending on how much data is on the old computer.
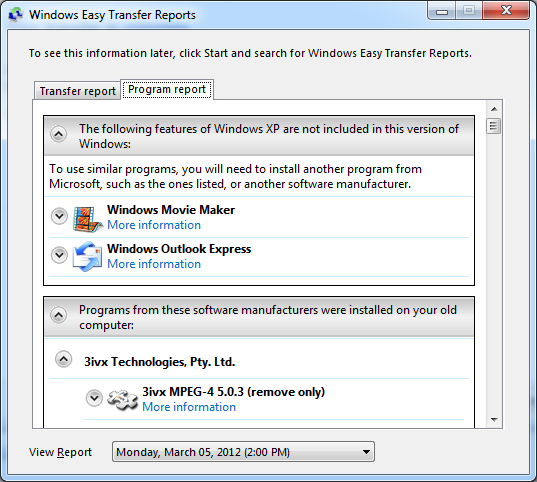
Another useful feature in this final window is an option to see what programs were installed on your old PC that you might want to install on your new PC.
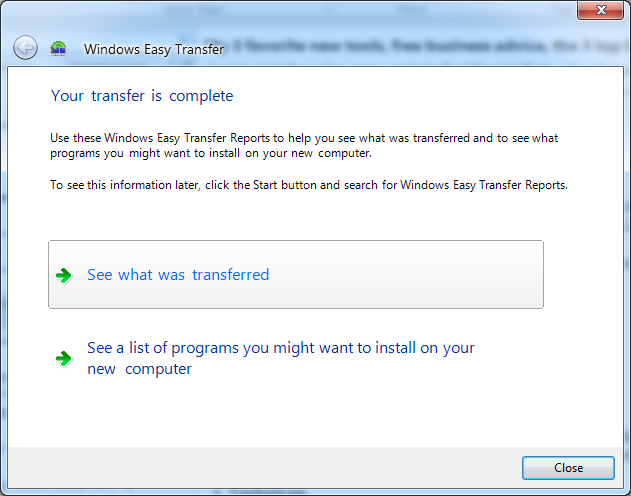
This is helpful since the Windows Easy Transfer software moves documents and account settings but not your installed apps. With this feature, you can see what you will need to re-install on your new PC to match your old PC’s functionality.
10. You now can close the Windows Easy Transfer software on both computers and disconnect the Windows transfer cable.
If You Need Help:
We’ve tried to cover the basics of how you can make the most of your Plugable USB-EASY-TRAN Windows transfer cable when using Windows Easy Transfer to upgrade to a Windows 7 or 8 computer.
Feel free to comment here or write us at support@plugable.com

