Originally authored by: Joshua Henry, March 12, 2015
New hard drives and SSDs are generally not initialized, partitioned, or formatted by the manufacturer - with the exception of dedicated external drives. To setup a new drive in Mac OS X the drive must be first initialized, then partitioned, and the data partition(s) formatted to be read from and written to by Mac OS X.
Mac OS X
For Mac OS X we'll be focusing on the Disk Utility. The Disk Utility is much like the Disk Management Console in Windows with many similar elements. The biggest difference is the type of partitions available and selecting the best partition scheme.
When a new blank hard drive or SSD is attached to a Mac system, you should see a dialog box automatically pop-up asking what you would like to do. If it does not, the Disk Utility can be found within the Utilities folder (found inside the Applications folder). If you're sure that erasing any data on the drive is OK, go ahead and click “Initialize…” to open the Disk Utility:

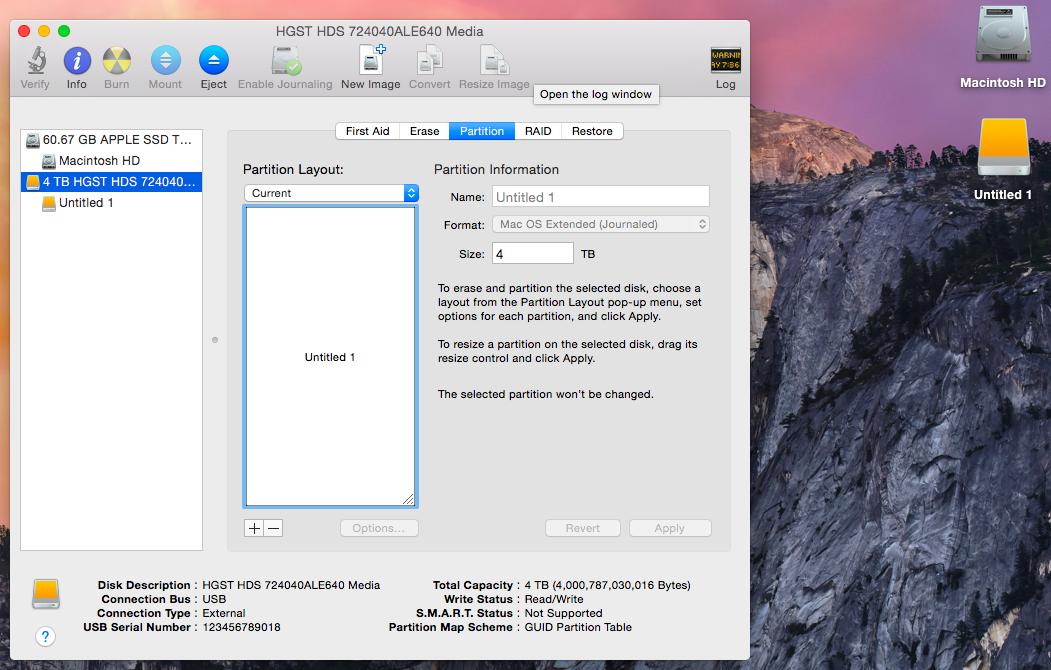
Once Disk Utility is open you will see a list of drives attached to the system to the left of the window. It should be fairly easy to identify the drive you want to initialize as the drive size and model number will usually be present. For this example we're using the “4 TB HGST HDS 724040…” hard drive:
After selecting the drive you wish to initialize you will be presented with several options. Click on the “Partition” tab:
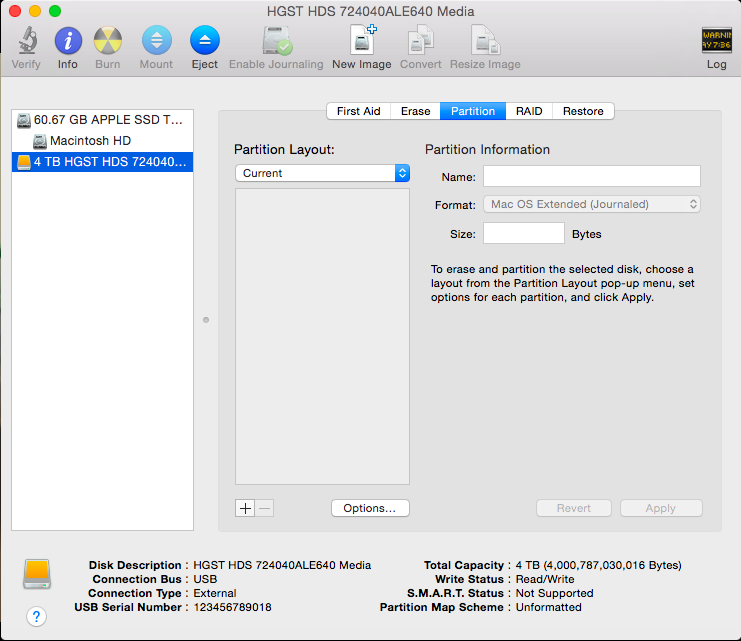
Now click on “Options” to select the partition scheme for the drive:
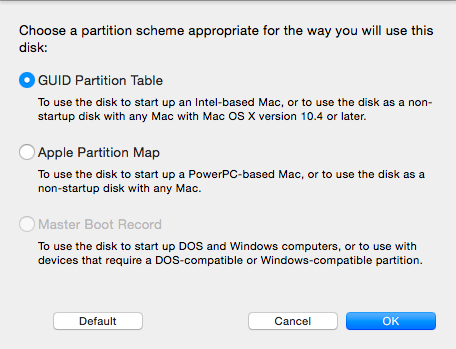
Here we have options for GUID (GPT) and MBR, but we're also presented with Apple Partition Map. MBR is the older legacy method of initializing drives, and is only necessary if you need to access the drive on a Windows XP system (XP is incompatible with GPT and Apple Partition Map). Apple Partition Map is also an older legacy method of initializing drives, and is only necessary if you need to use the drive as a start up disk on a PowerPC-based Mac. Because our example hard drive is greater than 2TB Apple does not give us the option to select MBR, only GUID (GPT) and Apple Partition map. We recommend GUID for most users.
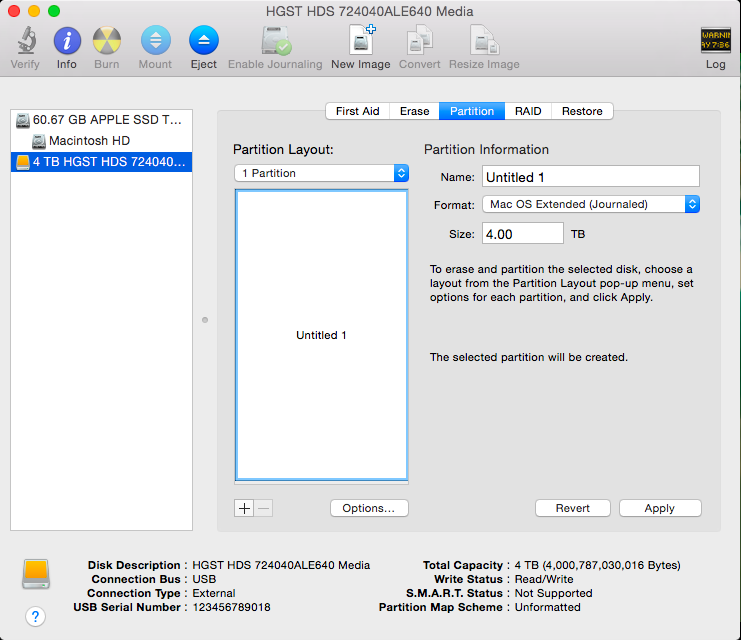
After clicking “OK” we now need to partition the drive. You can create multiple partitions if you want, but this guide assumes that you, like most people, want to access the entire drive through a single partition. Click on the “Partition Layout” drop-down menu and select “1 Partition”. You may give the partition a name you will see associated with the drive in Finder, we chose to leave ours as the default “Untitled 1”:
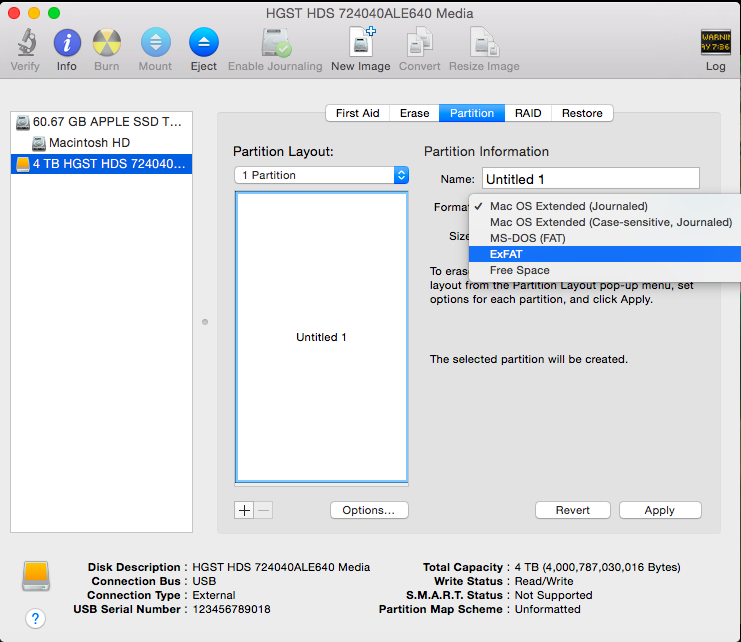
Now we need to select what format (filesystem) to use. If you are solely a Mac user, the best option is “Mac OS Extended (Journaled). If you need to use the drive with older Windows XP based computers you will want to select “MS-DOS (FAT)” but please take note that the maximum file size this format supports is 4GB which is problematic for larger files like HD video. If you want to use this drive between Windows Vista and newer computers, the best filesystem is ExFAT. For this example we're going to select ExFAT since in our office we use a mixture of Mac and newer Windows systems:
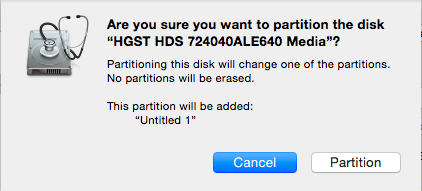
After selecting the format and clicking “Apply” you will be presented with a confirmation dialog:
After clicking “Partition” Disk Utility will format the drive:
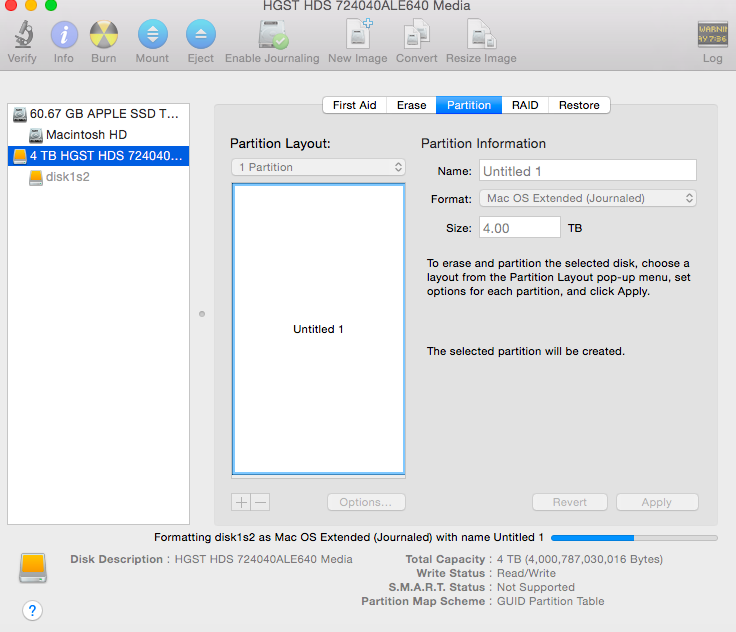
After the formatting process is complete the Disk Utility will show the hard drive size and model and there will now be an entry for your formatted drive partition and the drive should automatically mount and be visible in the Finder (we have the Finder set to show mounted drives on our desktop, this is not enabled by default on newer versions of OS X):