
This article applies to:
- Operating systems: Windows 10, Windows 11
- Products: DisplayLink based docking stations and graphics adapters
This article requires using the Windows command prompt (or Windows PowerShell) and affects some Windows Default settings and behavior, and is recommended for experienced users. I recommend creating a system restore point before proceeding.
What is a Power Plan?
Windows uses Power Plans to store configuration settings, this includes the time for the computer to enter sleep mode, how a laptop behaves when the lid is closed, as well as how USB devices are powered and communicated with in a variety of situations.
By default Windows loads a "Balanced" plan, this can be modified to change how the computer behaves however we have seen instances where the Balanced plan is being reset or specific settings modified by updates or through software which may make the docking station or connected devices fail to perform as expected.
Solutions
The Balanced power plan may be altered from any number of sources potentially causing erratic behavior, the recommendation in this article is to create a duplicate power plan to use instead of the Balanced power plan. The duplicated power plan will have a different name and unique identifier and should not be reset as often as the Balanced power plan is being reset for some users.
Duplicate and name a new power plan
Windows provides a Graphical User Interface (GUI) for creating the duplicate power plan, alternatively it may be created through the Windows Terminal for power users, or if the GUI is not functional.
Using the Windows Control Panel GUI
- Open the Windows "Power Options" dialog: open the Start Menu and type in "powercfg.cpl", select the Best Match result: "powercfg.cpl | Control panel item"
- On the left side of the window, select the link to "Create a power plan"
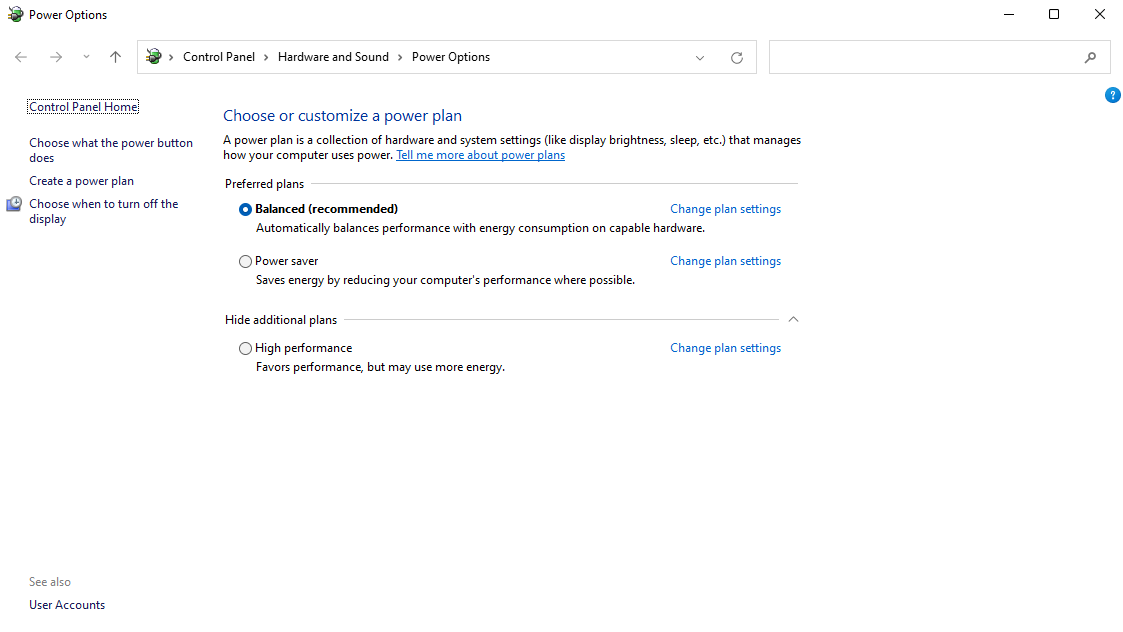
- Under "Create a power plan" the "Balanced (recommended)" plan should be selected, please select this if not already selected
- In the "Create a Power Plan" window, type in a descriptive plan name into the "Plan name:" field, I will use "DisplayLink Docking Station" in this example
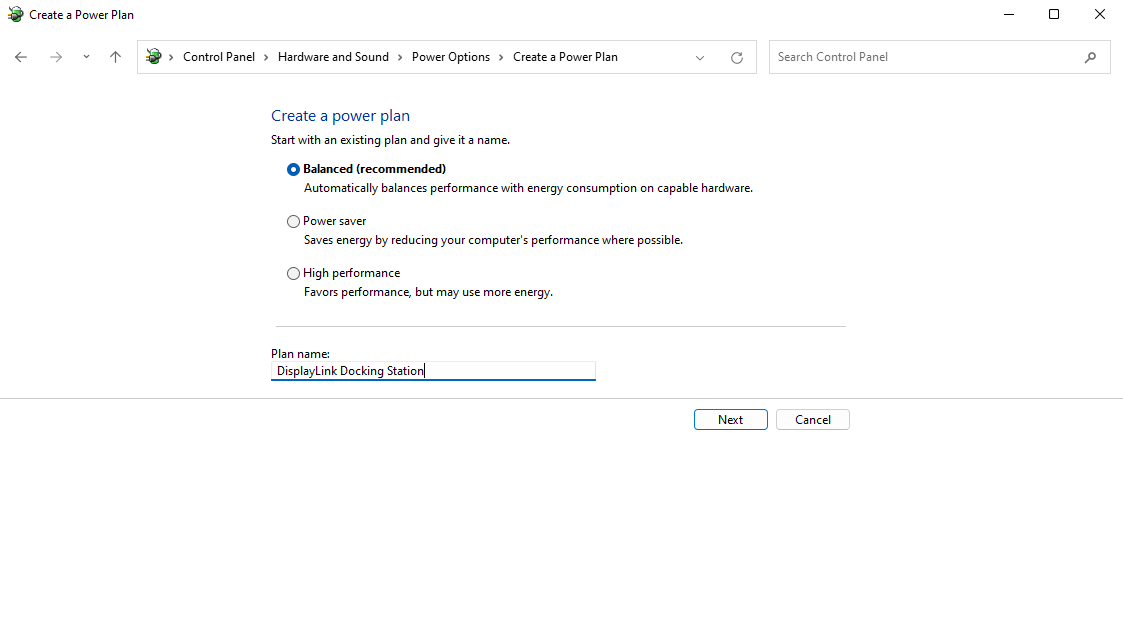
- Click the Next button
- No changes are necessary on this page, Click the Create button to continue to the "Power Options" view
- Select the new power plan (if not already selected) by checking the radio button next to the plan name
- Verify the "DisplayLink Docking Station" power plan is selected and close the window
Using the Terminal
Sometimes the graphical user interface will not allow you to create a duplicate power plan, or you may be more comfortable working in the Windows Terminal.
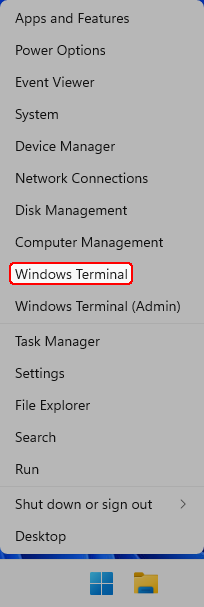
- Open the Windows Terminal (cmd.exe or Window PowerShell): Right-click on the Start Menu and select "Windows Terminal" or "Windows PowerShell"
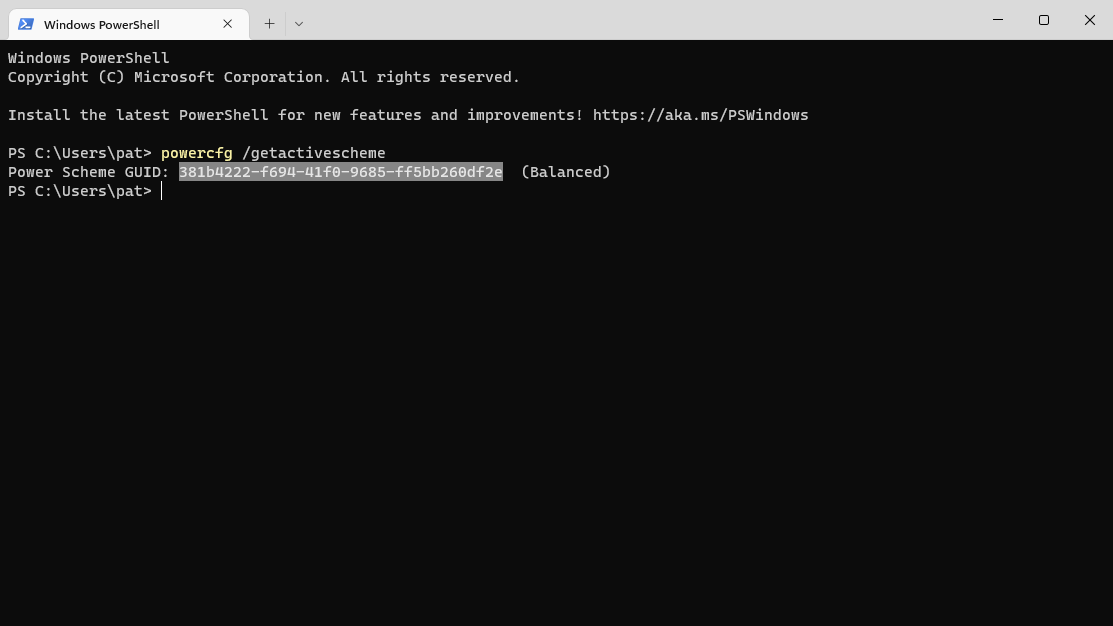
- Type in the following command
powercfg /GetActiveSchemeand tap the Enter key to execute the command - Copy the Power Scheme GUID by selecting the unique identifier and then right-clicking in the terminal window
- Type in the following command
powercfg /DuplicateSchemewith a space after the last word, then right-click to paste in the GUID from the last step, tap the Enter key to execute the command - From the new line, highlight and copy the new GUID like in step #3 above
- Type in the following command
powercfg /SetActivewith a space after the last word, then right-click to paste in the GUID from the last step, tap the Enter key to execute the command and make the new power profile active - Type in the following command
powercfg /ChangeNamewith a space after the last word, then right-click to paste in the GUID from the last step, and type in the following"DisplayLink Docking Station", then tap the Enter key to execute the command and rename the new power profile - Finally, type in the following command
powercfg /Listto list the power profiles and confirm the newly created power profile is set active with the "*" after the name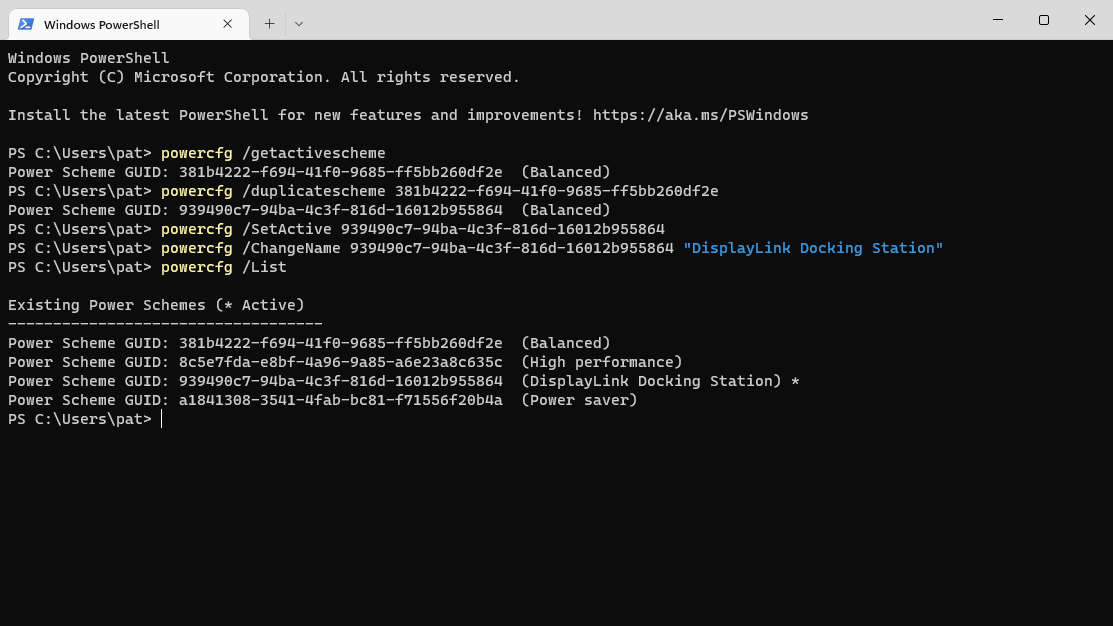
Configure the new power plan
Windows hides some of these settings from the graphical user interface and the next steps require accessing the Windows Terminal, command prompt, or Window PowerShell.
- Open the Windows Terminal (cmd.exe or Window PowerShell): Right-click on the Start Menu and select "Windows Terminal" or "Windows PowerShell"
- Type in the following command
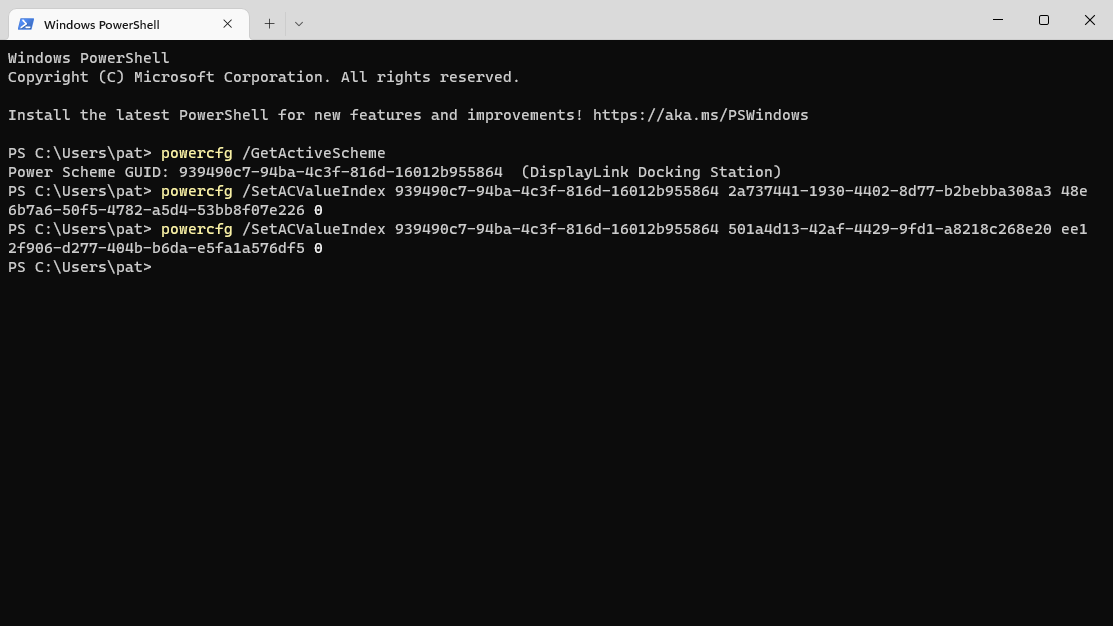
powercfg /GetActiveSchemeand tap the Enter key to execute the command - Copy the Power Scheme GUID by selecting the unique identifier and then right-clicking in the terminal window
- Type in the following command
powercfg /SetACValueIndexthen paste in the GUID from step #3, then copy and paste in the following code2a737441-1930-4402-8d77-b2bebba308a3 48e6b7a6-50f5-4782-a5d4-53bb8f07e226 0and tap the Enter key to execute the command, this will disable USB Selective Suspend when the computer is connected to a power source. - Type in the following command
powercfg /SetACValueIndexthen paste in the GUID from step #3, then copy and paste in the following code501a4d13-42af-4429-9fd1-a8218c268e20 ee12f906-d277-404b-b6da-e5fa1a576df5 0and tap the Enter key to execute the command, this will disable PCIe Link State Power Management when the computer is connected to a power source. - When completed successfully the terminal should look similar to this:
- Close the terminal, these settings should take effect immediately, however I still recommend restarting the computer
