
1. DockTag™ at a Glance
DockTag™ is a web-based system for reserving desks, managing shared workspace inventory, and connecting Plugable docking stations or sticker-only desk tags to a reservation workflow. Users access DockTag™ through an organization-specific web environment. Depending on their role, they may reserve desks, manage desk status, register docking stations, configure the organization, manage users, and view analytics.
- DockTag™ supports both authenticated organizations and Open Access organizations where users can reserve by entering an email address.
- Each desk can have a location, status, tags, optional floorplan context, and optional Plugable dock metadata such as serial number, SKU, and MAC address.
- Desk availability is visible in table views, inline schedule strips, multi-day Gantt charts, hotdesk pages, and QR-code landing pages.
- Confirmation, update, cancellation, and optional reminder emails help users keep calendar entries current.
- Administrators can start with up to 20 free desks, then request or provision additional paid desks depending on payment history.
Terminology: The guide uses "desk" broadly. A desk may be a sticker-only DockTag™ desk or a desk associated with a Plugable dock. When a Plugable dock is linked, the desk shows hardware metadata and is treated differently for licensing/billing.
2. User Roles and Access
DockTag™ uses role-based access. The interface changes based on role so users see only the tools they need.
| Role | Primary Responsibilities | Typical Access |
| Administrator | Set up the organization, configure branding and access, manage users, manage desks and licenses, link docks, manage tags, delete desks, view analytics, and override reservation conflicts. | Full organization administration plus all manager and standard-user capabilities. |
| Manager | Run day-to-day desk operations, manage desk status and location, register docks by QR scan, view analytics, and override reservation conflicts. | Operational tools without user management or organization settings. |
| Standard User | Find, reserve, extend, shorten, and cancel their own desk reservations. | Reservation tools, account security, and QR scanning for registered desks. |
Access Denied: If you open a page your role cannot use, DockTag™ displays an access-denied message or hides that page from navigation.
3. Getting Started and Signing In
3.1 Organization signup
An administrator can create a free organization directly from the DockTag™ signup page → https://osd.plugable.com/signup The free organization supports up to 20 desks. No sales call, credit card, or manual approval is required for the free allocation.
- Open the DockTag™ signup page.
- Enter the Organization ID. DockTag™ auto-slugifies this value to a lowercase URL-friendly form, such as converting "My Company" to "my-company".
- Enter the display name for the organization.
- Enter the administrator email, first name, and last name.
- Optionally enter an IT support email address.
- Create initial desk locations using either the hierarchical builder or manual desk-name entry. Optionally upload an initial floorplan image.
- Select the QR code format: Sticker, Poster, or Both. Choose delivery options: email the PDF to the admin, download the PDF in the browser, or both.
- Choose the reservation access level: Login Required or Open Access.
- Optionally set Timezone and Reservation Hours, Reservation Notifications, and Check-in Enforcement options.
- Click the ‘Create Free Account’ button to submit the form. DockTag™ creates the organization, creates the admin account, generates QR-code PDFs, and delivers them according to the selected delivery options.


3.2 Desk setup during signup
- Hierarchical builder
- Enter a building name, such as HQ.
- Enter a floor name, such as Floor 1.
- Use the desk-count slider. The on-screen counter shows the current count against the 20-desk free limit.
- Add floors or buildings as needed.
- Review the auto-generated desk-name preview, for example HQ:Floor 1:Desk 1.
- Manual builder
- Switch to manually entering desk names.
- Use + Desk to add custom desk names one at a time.
- Watch the desk counter so the initial free limit is not exceeded unless you intend to request additional paid licenses.
3.3 Sign-in options
- Google SSO is the recommended sign-in method. Select Sign in with Google and use your organization account.
- Temporary password login is available from the invitation email. If you use a temporary password, DockTag™ requires you to set a new password on first login.
- After signing in, you arrive at the Organization Home Page.
4. Home Page and Navigation
The Organization Home Page (osd.plugable.com) is the launch point for DockTag™. It shows your organization name, optional logo, welcome message, and role-specific navigation cards. A sidebar hamburger menu provides the same navigation in a compact form.
4.1 Guided tours
- The home page can show a green Take a Tour banner for new users. This is the entry point for the full multi-page guided tour.
- Individual pages can show a compact Take a Tour pill below the page title. Those page tours are scoped to the current page and do not continue to other areas.
4.2 Navigation cards by role
| Card or menu item | Administrator | Manager | Standard User |
| Reserve a Desk | Yes | Yes | Yes |
| My Reservations | Yes when enabled | Yes when enabled | Yes when enabled |
| Manage Desks & Licenses | Yes | Yes | No |
| Analytics | Yes | Yes | No |
| Manage Users | Yes | No | No |
| Organization Settings | Yes | No | No |
| Account Security | Yes | Yes | Yes |
| Scan QR Code | Yes on mobile | Yes on mobile | Yes on mobile |
My Reservations: When enabled, My Reservations links to the reservations page filtered to your own bookings. Reserve a Desk and My Reservations highlight separately so you can tell whether you are browsing all desks or managing your own reservations. For Unauthenticated Users, all they will see are the “Reserve a Desk” and “Scan QR Code” Cards.

5. Administrator Setup and Organization Settings
Administrators use Organization Settings to configure the organization after signup. Some overview fields are read-only for organization users.
5.1 Read-only organization overview
- Organization ID
- Display Name
- Desk Limit

5.2 Company logo
- Open Organization Settings.
- In the Company Logo area, upload a PNG or JPEG file up to 5 MB.
- Review the preview, which appears alongside the Plugable logo.
- Save changes.
- Return to the home page to confirm the logo appears.
- Use Remove Logo if you want to clear the uploaded logo.
![]()
5.3 Floorplan images
- Upload images for buildings and floors so users can visually locate desks.
- Use the naming convention Building - Floor.png, such as HQ - Floor 1.png.
- After upload, thumbnails appear with controls to remove them, if necessary.
- Floorplan tabs appear above desk tables when floorplans are available.

5.4 Support and branding messages
- Set an IT Support Email so users know who to contact for local help.
- Add an IT Help Portal Link if your organization has a support site or ticketing portal.
- Add a Custom Welcome Message that appears below the organization name on the home page.
- Add a Custom Support Message for additional help instructions.

5.5 Reservation access level
| Access Level | What users experience | Best for |
| Login Required | Users must sign in before reserving desks. Authenticated users have their email prefilled and locked on the reservation form. | Organizations that want stronger identity control and a managed user list. |
|
Open Access
|
Anyone with the link can reserve by entering an email address. The browser can remember the email for convenience. | Shared spaces, demos, lobbies, coworking areas, or environments where accounts are not required. |

5.6 Working hours, timezone, and schedule range
- Open the Working Hours, Timezone & Schedule Range card.
- Choose the organization timezone from the curated IANA timezone picker. Use the show-all-zones search fallback if needed.
- Turn on Restrict reservations to working hours if users should book only inside approved hours.
- Set working hours for each day, such as Monday through Friday, 09:00 to 17:00.
- Use Apply Monday's hours to all days to copy Monday's schedule to the rest of the week.
- Use the Days visible on charts slider to set the reservation horizon shown on multi-day charts. The range is 1 to 30 days; the default is 7.
- Click Save Working Hours.
Timezone behavior: Reservation charts and hotdesk pages use the organization timezone. A 9:00 AM block means 9:00 AM in the organization's wall-clock timezone, not necessarily the browser's local timezone.

5.7 Reservation notifications and check-in options
- The Reservation Notifications card can enable a 30-minute reminder email for confirmed future reservations.
- Each qualifying future reservation receives a single reminder 30 minutes before the start time.
- Reservations made inside the 30-minute window receive only the standard confirmation email, avoiding duplicate emails.
- If enabled for your deployment, Require check-in scan can require users to scan a QR code within a configured grace window.


5.8 Saving settings
- The Save Changes button is disabled until a field changes.
- After saving, DockTag™ shows a success notification.
- Return to the home page to verify visible changes such as logo, welcome message, and support details.
6. User Management
Only administrators can create, modify, or delete user accounts. Managers and standard users do not see user-management tools.
6.1 User table
- The user table shows email, user ID, role, and two-factor-authentication status.
- Use search to filter by email or role.
- Use pagination controls when the organization has many users.

6.2 Create a user account
- Open Manage Users.
- Select Create User.
- Enter the user email address.
- Choose a role: Administrator, Manager, or Standard User.
- Submit the form.
- DockTag™ sends the user an invitation email with Google SSO and temporary-password options.
- The new user appears in the table immediately.

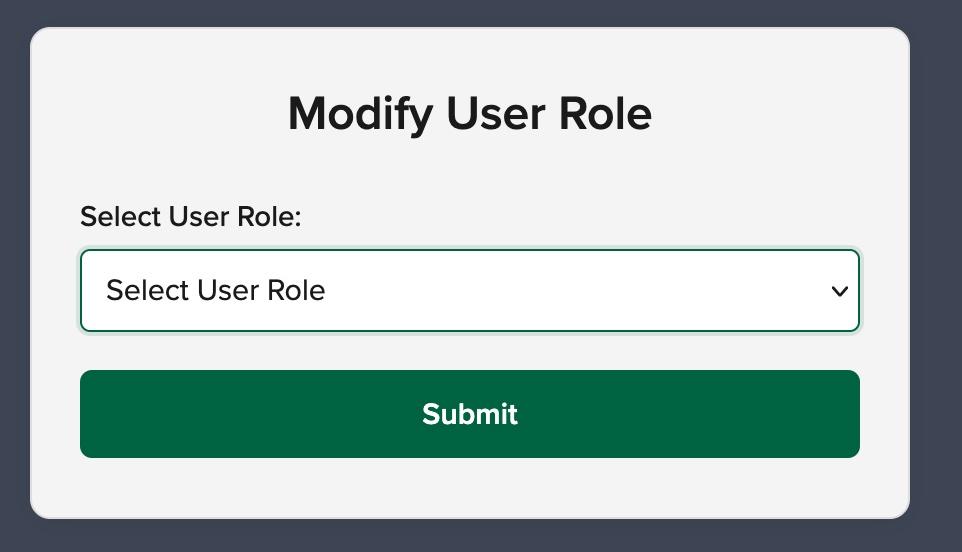
6.3 Change a user role
- Open Manage Users.
- Select the user email to open the user detail panel.
- Review the current role and MFA status.
- Change the role.
- Save the change. The new role takes effect on the user's next page load.
6.4 Delete a user
- Open the user detail panel.
- Choose Delete.
- Type the username exactly when prompted.
- Confirm deletion.
Important: Deleting a user permanently removes the account and cannot be undone.

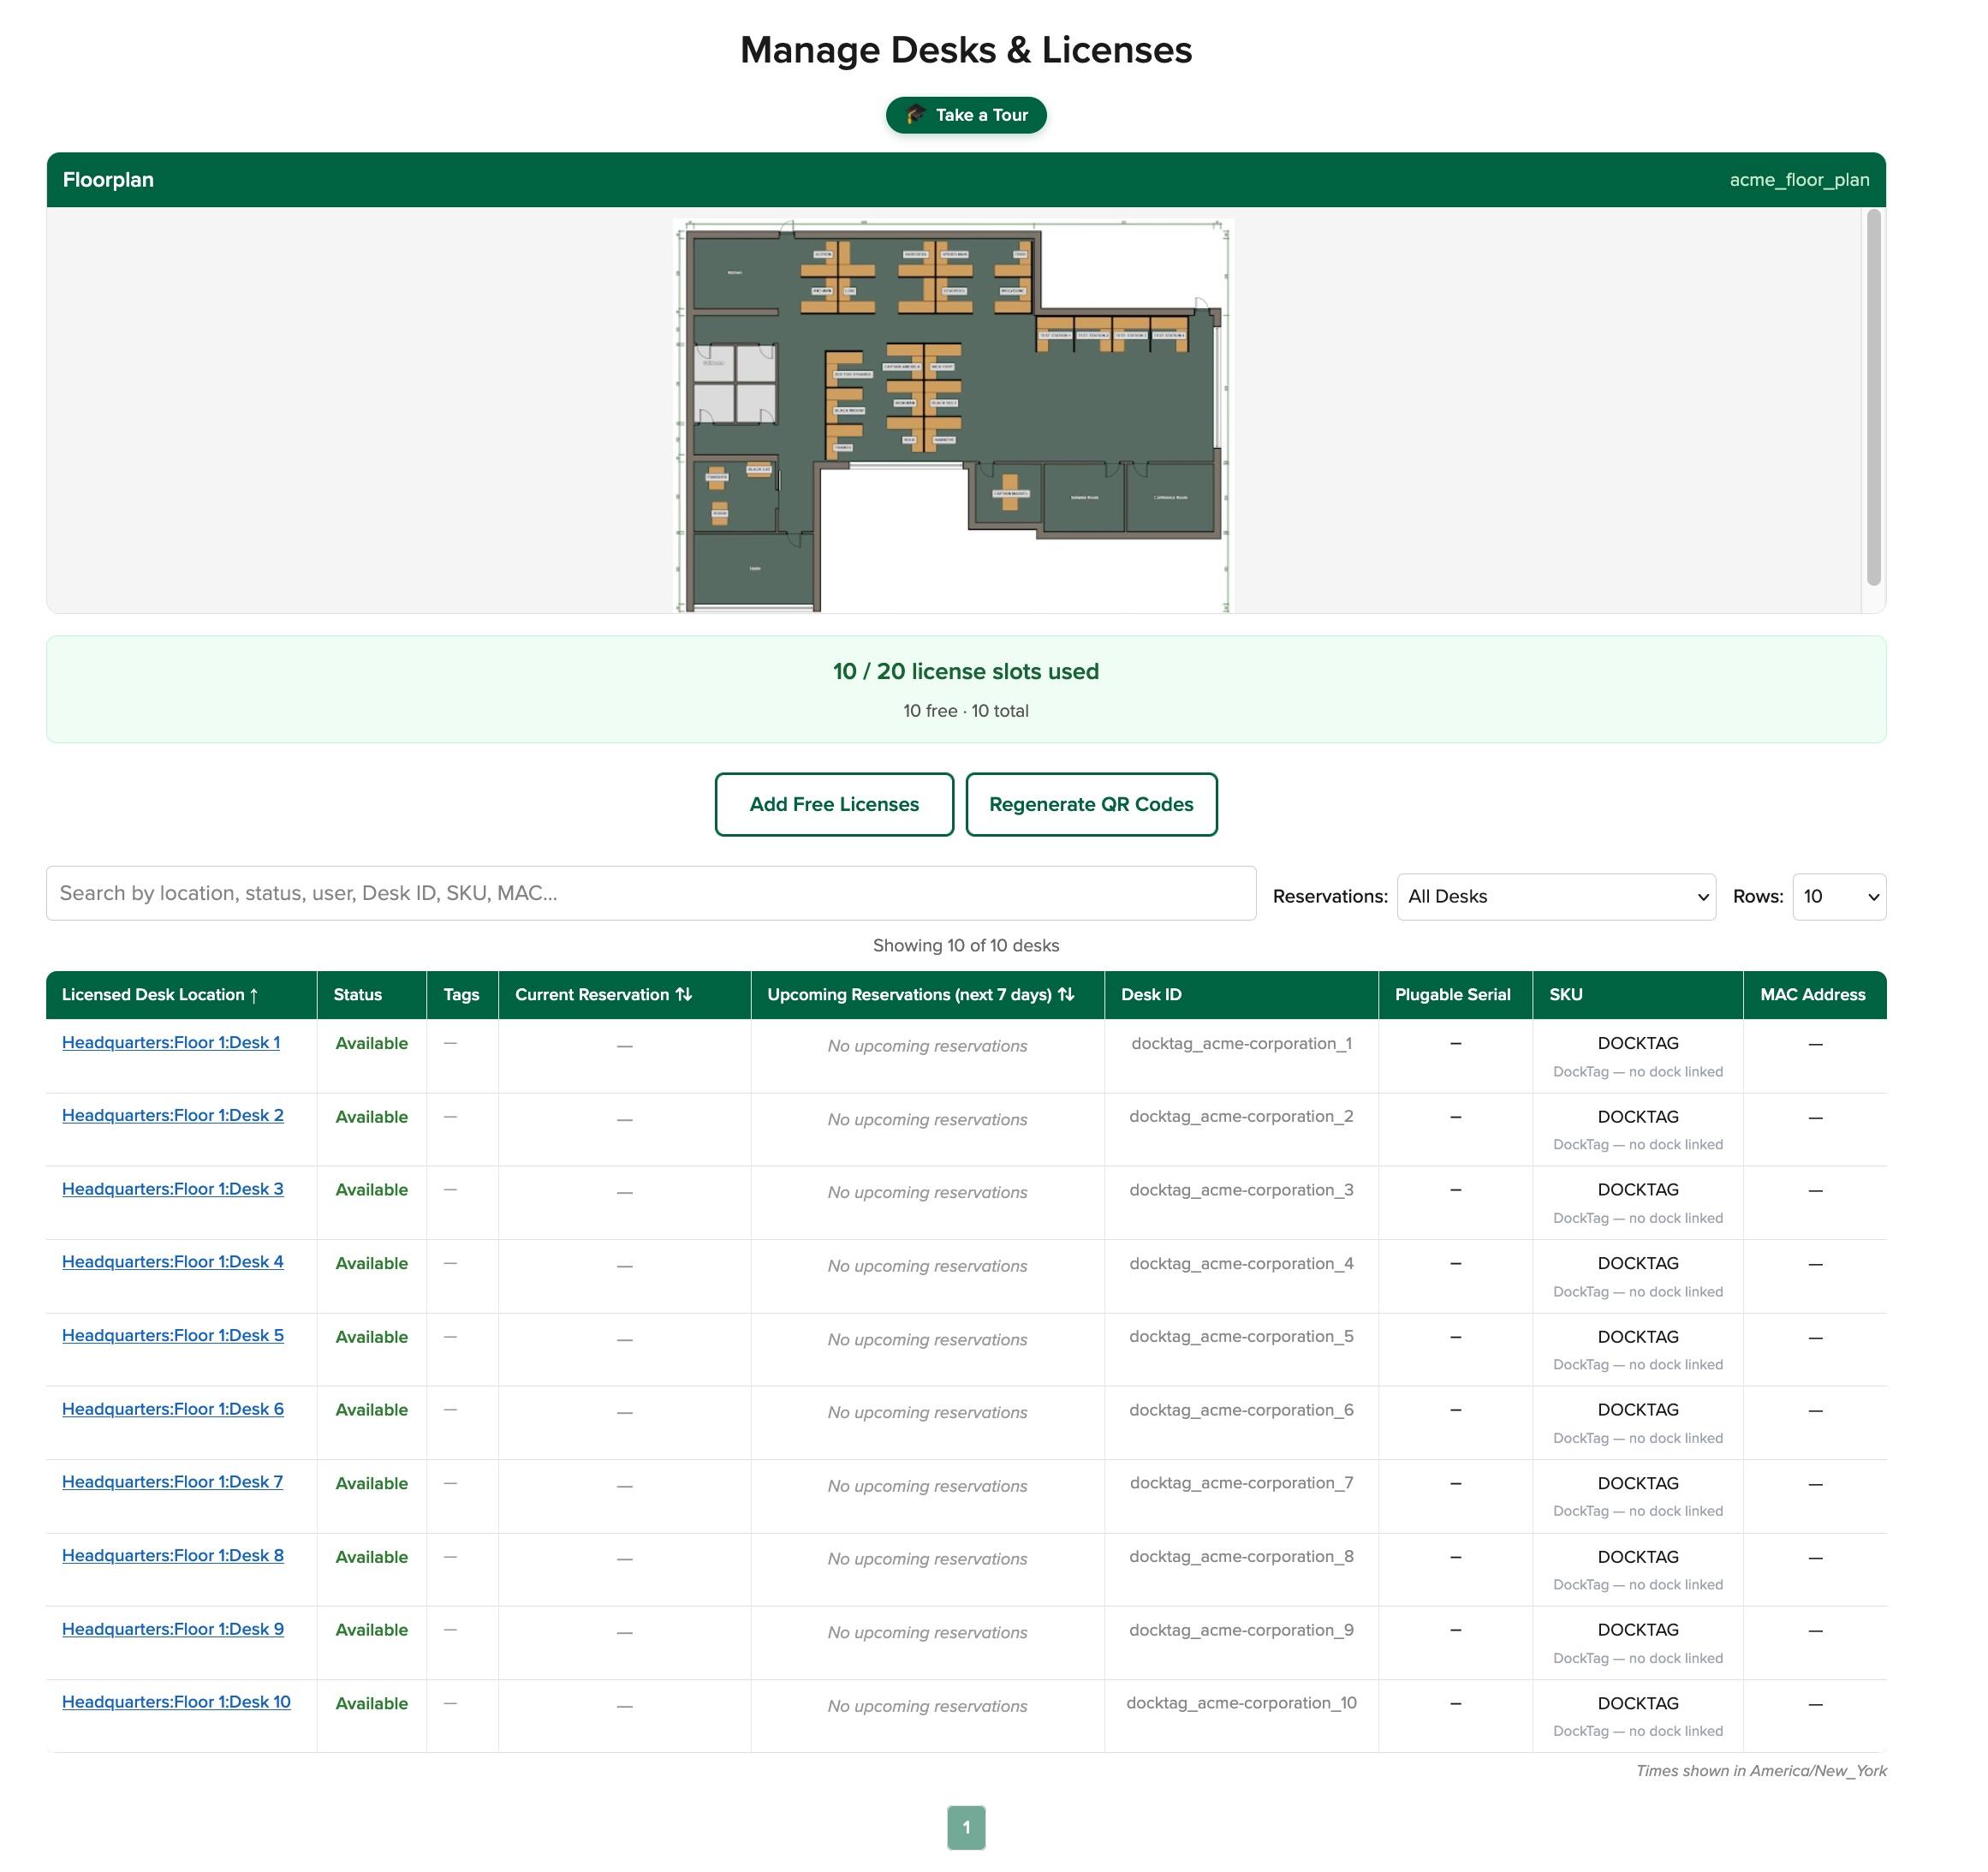
7. Managing Desks and Licenses
Administrators and managers use Manage Desks & Licenses for workspace operations. Administrators have license-provision actions that managers do not have. Both Administrators & Managers can link Plugable Docks to a license.
7.1 Desk table overview
- The table includes Desk / Location, Status, Tags, Current Reservation, Schedule (today), Upcoming Reservations, and SKU.
- Administrators and managers also see Desk ID, Plugable Serial, and MAC Address columns.
- Standard users do not see Desk ID, Plugable Serial, or MAC Address.
- Upcoming Reservations reflects the Days visible as defined within the Weekly Schedule configured within Organization Settings.
- The SKU column lists a linked Plugable brand docking station model. If no Plugable model is linked, then the field will display ‘DOCKTAG’
- If a desk has no associated MAC address, the table displays a dash, matching the Plugable Serial fallback.
7.2 Search, filters, and pagination
- Search by location name or other visible text.
- Filter by status: Available, In Use, Maintenance, or Disabled.
- Use the reservation filter to show all desks, desks with upcoming reservations, or desks without upcoming reservations.
- If tags are configured, use the tag multi-select filter.
- Change rows per page to 10, 25, or 50.
7.3 Floorplan viewer
- Floorplan tabs appear above the desk table when images have been uploaded.
- Each tab corresponds to a building/floor image.
- Use the tabs to visually locate desks before reserving or managing them.
7.4 Add licenses and provision desks
Administrators use the license action button to add free or paid desks. The label changes depending on the organization state, such as Add Free Licenses, Add Paid Licenses, or Add More Paid Licenses.
- The Add Licenses modal shows current usage and an always-visible breakdown of Free, Paid, Dock-linked, and Total licenses.
- The modal lets you select QR-code format and delivery preferences.
- Desk input modes include floor slider, TSV/CSV file upload with templates, and manual entry.
- Additional paid licenses are handled through Plugable sales processes when no payment history exists. Contact sales@plugable.com for pricing.


| Path | Starting Point | What happens |
| All free | The new total remains at or below 20 desks. | New desks are provisioned immediately. QR codes are delivered according to admin selections. |
| Mixed free and paid, first time paying | Some free slots remain, but the request exceeds the 20-desk free limit. | The remaining free desks are provisioned immediately. The paid portion creates a license expansion request for Plugable approval. |
| All paid, first time paying | The organization is already at the 20-desk free limit and has no paid history. | The entire request becomes a pending paid-license request. Paid desks provision after approval and billing setup. |
| Paid with existing payment history | The organization already has paid licenses. | New paid desks provision immediately and a billing record is created for the new tranche. |
7.5 Administrator and Manager-only desk actions
- Associate a Plugable dock
- Open a sticker-type desk or a desk without a Plugable docking station serial number.
- Choose Link Dock to associate a Plugable docking station.
- Enter the 3-part serial number: 4-digits, letter A-Z, and 5-digit sequence.
- Optionally enter a MAC address.
- Submit. The desk displays dock metadata and becomes hardware-backed.
- Manage desk tags
- Add tags such as monitor, standing, or quiet-zone.
- A desk can have up to 10 tags.
- Tags appear as color-coded chips and can be used as desk-table filters.
- Delete a desk
- Choose Delete this Desk from the action dropdown.
- Type the exact Desk ID to confirm.
- Confirm deletion. The desk is removed from the table and cannot be restored from the UI.

NOTE - Only Administrators can send new free of paid license provision requests
Billing effect of dock association: When a Plugable dock is linked, the desk becomes a hardware-backed license. If linked to a paid license, it no longer counts toward paid license charges and a proration credit is applied to the next billing cycle. If linked to a free license, it opens up another free license slot.
8. Manager Day-to-Day Operations
Managers use DockTag™ for operational desk management. They can manage status and location, register docks by QR scan, view desk history, review analytics, and override reservation conflicts. They cannot manage users, organization settings, dock association from the admin-only desk action, tags, deletion, or license billing setup.
8.1 Manager home page differences
- Manage Users is hidden.
- Organization Settings is hidden.
- Add Licenses Button on Manage Desks & Licenses hidden.
- Other Options on Manage Desks & Licenses, Analytics, Reserve a Desk, Account Security, and mobile Scan QR Code remain available.
8.2 Manage desk status
| Status | Effect |
| Available | The desk is open for reservations. |
| In Use | Requires a user email and creates a 1-hour reservation. Notes are optional. |
| Maintenance | Pulls the desk from rotation and cancels existing reservations. Users are notified. |
| Disabled | Takes the desk completely offline and cancels existing reservations. |
- Open Manage Desks & Licenses.
- Select a desk to open the detail panel.
- Choose Manage Desk Status.
- Select the new status.
- Provide any required email or notes.
- Save the change.

8.3 Assign or change a desk location
- Open a desk detail panel.
- Choose Assign Location.
- Select an existing location from the dropdown or enter a new location as free text.
- Use the N/A checkbox to clear the location if needed.
- Save the change.

8.4 View desk history
- Open a desk with prior activity.
- Review the chronological event list, newest first.
- Events can include reservation creation, status changes, dock links, and other desk activity.

8.5 Reservation conflict override
Managers and administrators can override reservation conflicts. Standard users cannot.
- Attempt to reserve a desk during a time window that conflicts with an existing reservation.
- When the conflict prompt appears, choose Override & Proceed to cancel the conflicting reservation and continue, or Keep Reservations to abort your attempt.
- If you override, DockTag™ sends an email notification to the affected user.
9. Reserving and Managing Desks
All roles can reserve desks, but standard users have the simplest interface. They can browse desks, create reservations, and manage only their own bookings.
9.1 Standard user home page
- Standard users see Reserve a Desk, Account Security, and Scan QR Code on mobile.
- They do not see Manage Desks & Licenses, Analytics, Manage Users, or Organization Settings.
- The Take a Tour banner can appear for new users.
9.2 Reserve a desk from the table
- Open Reserve a Desk.
- Use search, status filters, tag filters, floorplan tabs, or pagination to find a suitable desk.
- Select an available desk location to open the desk detail panel.
- Choose Book Now for an immediate reservation or Schedule Future for a later reservation.
- For authenticated users, the email field is prefilled and locked.
- Choose duration and, for future bookings, date and time. Future reservation times must be at least 5 minutes from now.
- Review the start and end time preview.
- Select Reserve Desk.
- DockTag™ confirms the booking, updates the desk status or upcoming reservation indicators, and sends a confirmation email with calendar attachment.

9.3 Click-to-book from the schedule strip
- Open the ‘Reserve a Desk’ table.
- Find a free area on the inline Schedule (today) strip for a desk.
- Click the free slot.
- DockTag™ opens the reservation form prefilled for a 1-hour booking starting at the clicked time.
- Confirm the reservation. The schedule strip updates with your block.

9.4 Drag-to-reserve from the multi-day Gantt
- Expand a desk row to display the multi-day Gantt.
- Click and drag horizontally across free time.
- Use the live duration label to confirm the selected range.
- Release the mouse or touch gesture.
- DockTag™ opens the form prefilled with your selected start time and duration.
- Confirm the reservation.
Drag behavior: The drag selection is clamped to free time and, when configured, to working hours. This helps prevent accidental bookings over existing reservations or outside the organization schedule.

9.5 Schedule a future reservation
- Open a desk detail panel.
- Choose Schedule Future.
- Select a date and time in the future.
- Select a duration.
- Review the exact time window.
- Submit. The desk displays an upcoming-reservation indicator.

9.6 Manage your reservation
| Action | How to use it | Result |
| Extend | Open your reservation and choose Extend. Select the additional time and confirm. | The end time moves later and DockTag™ sends an updated email and calendar attachment. |
| Shorten | Open your reservation and choose Shorten. Select a new end time between now and the current end time. | The desk becomes available sooner and DockTag™ sends an update. |
| Cancel | Open your reservation and choose Cancel. Confirm the prompt. | The desk returns to Available when applicable and DockTag™ sends a cancellation email with a calendar attachment. |

9.7 Hotdesk page reservation tools
- Open a desk hotdesk page from a QR code scan URL or from the desk table.
- Review the multi-day reservation Gantt below the reservation form.
- The chart shows upcoming reservations for the organization schedule horizon, from 1 to 30 days depending on settings.
- Click a free slot to book one hour, drag across free time to book a custom range, or click your own block to manage it.
9.8 Reservation conflicts for standard users
- If a standard user attempts to reserve a conflicting time, DockTag™ blocks the reservation and asks the user to choose a different time slot. Where applicable, it shows up to 3 closest desks (based on Building/floor/desk number proximities) with availability for said time-slot.
- Only administrators and managers can override conflicts.
9.9 Open Access reservations
- When the organization is set to Open Access, users do not need to sign in.
- Open the organization desk table in a browser and reserve by entering an email address manually.
- The browser can remember the entered email for convenience. For Open Access Organizations, if reservers need to modify or cancel their reservation, they can enter their emails from the respective Desk Homepage to view current & upcoming reservations to manage them.
- The reservation workflow otherwise looks like the authenticated workflow.
10. QR Code Scanning
QR codes connect physical desks and docks to DockTag™ pages. QR code scanning is especially useful on mobile devices.
10.1 Scan a registered desk
- On a mobile device, open the Organization Home Page.
- Tap Scan QR Code.
- Allow camera access if prompted.
- Scan the QR code on a registered desk.
- Review the Product Info Page, including desk details, status, current reservation, and schedule.
- Use Reserve This Desk or Manage Reservation depending on availability and ownership.
10.2 Scan an unregistered dock as administrator or manager
- Scan the QR code for an unregistered Plugable dock.
- DockTag™ opens a registration form with serial, MAC, and SKU prefilled as read-only fields when available.
- Select or enter a desk location.
- Submit the form.
- DockTag™ registers the desk and redirects to the desk table.
10.3 Scan an unregistered dock as a standard user
- Standard users cannot register docking stations.
- If a standard user scans an unregistered dock, DockTag™ displays an error indicating that only administrators and managers can register docking stations.
- The user should contact their IT team or DockTag™ administrator.
11. Analytics
Administrators and managers can open Analytics to review desk activity and utilization.
- Summary cards: Total Desks, Active Reservations, Reservations Today, and status counts for In Use, Available, Maintenance, and Disabled.
- Status Breakdown pie chart: Available, In Use, Maintenance, and Disabled.
- Time-range selectors: 7 days, 30 days, and 90 days.
- Export CSV downloads all chart data as a ZIP of CSV files for the selected time range.
11.1 Available charts
| Chart | What it helps answer |
| Daily Reservation Trend | How reservation volume changes day by day. |
| Peak Hours | Which hours of the day are busiest. |
| Most Used Locations - by Reservations | Which locations receive the most bookings. |
| Top Users - by Reservations | Which users make the most reservations. |
| Busy Times Heatmap - Reservations | Which day/hour combinations are busiest. |
| Desk Utilization Rate | Which desks have the highest percentage utilization. |
| Status Duration by Location | How long desks spend in each status by location. |
| Top Locations - by Duration | Which locations accumulate the most reservation time. |
| Top Users - by Duration | Which users accumulate the most reserved time. |
| Average Reservation Duration | How the average booking length changes over time. |
| Reservations by Day of Week | Which days have the most reservations. |
| Cancellation Rate Over Time | How cancellations trend over time. |

12. Account Security and Two-Factor Authentication
Two-factor authentication is available to every user role.
12.1 Enable two-factor authentication
- Open Account Security.
- Review current MFA status.
- Select Enable Two-Factor Authentication.
- Enter your current password. DockTag™ limits password confirmation attempts.
- Scan the displayed QR code with Google Authenticator, Authy, or a similar authenticator app.
- If needed, use the manual secret key option. The key can be copied and is automatically cleared from the clipboard after 30 seconds.
- Enter the 6-digit verification code. DockTag™ limits verification attempts.
- After verification, MFA is enabled for future logins.

12.2 Disable two-factor authentication
- Open Account Security.
- Select Disable Two-Factor Authentication.
- Enter your current password to confirm.
- Submit. MFA is removed and can be re-enabled later.
13. Organization Status Banners
Organization status can be changed only by Plugable Administrators . Organization administrators, managers, and standard users cannot change these states. They can only see the resulting banner (if applicable) and service behavior.
| Status | Banner | User impact |
| Active | No status banner. | The organization works normally. |
| Suspended | Yellow banner: This organization has been suspended. Services are temporarily unavailable. | Every user sees the banner. Services are temporarily unavailable until Plugable restores the organization. |
| Disabled | Red banner: This organization has been disabled. All services are unavailable. | The organization is fully locked out. No reservations, desk management, or access are available. |
14. Common Scenarios and Troubleshooting
| Scenario | What to check or do |
| I do not see Manage Users. | Only administrators can manage users. Ask an administrator to change your role if needed. |
| I do not see Organization Settings. | Only administrators can configure organization settings. |
| I cannot override a conflicting reservation. | Only managers and administrators can override conflicts. Standard users must choose another time. |
| A desk is unavailable or missing from reservation results. | Check whether the desk is Available, In Use, Maintenance, or Disabled. Maintenance and Disabled desks are removed from normal use. |
| A reservation time looks wrong. | Confirm the organization timezone in Organization Settings. Reservation charts use the organization timezone. |
| I cannot book outside business hours. | The organization may restrict reservations to working hours. Choose a time inside the configured schedule. |
| A QR code scan says the dock is unregistered. | Administrators and managers can register it. Standard users should contact IT. |
| I need more than 20 desks. | An administrator can use Add Licenses. Depending on payment history, paid licenses may require Plugable approval. |
| I forgot my password or cannot use MFA. | Contact your organization administrator or IT support address shown in DockTag™. |
Appendix A. Role Permission Matrix
| Capability | Admin | Manager | Standard |
| Reserve desks | Yes | Yes | Yes |
| Manage own reservations | Yes | Yes | Yes |
| Scan registered desk QR codes | Yes | Yes | Yes |
| Register unregistered docks by QR scan | Yes | Yes | No |
| View Manage Desks & Licenses | Yes | Yes | No |
| Manage desk status | Yes | Yes | No |
| Assign desk locations | Yes | Yes | No |
| View desk history | Yes | Yes | No |
| Override reservation conflicts | Yes | Yes | No |
| View analytics | Yes | Yes | No |
| Export analytics CSV | Yes | Yes | No |
| Manage users | Yes | No | No |
| Organization settings | Yes | No | No |
| Add licenses | Yes | No | No |
| Associate Plugable dock from desk action | Yes | No | No |
| Manage desk tags | Yes | No | No |
| Delete desks | Yes | No | No |
| Enable or disable own MFA | Yes | Yes | Yes |
