
Thunderbolt 3 Windows systems may need to have newly attached Thunderbolt devices authenticated before they can be used. For most computers this process needs to be performed manually through the Legacy Thunderbolt utility installed on your computer. Newer Windows host systems (around November 2018 and newer) may be using an updated driver model, Declarative C
Note: If you are not certain if your computer requires for newly attached devices to be authenticated, please see here for more information: Do I need to approve or authenticate Thunderbolt devices when I connect them to my Windows or Mac computer?
Below we will cover both methods of authentication as well as how to check NVM on older systems to see if an update is required. These processes may vary depending on how the host system Thunderbolt security level is configured in the UEFI BIOS, however, most systems will be set for user authorization or secure connect.
Thunderbolt 3 DCH and Legacy Driver:
Legacy Thunderbolt 3 Authentication (non DCH Thunderbolt 3 drivers & Thunderbolt Utility):
When first connecting a Thunderbolt 3 device to a Windows system, the device must first be authenticated through Intel’s Thunderbolt 3 software. After connecting a Thunderbolt 3 device the first thing that you should see (assuming that the system NVM, UEFI BIOS, drivers, etc are up to date and compatible) is an automatic notification above the system tray notifying you that a new device has been attached. You will want to click OK:
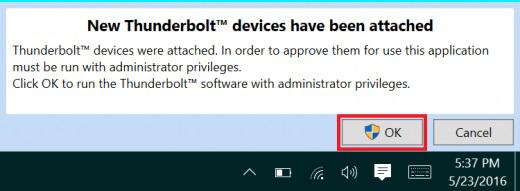
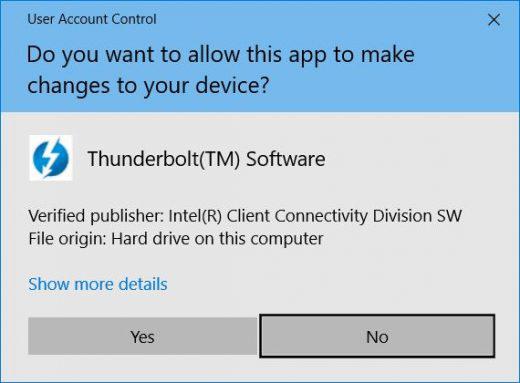
After clicking OK, you may get a Windows User Account Control (UAC) popup asking if you “want to allow this app to make changes to your PC?”. Click Yes:
After clicking yes you should see an application window appear where you will approve the Thunderbolt 3 device that was just attached:
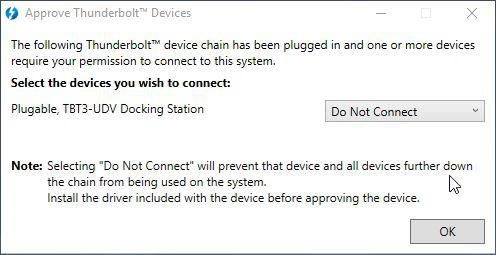
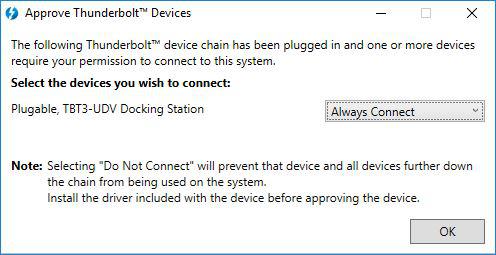
Click on the drop down menu where it says “Do Not Connect” and select “Always Connect”. Then click OK:
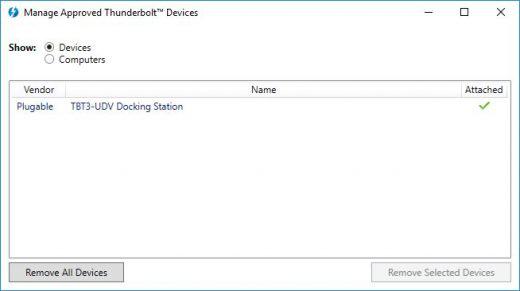
To view and manage the approved devices you can find the program sitting in the system tray. You may need to click the caret (up arrow icon) to show all of the running programs then right click on the Thunderbolt icon it and select Manage Approved Devices:

You may again get a Windows UAC prompt, click yes. After clicking yes the below window will open and you can see any approved devices and remove them if you choose.
Thunderbolt 3 Authentication (DCH Thunderbolt 3 drivers & Windows App Store Thunderbolt Utility):
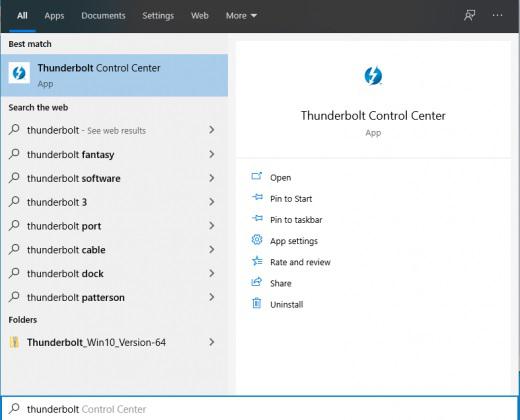
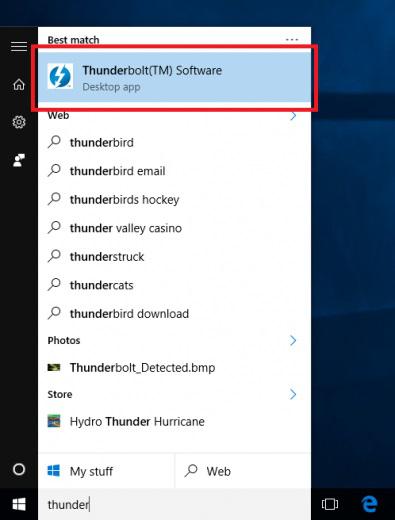
For systems running the DCH version of the Thunderbolt 3 drivers and the Windows Store Thunderbolt Control Center app, many newer hosts will automatically authenticate the attached device using secure connect. For systems where your attached Thunderbolt 3 device is not authenticated automatically via secure connect you can authenticate the device manually. Start by searching the start menu for Thunderbolt and selecting the Thunderbolt Control Center:
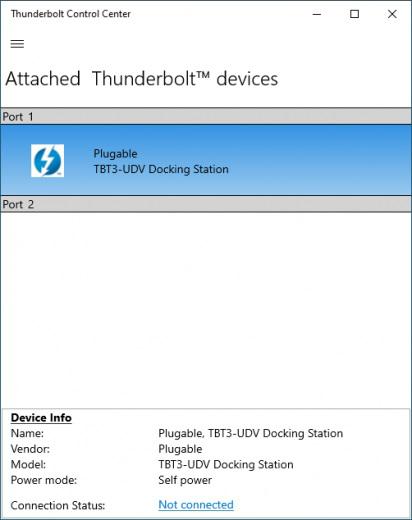
Here you should see your attached device:
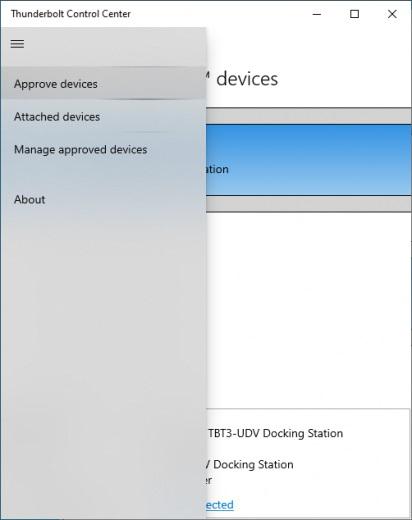
To approve the device click on the menu button (three horizontal lines) and then click “Approve devices”:
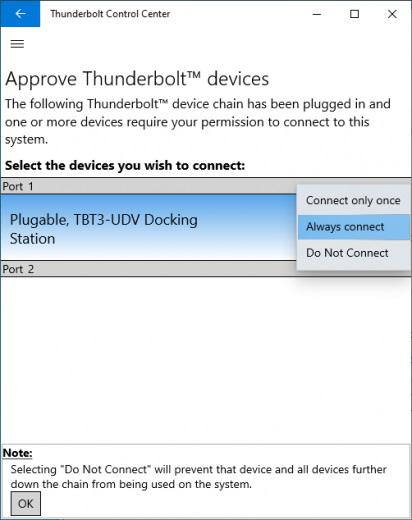
Next you can select “Always connect” and then press “OK” at the bottom of the application:
Your device should then automatically be approved the next time it is attached.
Checking NVM Version (Legacy)
How do I check which version of Thunderbolt 3 software and NVM firmware I am running in Windows?
To determine what version of NVM firmware your system has, the first step is to ensure you have the latest Thunderbolt software version which varies depending on the system manufacturer. You should be able to download it from your system manufacturer’s website.
Once installed you can open the software by searching the start menu for Thunderbolt:
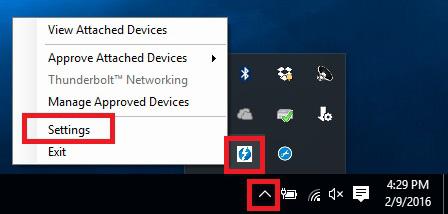
Once open you can find the program sitting in the system tray. You may need to click the caret (up arrow icon) to show all of the running programs then right click on the Thunderbolt icon and select Settings:
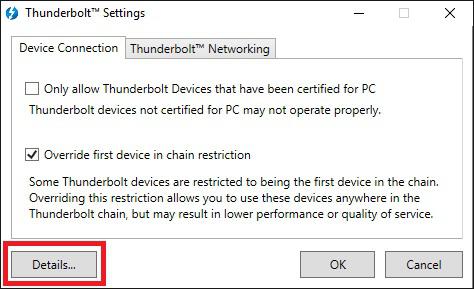
Now you should see the settings window. Click on Details to find out all of the Thunderbolt software and controller information:
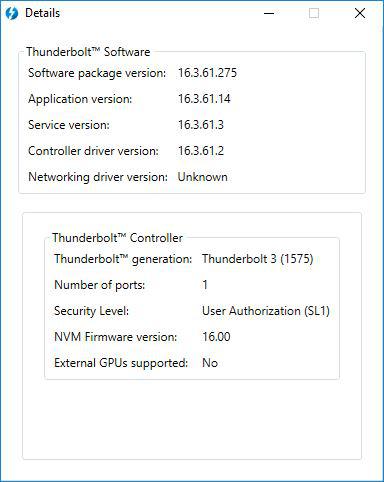
If a Thunderbolt 3 device has been connected to the system the Thunderbolt software will show you information about the controller. Below you can see the details from our Dell XPS 13 9350 system:
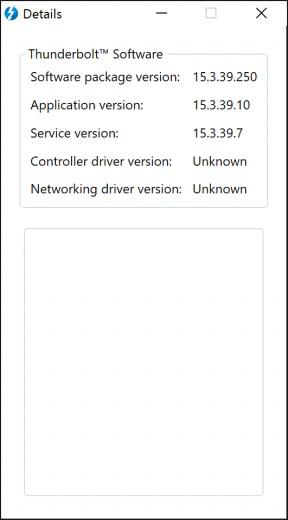
Unfortunately if a Thunderbolt device has not yet been connected to the system, the information about the NVM firmware may not be available within the utility:
Support
If you have any questions feel free to contact our support team, we’re more than happy to help!
Thunderbolt and the Thunderbolt logo are trademarks of Intel Corporation in the U.S. and/or other countries.
