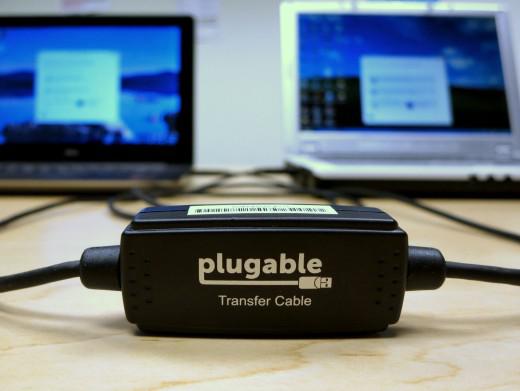
** This is a legacy article. Updated information may be available. Please see the product pages for the USB-EASY-TRAN, and USB3-TRAN for more details on current topics.
Many recent computers combine a small, speedy solid-state drive (SSD) for system files with a larger, slower hard disk for data files. This can pose a problem when migrating from an older computer using the Plugable Windows Transfer cable because the data files and operating system files should go to two different drives. In some cases, even without an SSD, people want to put their data on a second drive separate from their system drive.
These scenarios are not well supported in the Bravura Easy Computer Sync software supplied with the Plugable Windows Easy Transfer cable. By default, Easy Computer Sync tries to transfer all the data from the main drive on the old computer to the main drive on the new computer. If the main drive on the new computer can’t hold all that data, an error message will complain that there is not enough space on the destination drive.
Otherwise, the data will end up on the wrong drive. In this post, we will look at a method for getting your data stored where you want it on the new computer. I will assume the common scenario where all the user files are transferred to the second drive on the new computer. I will use a Windows XP computer as the old one and a Windows 8.1 computer for the new one, but this will work with any combination of supported operating systems. With appropriate modifications, this same method can be used to select any collection of files or folders from any fixed disk on the old computer and send them to any location on any fixed disk on the new computer.
I’ll assume you have downloaded the Bravura Easy Computer Sync software, installed it on each computer, and entered your Product Key. If you haven’t, follow the Install Instructions section of this article.
Preparing the Old Computer:
1. Plug the Windows Transfer cable into each computer and start the Bravura Easy Computer Sync software. You will see the Welcome window.
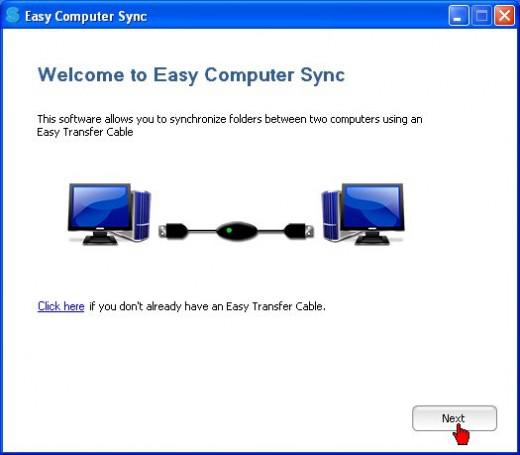
2. On both computers, click Next twice until the screen says “Waiting for Connection.”
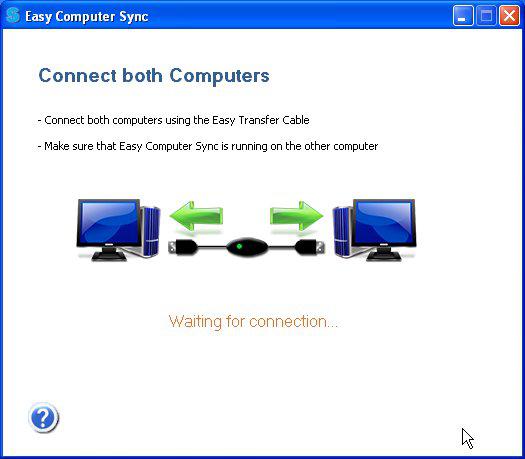
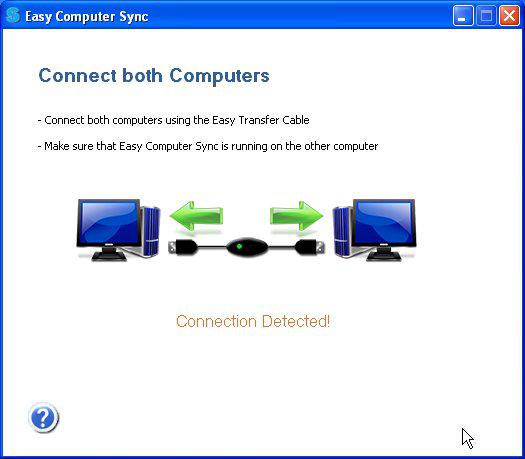
3. In a moment, the on-screen message should change to “Connection Detected.” If it doesn’t change within a minute or so, temporarily disable any anti-virus or firewall software and try again. If this doesn’t work, contact Plugable support for help.
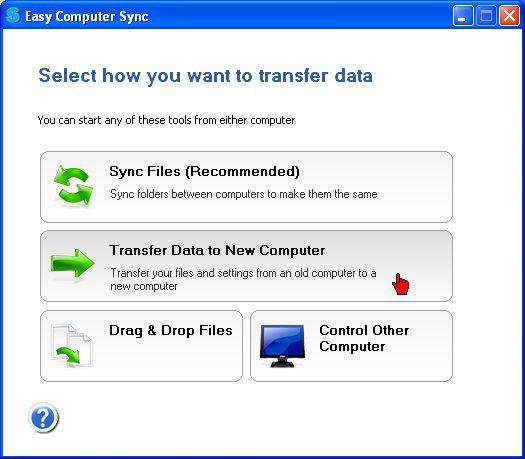
4. After the connection is detected, Easy Computer Sync will display the Tools window. This is where you select the type of transfer you want to do. Since we are transferring files from an old computer to a new one, select Transfer Data to New Computer.
The Sync Files option is used when you want to send data back and forth between two computers on an ongoing basis. However, the technique mentioned here will work for the Sync Files function also. The Drag & Drop function is used for manually transferring individual files and folders.
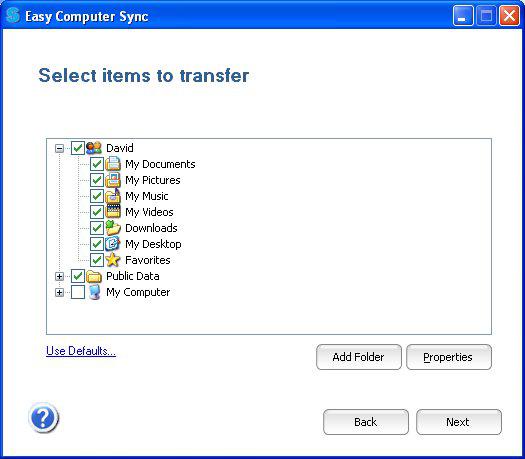
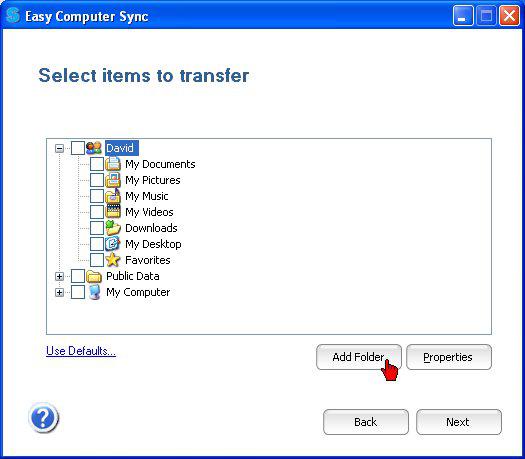
5. Easy Computer Sync will display a list of user folders it wants to transfer to the main drive on your new computer. Although the user folders under the user name—such as My Documents and Pictures— are frequently accessed, the individual files they contain are infrequently accessed and should go to the second drive on your new computer. Unfortunately, the software will not allow you to change the transfer location in this window. If these folders are left in their currently selected state, they will go to the smaller SSD drive, which is the system drive (usually the C drive).
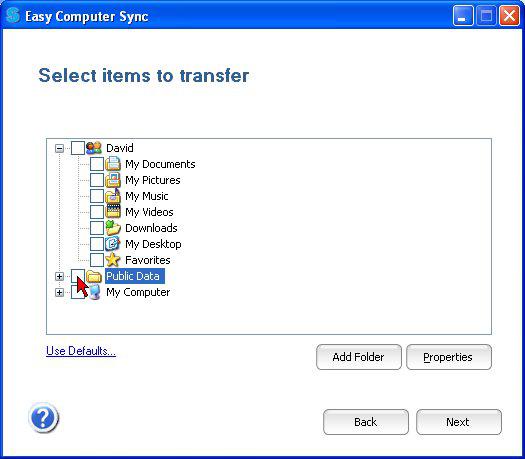
6. Since you don’t want these user folders on your SSD, clear the check mark next to each folder here, including the Public folder. In another window, you will individually select the destination disk and folder on your new computer for each user folder you see here
In the following Steps 7 through 17, we will select the destination for a single user folder on the old computer. This procedure must be repeated for each user folder you want to transfer from the Select Items to Transfer window. At the end of this post, I will show you how to make the newly transferred folders the default user folders on your new computer.
7. To make a gathering place for those folders on your new computer, start by creating a folder on the destination drive with your Windows user name. Do this before proceeding to the next step.
In this example, I want to transfer folders belonging to the user named “David” on the XP computer to a folder named “David” on the second drive of the new computer. So I use Windows Explorer to create a folder named “David” on that drive.
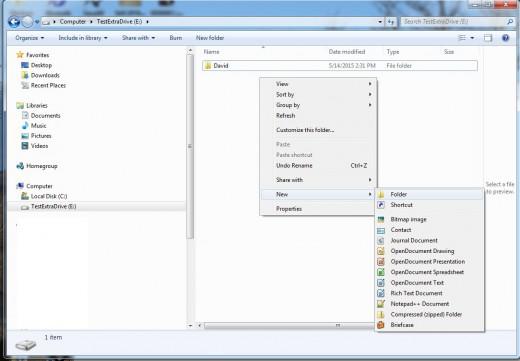
Setting up a folder for transfer to the second drive of the new computer (repeat for each folder)
Do Steps 8 through 17 for each user folder you want to transfer from those shown in the Select Items to Transfer window. You can also use this procedure to transfer other data folders on your old computer if you know where they are. In this example, I will transfer the My Documents and Desktop folders from the David user in the XP computer to folders I will create with the same names in the David folder on the second disk of the new computer. In real life, you will probably want to transfer all the folders shown under your user name in this window.
8. Click Add Folder
9. This opens a new window that shows drives on the old computer and the new computer. You can expand a drive and reveal its folders by clicking the + (plus) sign next to it.
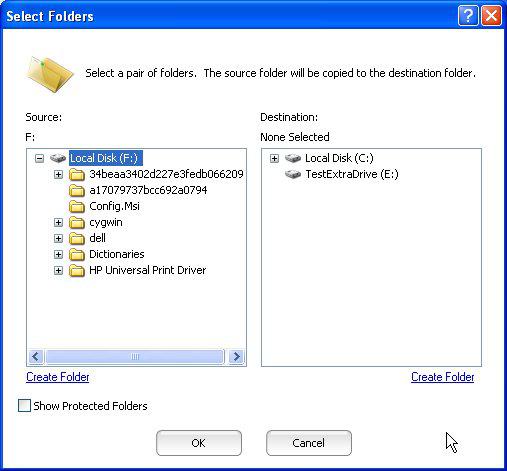
10. Unfortunately, in this view Easy Computer Sync does not automatically show the user folders we want to transfer, such as Documents, Pictures, Desktop, Music, Videos, and the like. This is because they are located under Documents and Settings folder on the system disk in Windows XP or under Users in later Windows versions. Easy Computer Sync hides these folders to protect them. To display and transfer them, you have to make these protected folders visible. To do this, click Show Protected Folders at the lower-left
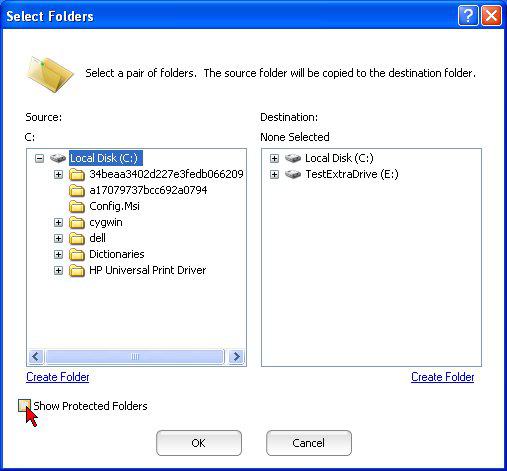
11. A confirmation window will appear. Click Yes.
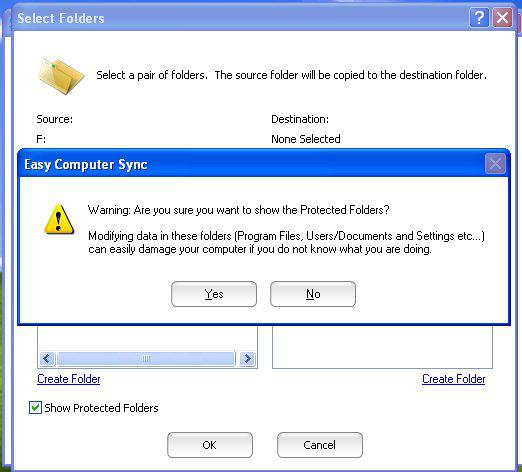
12. Expand the local disk again by clicking the + (plus) sign
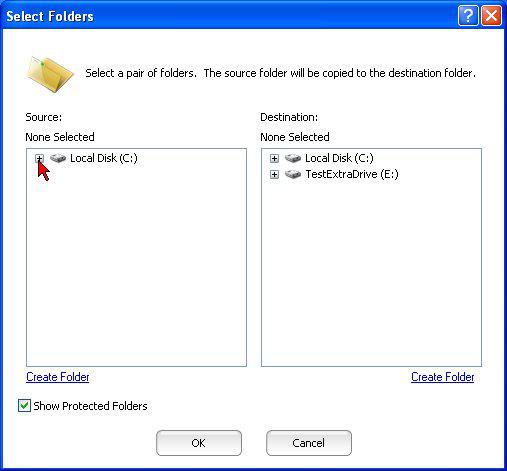
13. The User folders are now visible. Expand the Documents and Settings folder in Windows XP or the Users folder in later Windows versions to view them. Expand the folder of the user you are transferring (David in this example.)
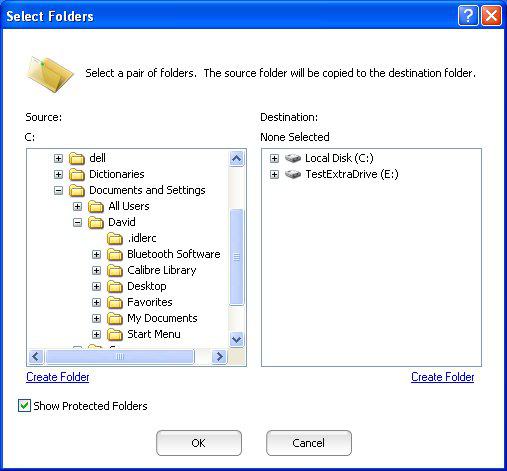
14. In the left-side panel, highlight the folder on the old computer (such as My Documents) that you want to transfer. With it still highlighted, go to the right-side panel and expand the drive you want to transfer that folder to, and highlight the user name folder you made on that drive in Step 7.
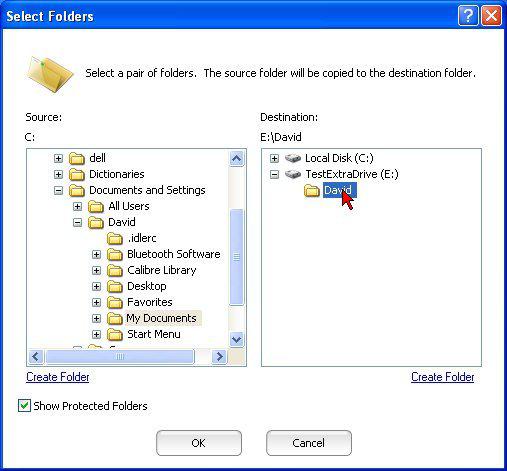
15. Use the Create Folder function to create a new folder for the contents of the folder you are transferring. The new folder will be created under the one highlighted in the right-side panel.
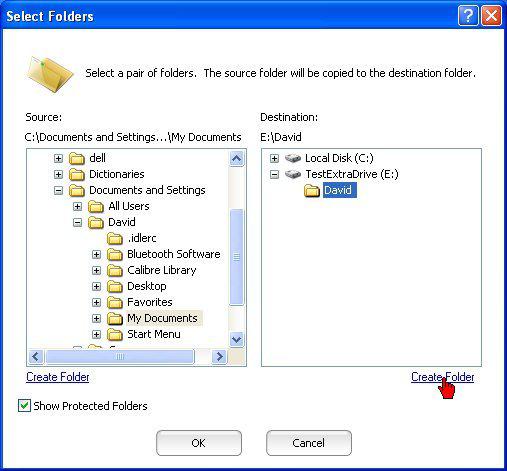
16. Click Create Folder
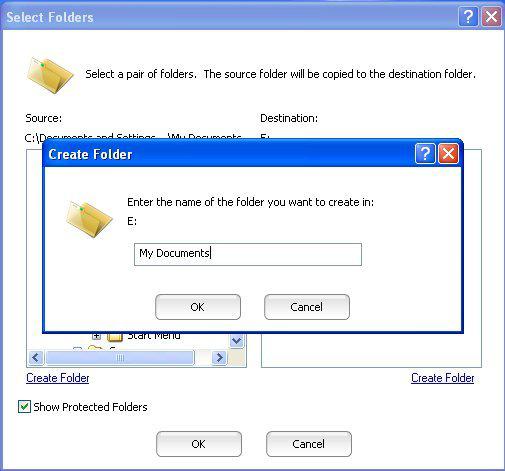
17. A text entry box will appear. Type in the name of the folder and click OK. The new folder will be created in the Select Folders Window. Making sure both the source folder and the destination folder are highlighted, and click OK in the Select Folders window to save this pair of folders.
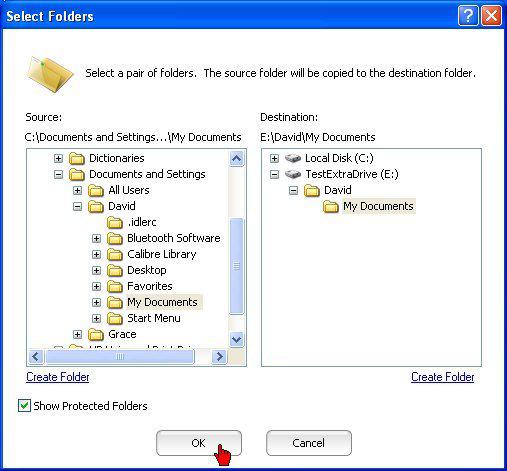
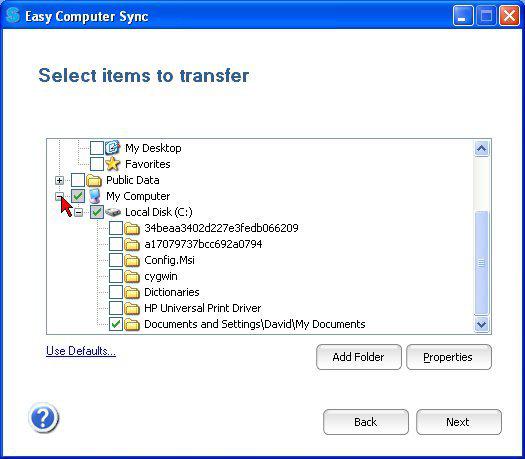
The Select Folders Window will close, and you will be returned to the Select Items to Transfer window, where you should see a checkmark next to the name of the folder you just added.
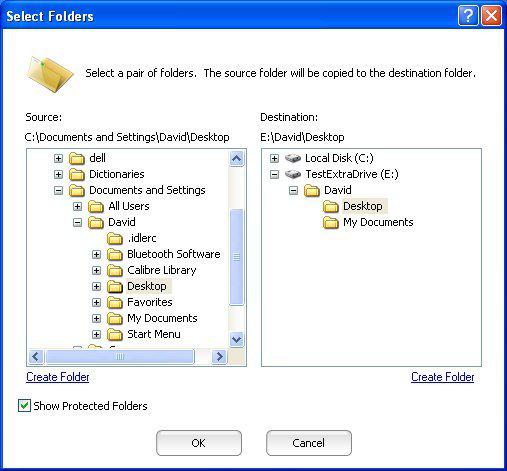
18. Use the same procedure to add each folder you want to transfer. The screenshot below shows the Desktop folder being added
19. When finished adding each new folder to be transferred, click OK in the Select Folders window. After the final folder has been selected, make sure each folder you selected has a checkmark next to it in the Select Items to Transfer window, as shown below. Make sure any folders you don’t want to be transferred are not checked. Easy Computer Sync will remember these settings for future transfers between the two computers.
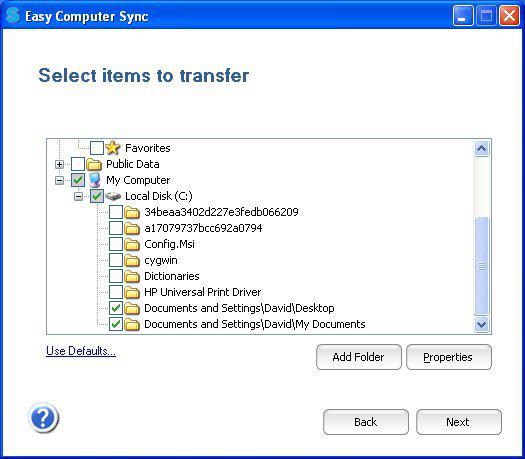
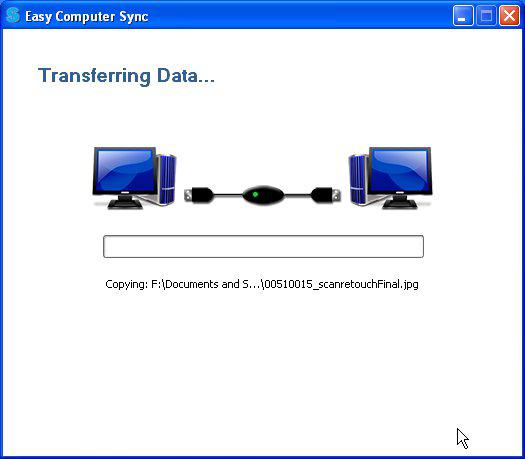
20. When all is ready, click Next in the Select Items to Transfer window to start the transfer. The Transferring Files window will show a progress bar while the files are being transferred. This may take a long time for large amounts of data.
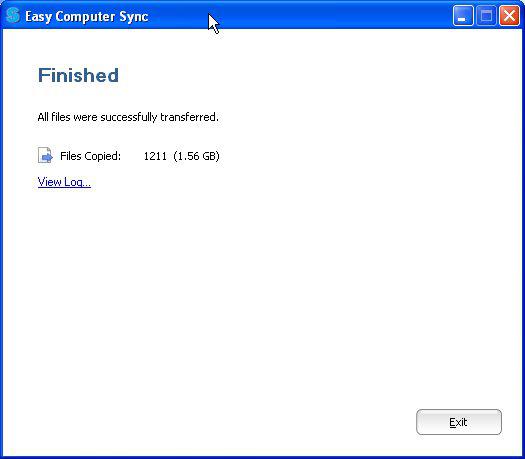
21. When the transfer is finished, the Finished window will be displayed, showing how many files were transferred.
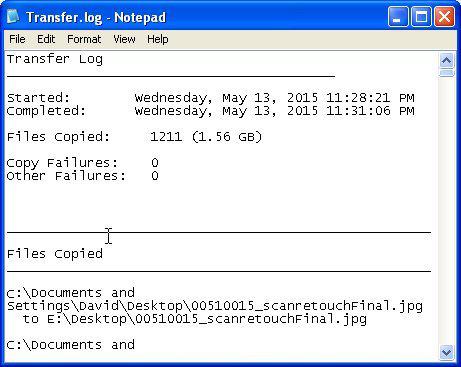
22. Click View Log to see a detailed view of which files were transferred. This is useful if Easy Computer Sync reports some files are not transferred. The log opens in Notepad as a text file and can be saved from there.
This completes the procedure for transferring the user folders to your new computer. If you want to make those newly transferred folders your default user folders, follow the procedure below.
Changing your default user folders to the ones you transferred
After transferring your user folders to the second drive on your new computer, you may wish to set those folders as the default user folders in place of the original ones on your SSD drive. Windows and many programs automatically select the default folders as the save location for files. For example, Word saves documents in the Documents folder. Photo programs like Picasa save photos in your Pictures folder. Many music programs save music in your Music folder. You change the default separately for each user folder. Please note that this will permanently alter your computer’s setup.
1. Open Explore, and navigate to the current default folder. Right-click and select Properties.
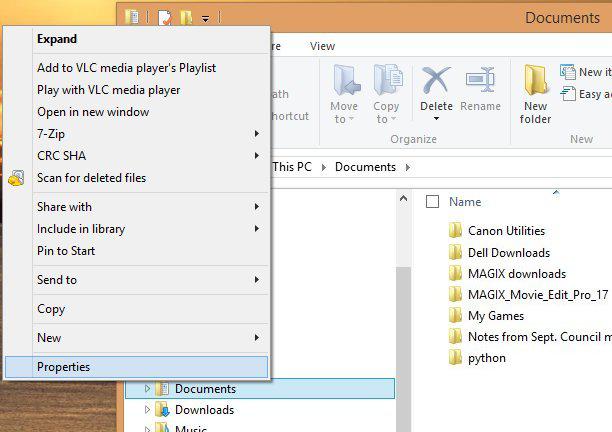
2. In the Properties Window, select the Location tab.
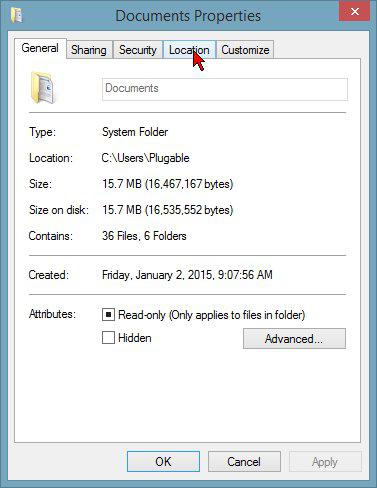
3. In the Location tab, edit the text box to show the location of the newly transferred folder. Clicking the Find Target… button will open another Explorer window where you can locate the target. Enter the location of that folder in the text box.
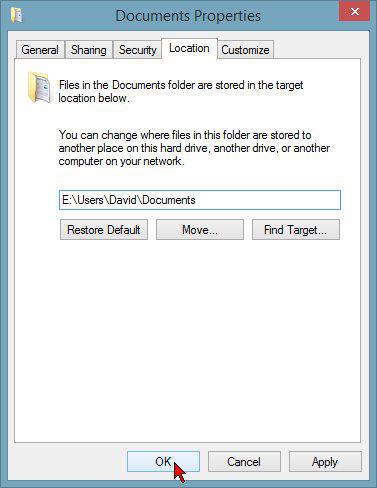
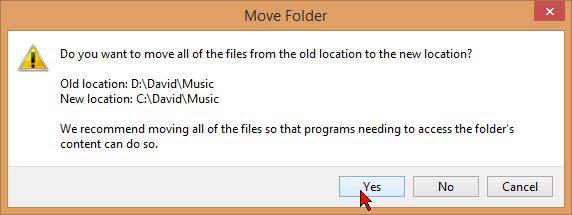
4. Click OK. You will be asked if you want to move your documents and other files from the current default folder to the new one. Click Yes here to consolidate all the files in one folder. A window will appear showing the transfer operation.
If you have any questions or issues following these instructions, please leave a comment on this post, or contact us at support@plugable.com

