
2023年09月25日 更新情報
Plugable 社は、Plugable Plugable USB3-E1000 および USBC-E1000 ギガビットイーサネットアダプターで使用されているチップセットである AX88179 ようにASIX 社が提供した最新デバイスドライバー「DriverKit DEXT v2.4.0」を macOS 14.x Sonoma 環境でテストし、正しく機能することを確認しました。
この macOS 14.x Sonoma 用のデバイスドライバをダウンロードするには、下記のボタンをクリックしてください。このドライバを導入する前に以前のドライバをアンインストールする手順は、このページの「ドライバのアンインストール」欄を参照してください。
2021年10月29日 更新情報
ASIX 社は、AX88179 チップセット用の新しいデバイス・ドライバー「DriverKit DEXT v2.0.0」の提供を開始しました。Plugable 社はこれを macOS 12.x Monterey システムと USB3-E1000 および USBC-E1000 ギガビット・イーサネットアダプターで動作を検証しました。
当バージョンのドライバーを入手したい場合は下記「ASIX macOS 12 Monterey DEXT 2.0.0(2021/10/29版)」リンクをクリックしてください。もしすでに以前のバージョンのドライバーを導入したことがある場合は、それを先にアンインストールしてから当最新版をインストールするようにしてください。それぞれの手順は当ページの「A. ドライバのインストール」 「C. ドライバのアンインストール」欄を参照してください。
2021年10月27日 更新情報
macOS 12.x Monterey で、AX88719 用デバイスドライバーの導入および機能に問題が生じていることがわかっています。Plugable 社製品では USB3-E1000 および USBC-E1000 イーサネット変換アダプターがこの影響を受けます。現在対応方法を調査中です。
2021年 8月18日 更新情報
Plugable 社は、ASIX 社製 AX88179 チップセット用の最新の DriverKit DEXT v1.3.0(Beta 1)を M1 Mac システムで検証し、これが正しく機能することを確認できました。この AX88179 チップは、Plugable USB3-E1000 および USBC-E1000 ギガビットイーサネットアダプターで使用されています。
検証した mac OS バージョンは 11.5.1、および macOS 12 Monterey のベータ版です。
2021年 7月28日 更新情報
Plugable 社のテストで、M1 システムに最新の macOS Bug Sur 11.5.1 を導入した環境では、ASIX 社が提供しているドライバーが導入時および使用時に問題が発生することがわかりました。
2021年 5月28日
ASIX チップセットを使用した Plugable 製品USB3-E1000 および USBC-E1000 用デバイス・ドライバの問題については、Plugable 社ブログ記事(英語) を参照してください。
A. ドライバのインストール
USB3-E1000 および USBC-E1000(ASIX AX88179 チップセット搭載)イーサネット・アダプタ用の最新デバイス・ドライバをダウンロードするには、こちらのドライバページを参照してください。
上記のドライバページに記載されているダウンロード・リンクをクリックし、ドライバーのインストールファイルをダウンロードします。ダウンロードされたファイルは自動的にダウンロードフォルダーに保存されます。導入中、インストーラからの指示があるまでイーサネットアダプターをコンピュータに接続しないでください。
インストールファイルをダウンロードした後、以下の手順に従ってください。(一部 1.x.x ドライバの画像のことがありますが、導入手順はそれ以降のバージョンでも同じです。)
-
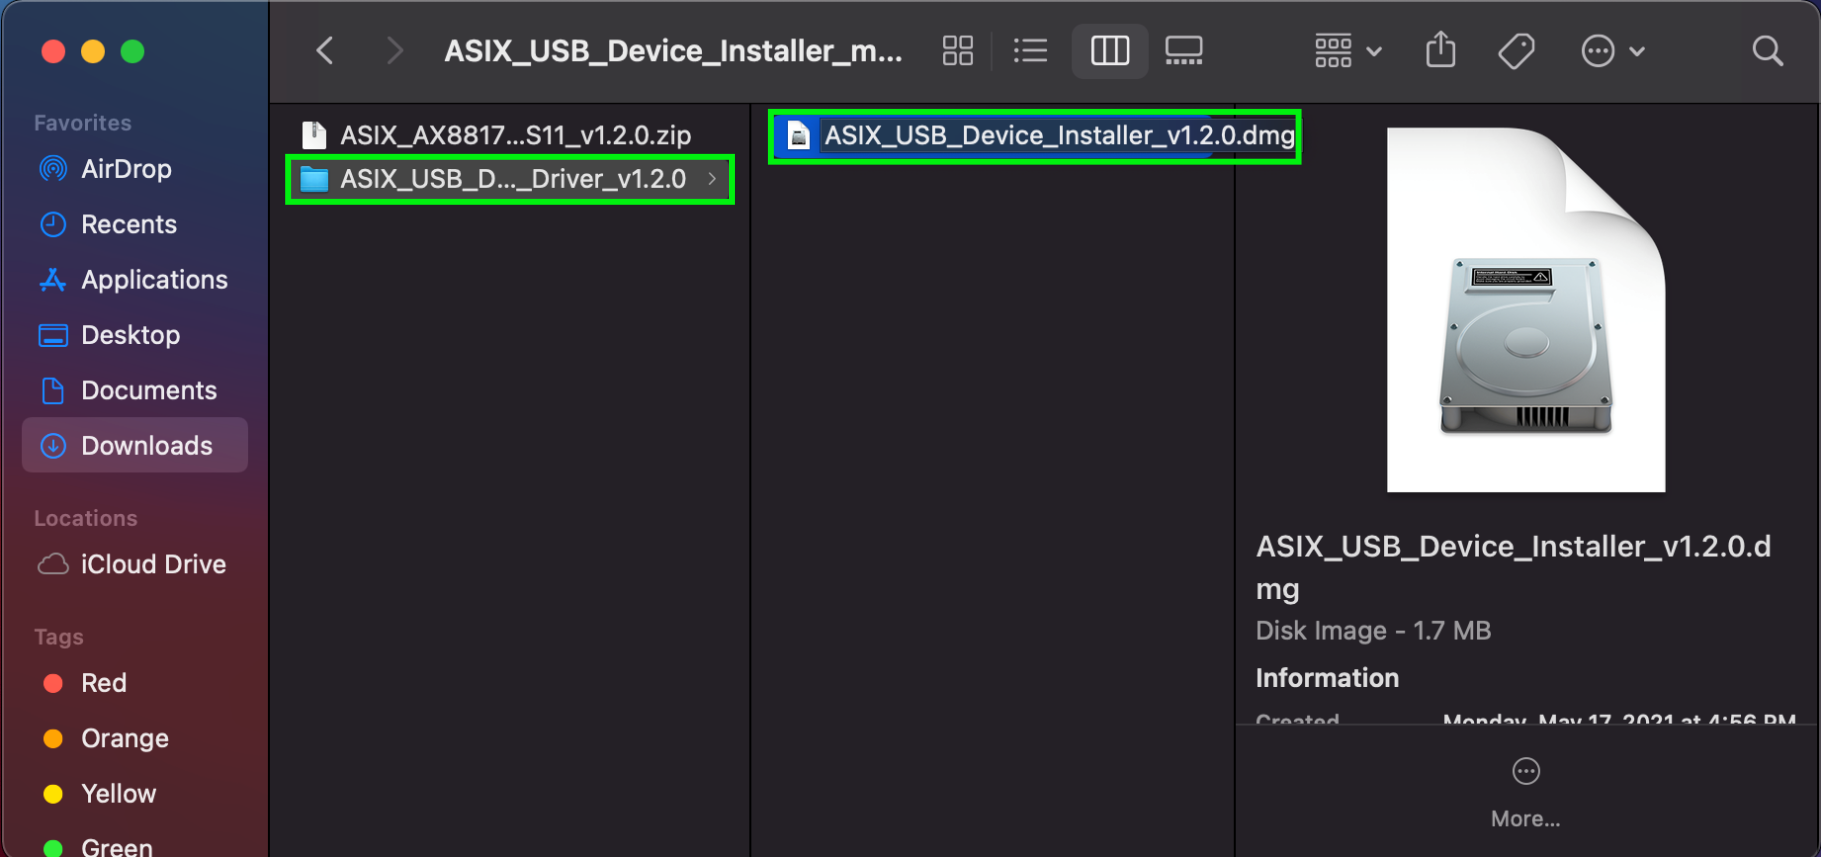
ダウンロードフォルダーをダブルクリックして開き、.zip 圧縮ファイルをダブルクリックします。 ASIX_USB_Device_Installer_v2.0.0.dmg ディスクイメージ・ファイルをダブルクリックします。
![ASIX Big Sur]()
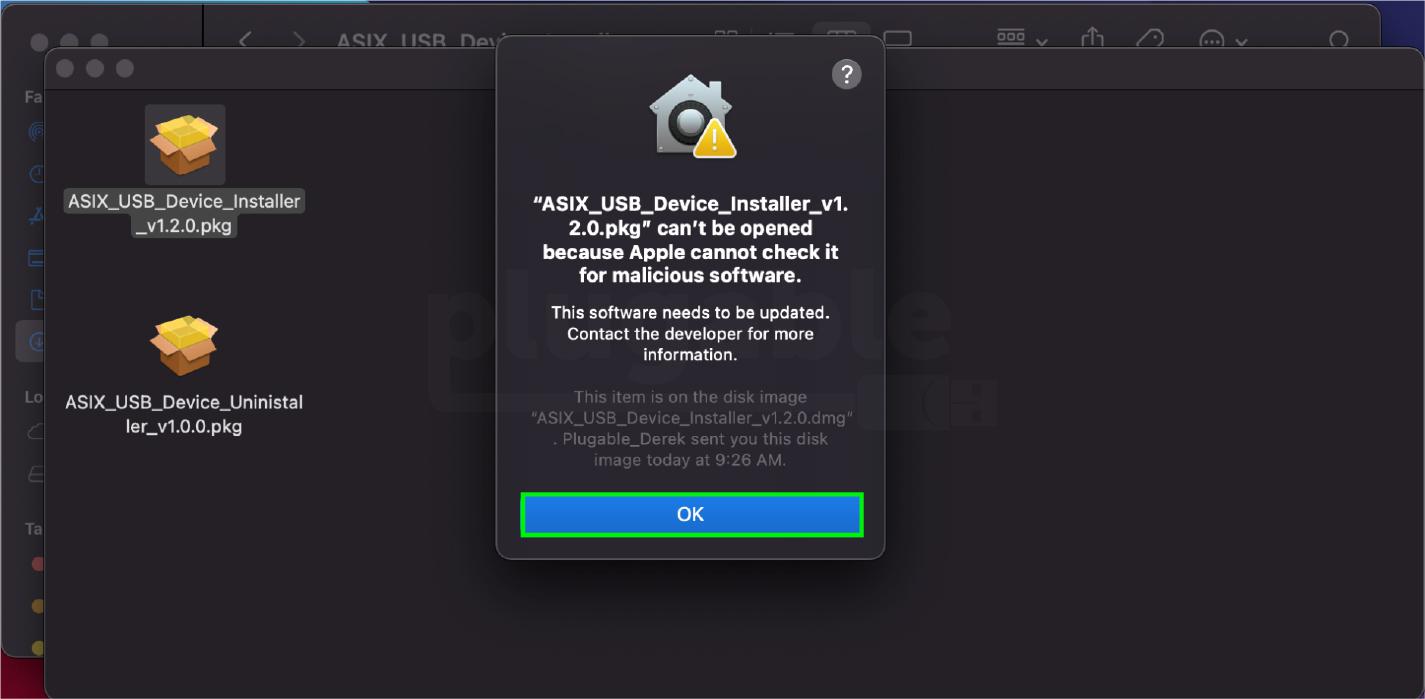
- 次に、ダブルクリックして ASIX_USB_Device_Installer_v2.0.0.pkg パッケージを開きます。以下のような画面が表示されることがありますが、これは「Apple 社はダウンロードされたソフトウェアパッケージに、悪意のあるソフトウェアが含まれていないかどうかをチェックできない」という意味です。 実際にはこれらのドライバーは安全ですし、Apple 社によって認証されたものです。 このメッセージは、ダウンロードが Apple のサーバーから直接行われていないために表示されます。OK をクリックして先に進みます。
![Asix Big Sur]()
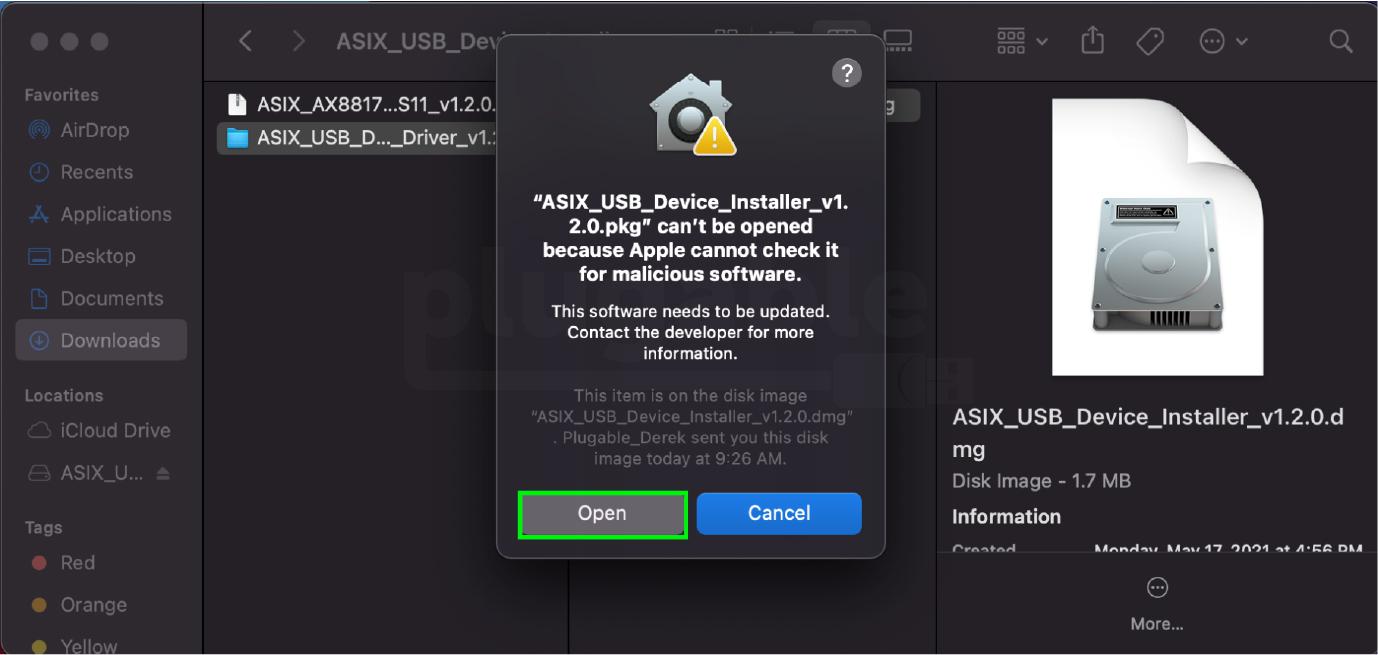
- 次に、「開く(Open)」をクリックします。
![Asix Big Sur]()
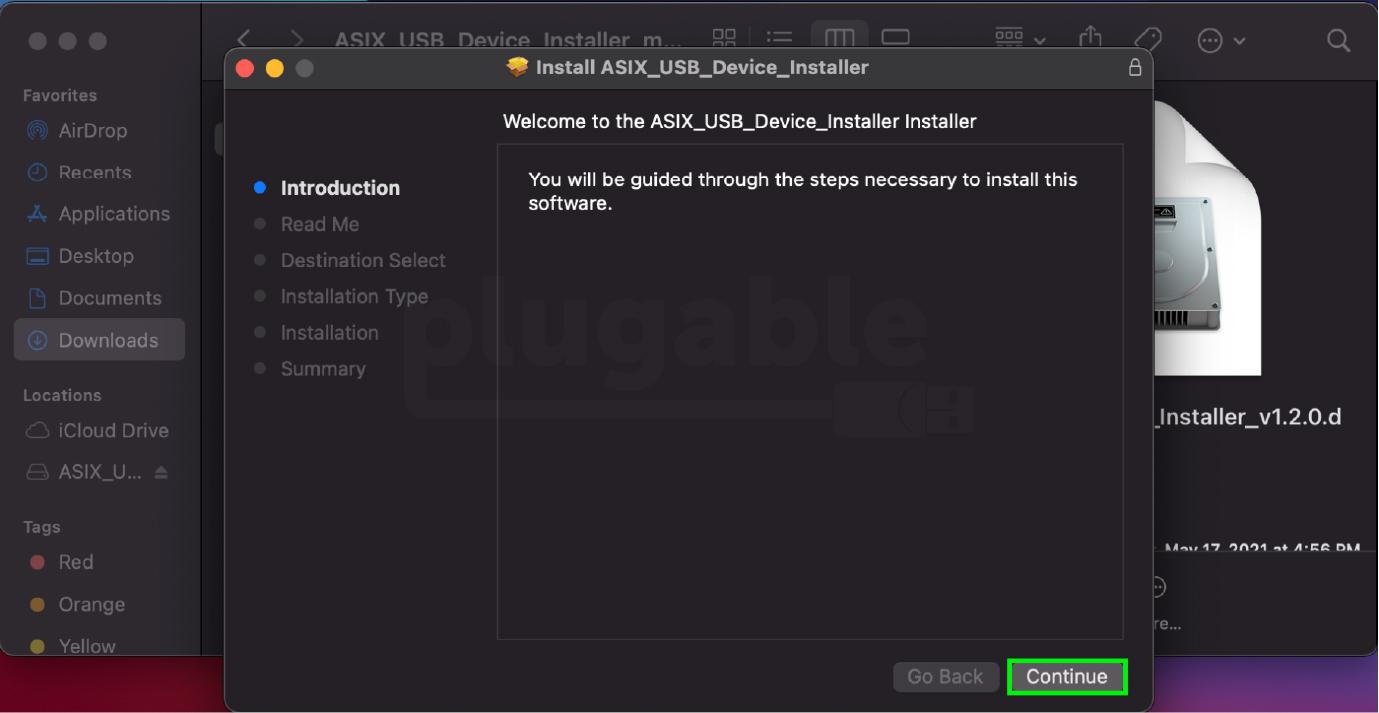
- 「次へ(Continue)」をクリックします。インストールを促すメッセージが表示されるまで先に進みます。
![Asix Big Sur]()
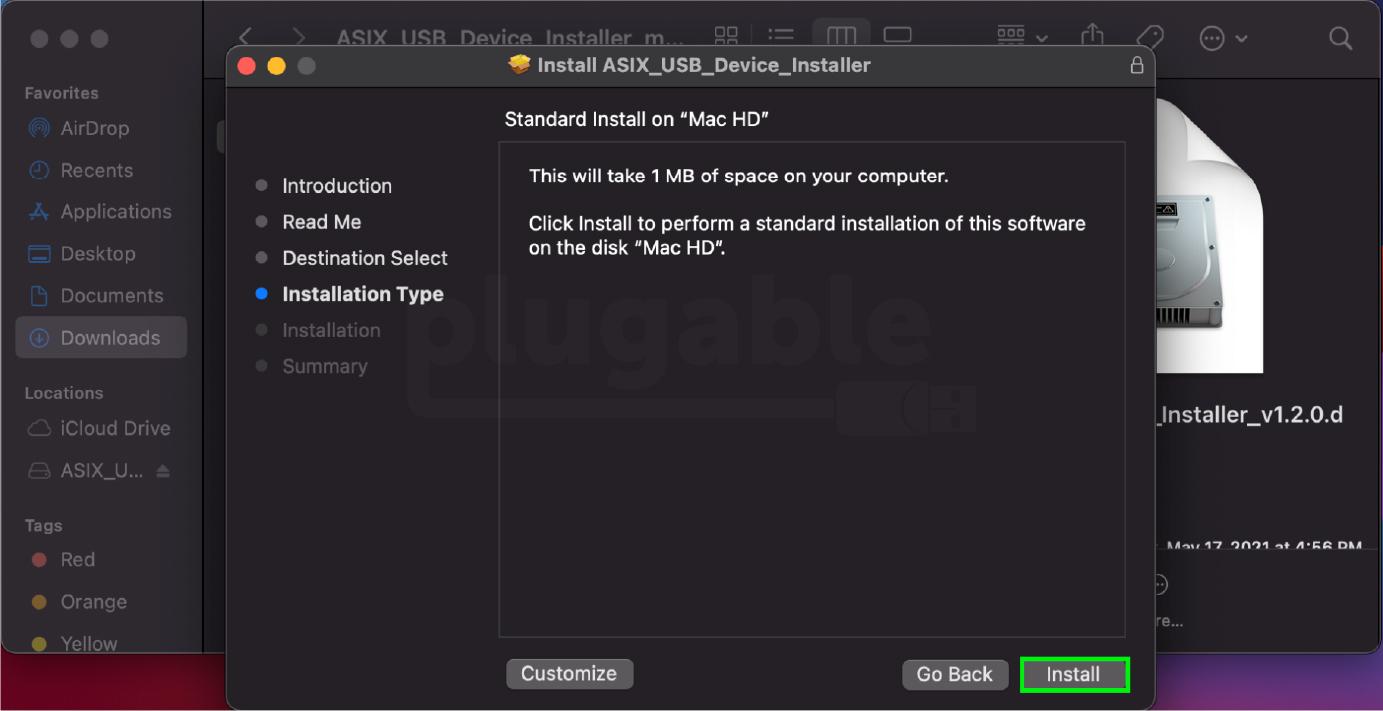
- さらに「インストール(Install)」 をクリックして、インストールを開始します。
![Asix Big Sur]()
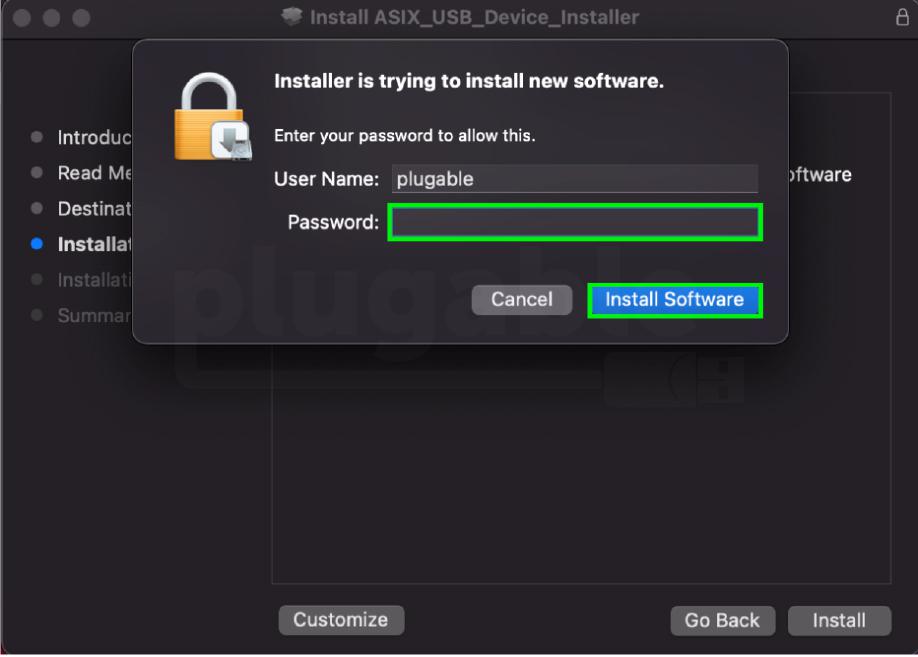
- パスワードを入力するよう促されます。ボックスにパスワードを入力してから 「ソフトウェアを導入する(Install Software)」をクリックします。
![Asix Big Sur]()
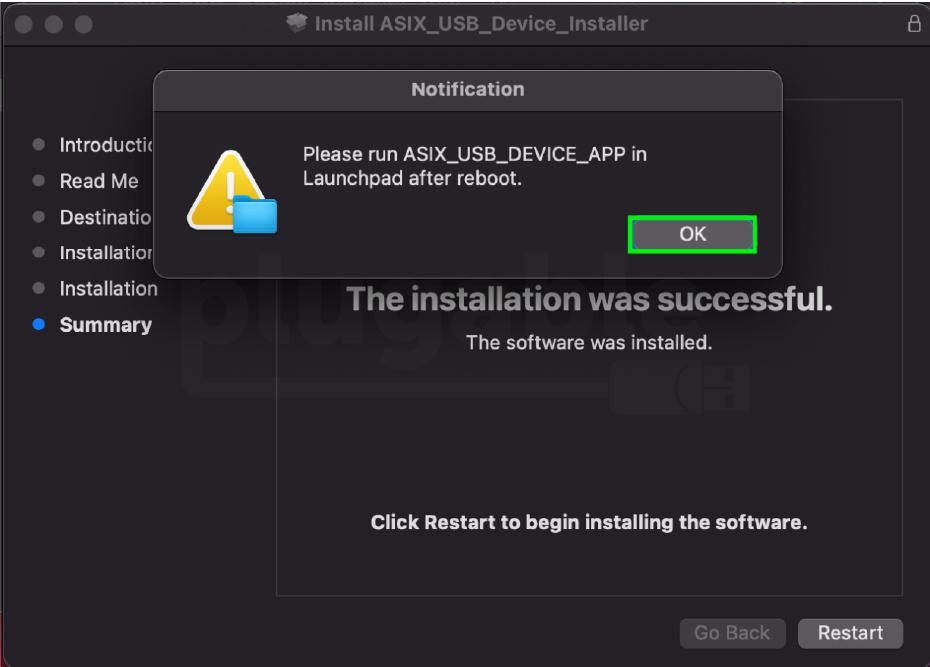
- パスワードを入力するとインストールが始まります。終了すると、下記のメッセージが表示されます。「OK」をクリックして警告を閉じ、「再起動(Restart)」ボタンをクリックしてインストールを完了します。(このメッセージにある通り、この後のステップ 9 でシステム再起動後にラウンチパッド内にある「ASIX_USB_DEVICE_APP」を実行します。)
![Asix Big Sur]()
-
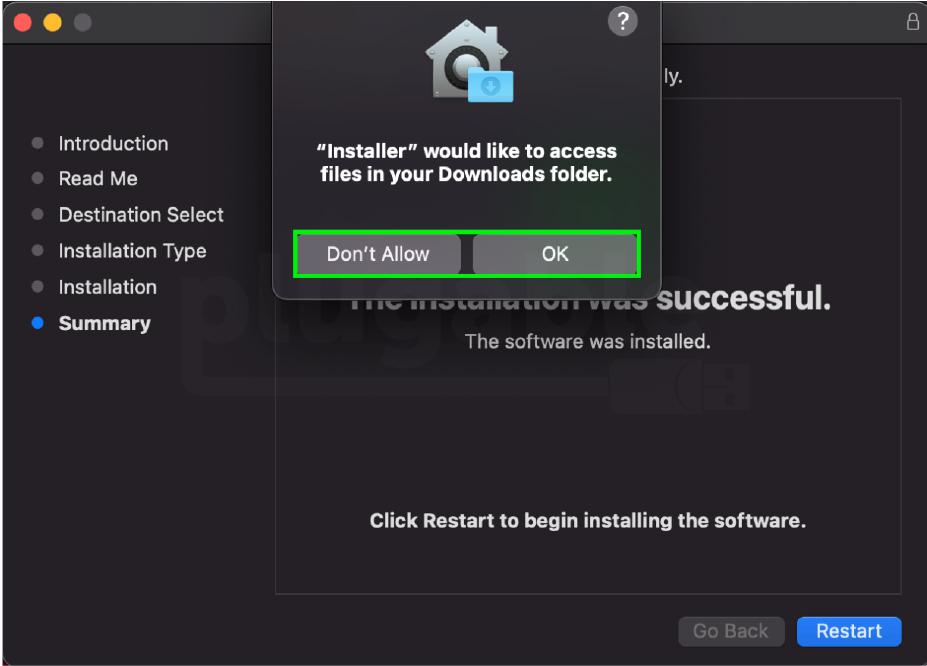
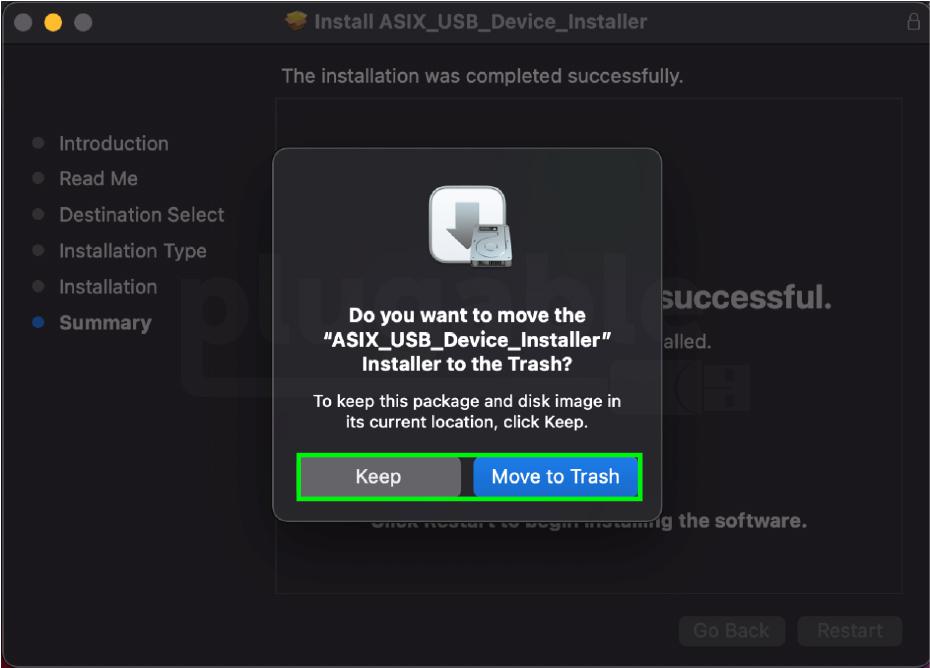
任意 - 「再起動」をクリックすると、インストーラにダウンロードフォルダへのアクセスを許可するかどうかを尋ねる別のウィンドウが表示されます。インストーラにアクセスを許可した場合、パッケージファイルを自動的にゴミ箱に移動させることができます。もし必要であれば、後で手動で移動させることもできます。
![Asix Big Sur]()
- ファイルを保存するか、ゴミ箱に移動するかを選択すると、コンピュータが再起動します。システムが再起動したら、ステップ 7 で指示されたとおり ASIX_USB_DEVICE_APP を実行します。
![Asix Big Sur]()
B. インストール後のセットアップ
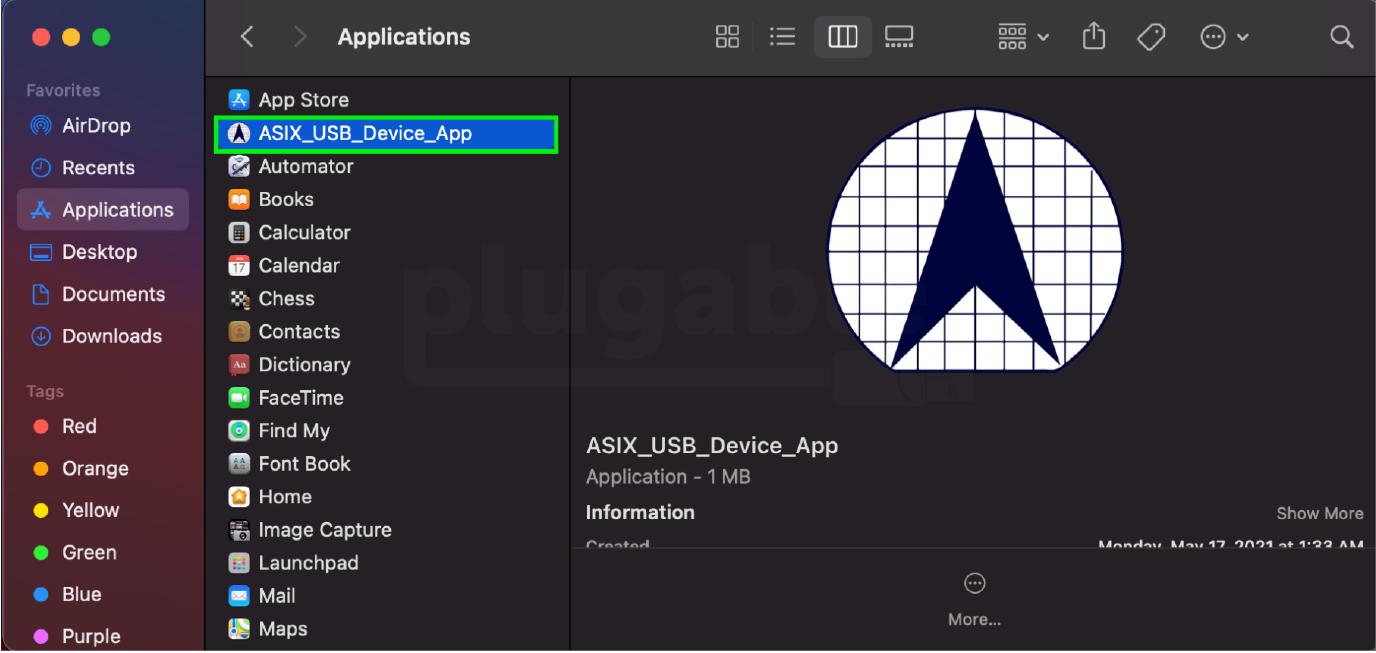
1. ウィンドウの「アプリケーション」をクリックし内にある ASIX_USB_DEVICE_APP というファイルをダブルクリックして開きます。
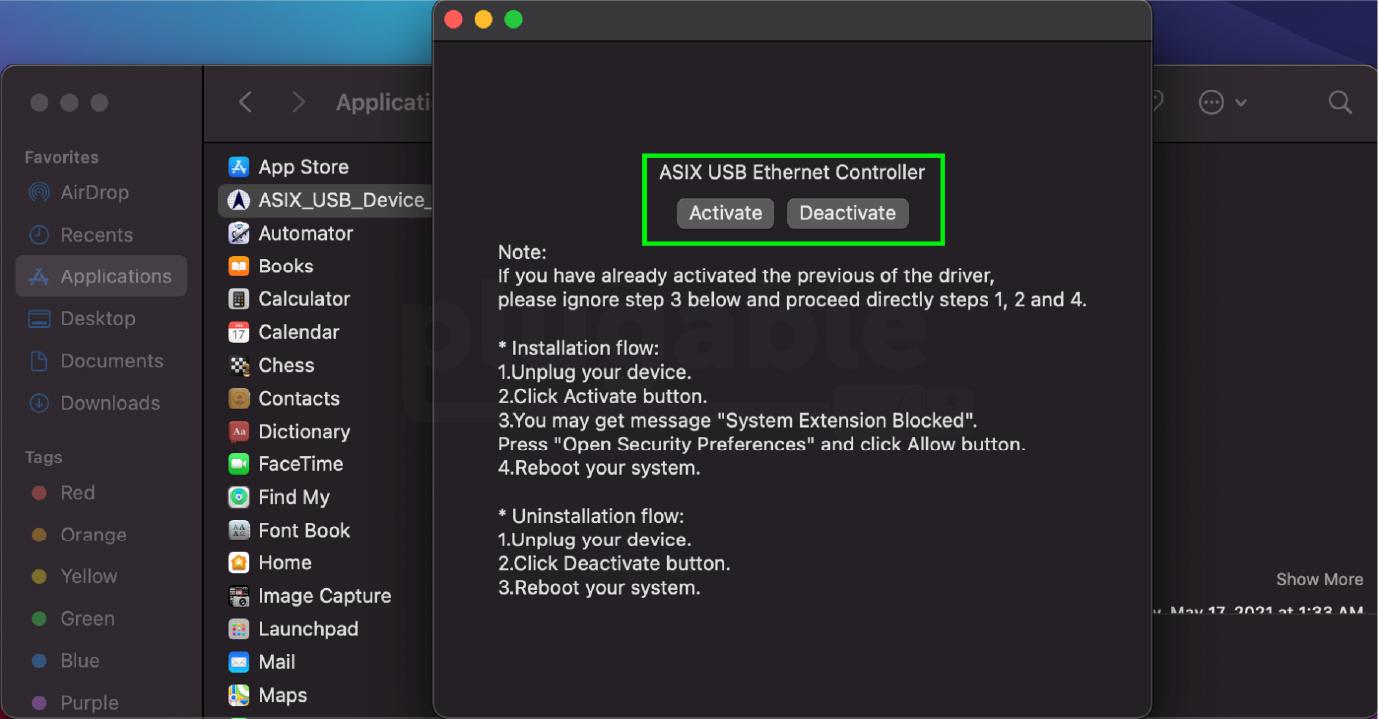
2. ドライバのインストールを有効にするための詳細を示す画面が表示されます。ドライバを正しく機能させるために、これらの指示に従がってください。この説明画面の中のステップ4(システムの再起動)が終わるまで、イーサネット アダプターを接続しないでください。「Activate(有効にする)」をクリックして次に進みます。
3. 次に、「System Extension is Blocked(システム拡張はブロックされました)」というメッセージがポップアップで表示されます。(注意: 新しい ASIX DEXT ドライバを初めてインストールしたときに表示されます。その以降のドライバーのインストールやアップデートでは、アクティベーションの再承認は必要ありません。)
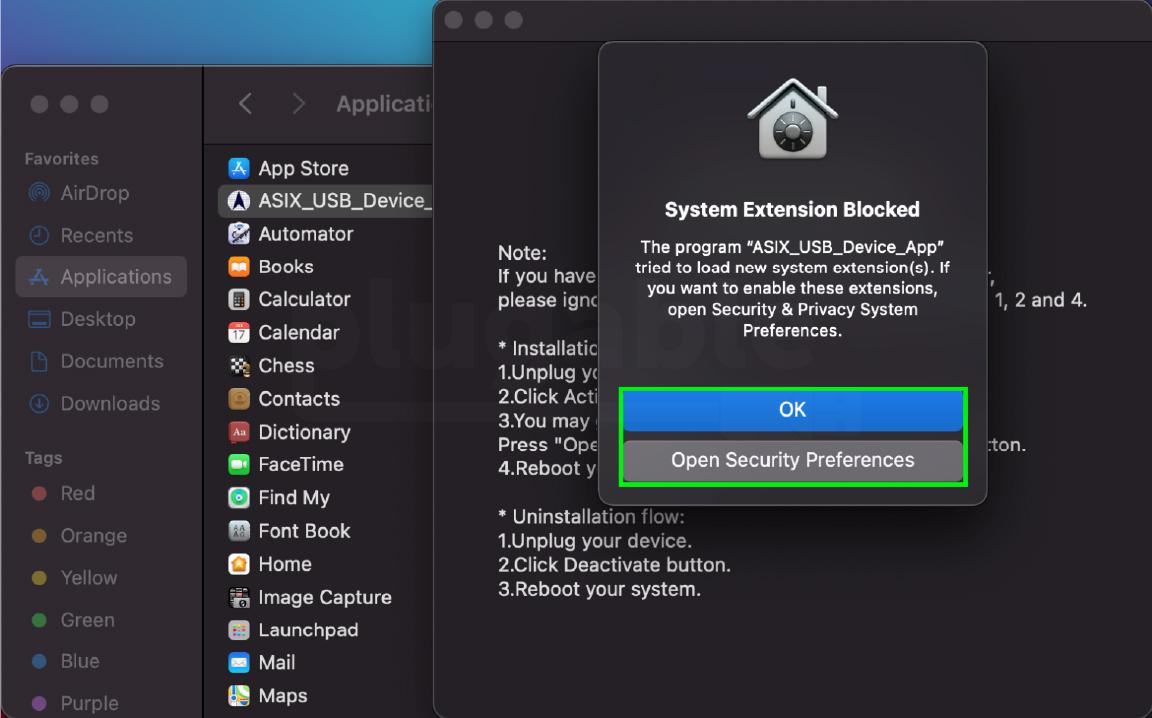
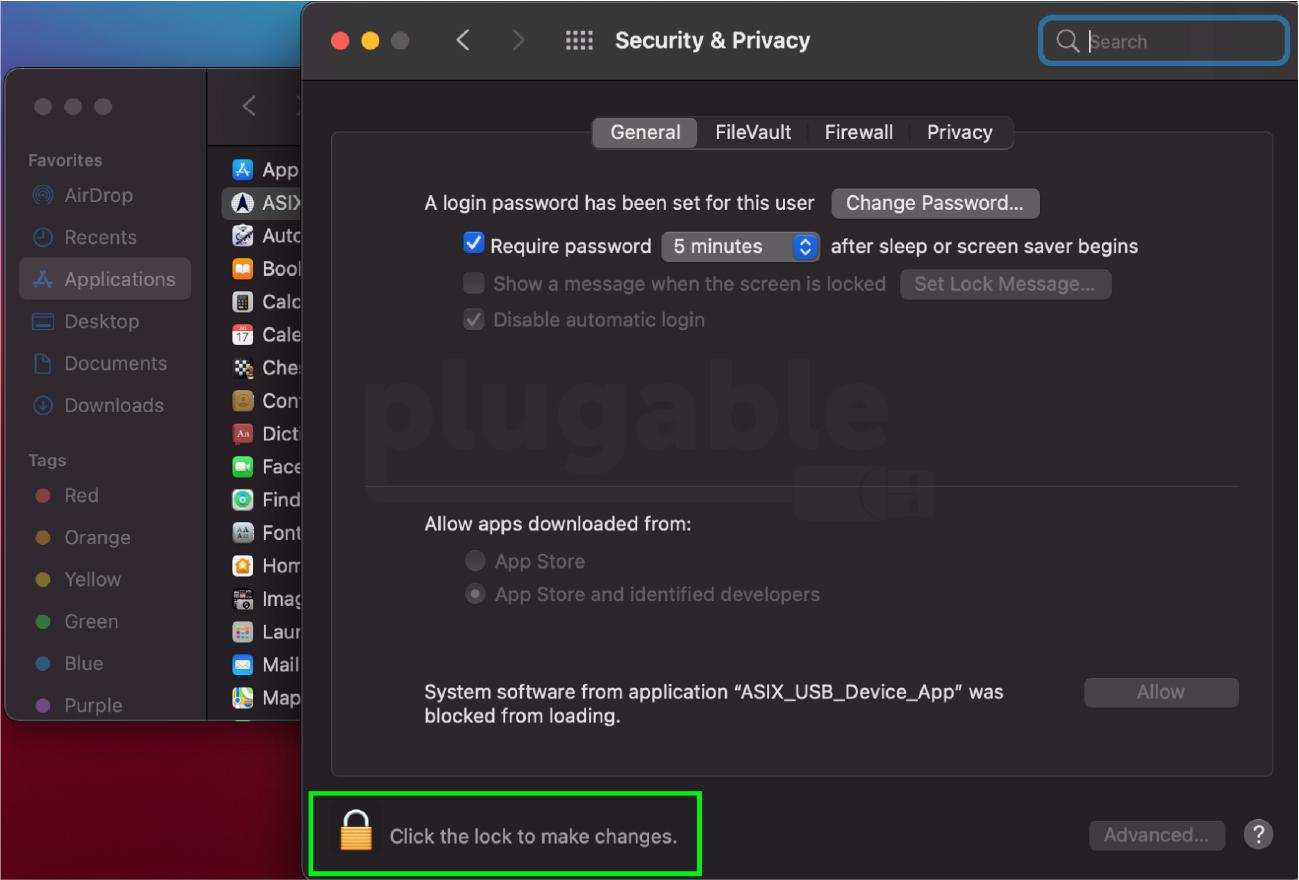
4.「セキュリティとプライバシー」の設定画面が表示されます(Apple メニュ>システム環境設定>セキュリティとプライバシー>ネットワーク>一般)。ウィンドウの左下にある「(金色の鍵のマーク)」をクリックすると、パスワードの入力を求めるプロンプトが表示されます。
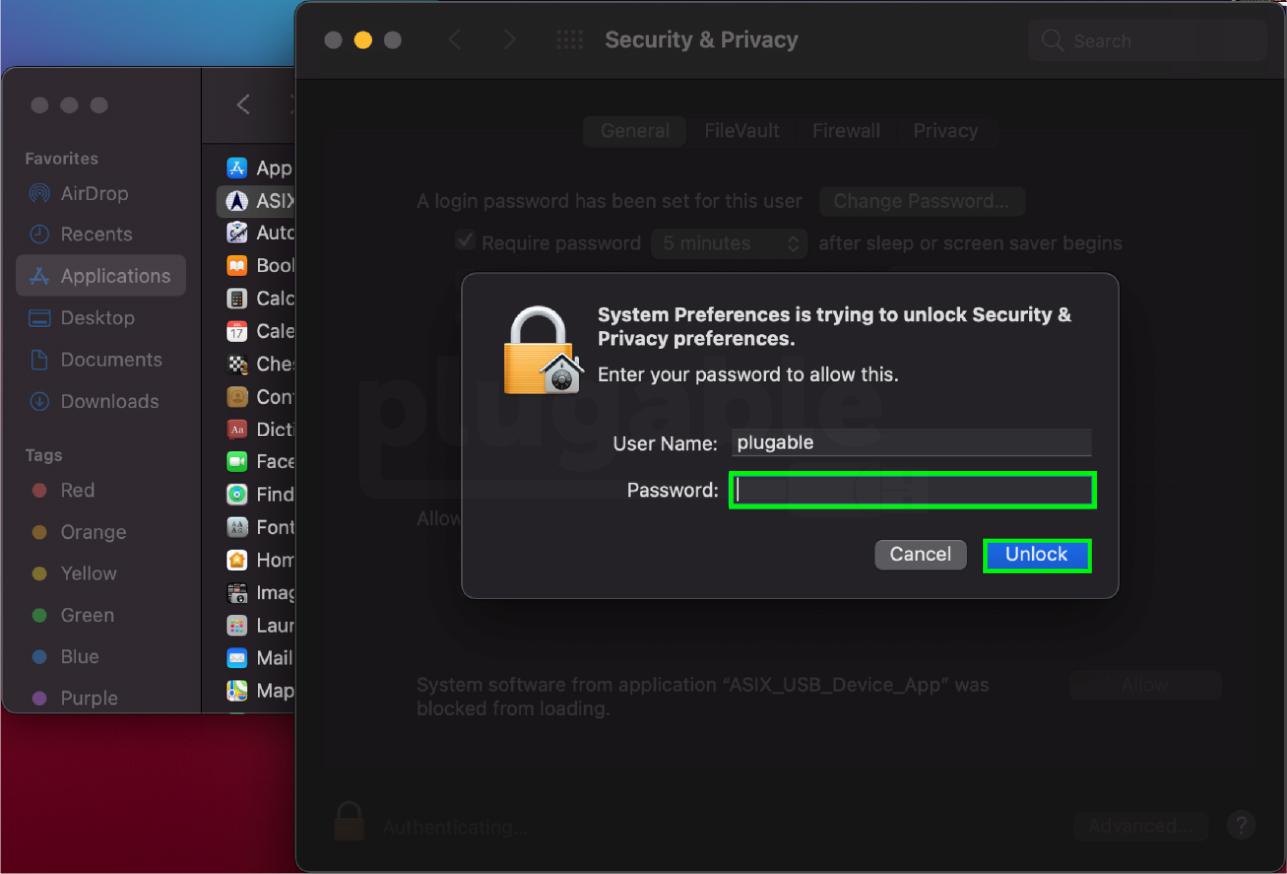
5.パスワードをフィールドに入力し、「Unlock(ロック解除)」をクリックします。
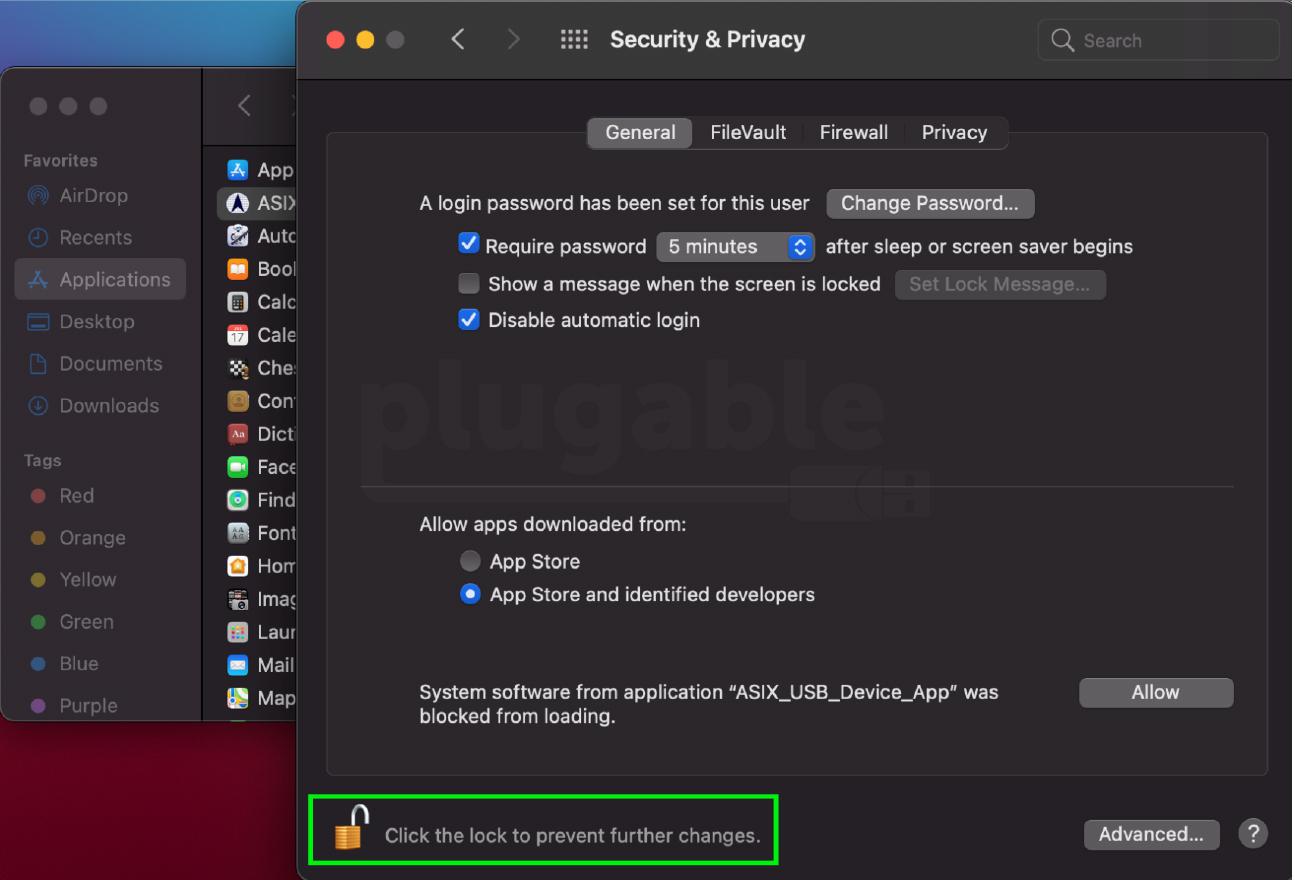
6. この、ロックがかかっていない状態で「Allow(許可)」をクリックしてドライバーの拡張を許可した後、システム環境設定と ASIX アプリケーションを終了します。最後にコンピュータを再起動します。
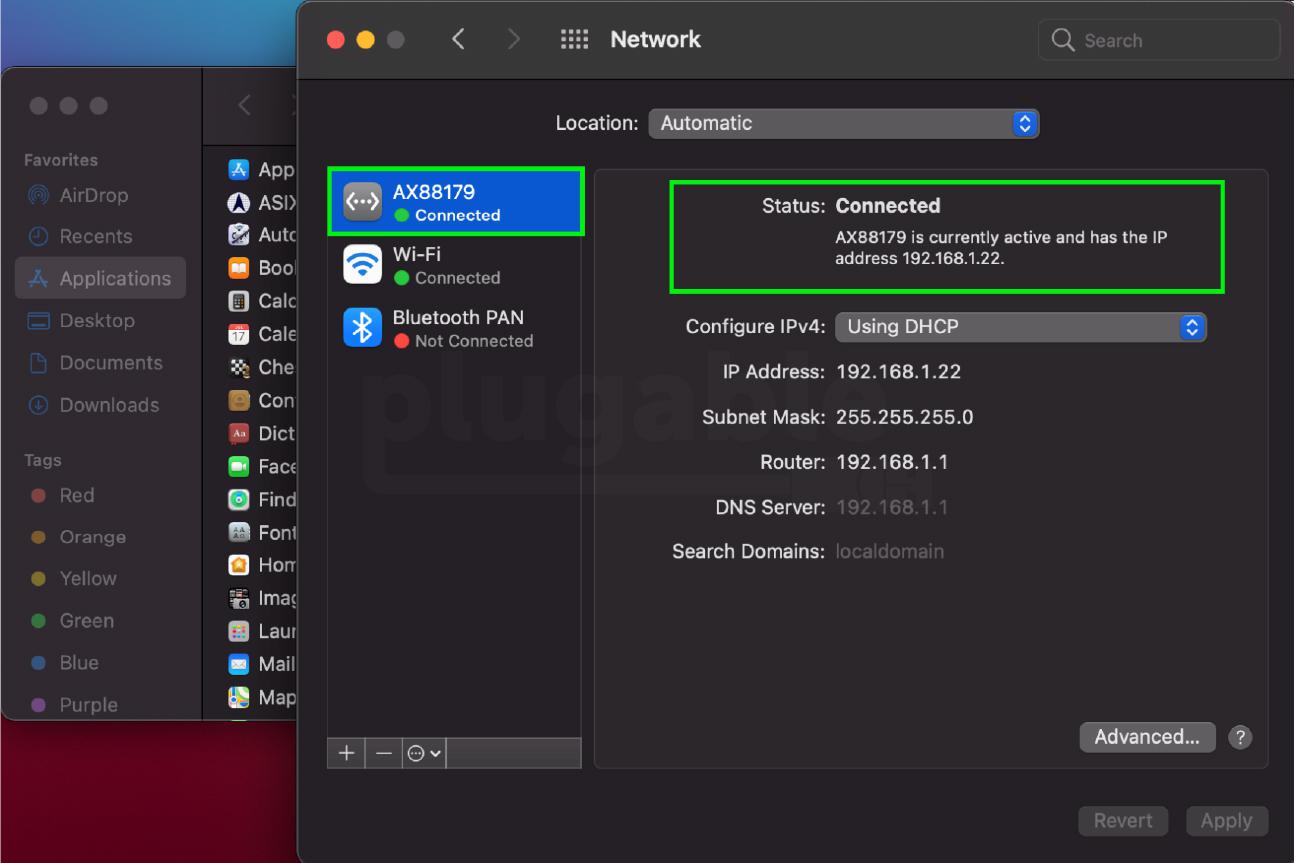
7. コンピュータを再起動した後、USB イーサネットアダプタとイーサネット ケーブルをコンピュータに接続してください。そして、ネットワーク画面でアクティブな接続を確認します。
(Apple メニュー>システムプリファレンス>ネットワーク を表示する)
ネットワークの状態を確認する際、ASIX アプリケーションがドッキングステーションで稼働している場合があります。ネットワーク機能のためにこのアプリケーションを開いておく必要はありませんが、アプリケーションを削除することはできません。これは DEXT 機能の必要条件です。
C. ドライバのアンインストール
既に以前のバージョンのドライバを導入したことがある場合のみ必要です。
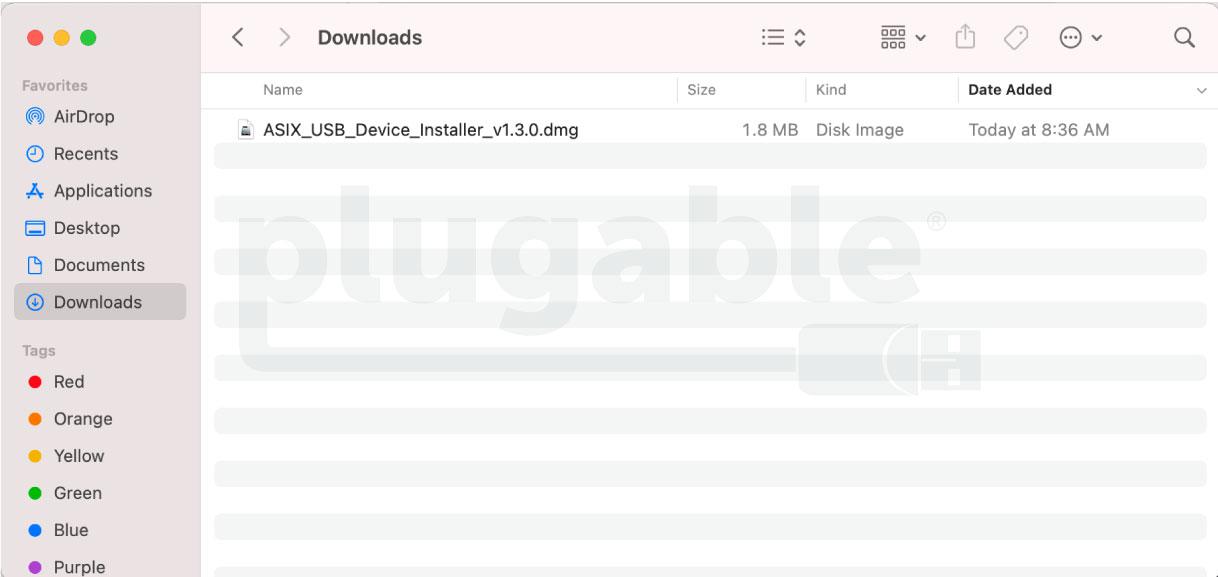
- 当記事内のリンクページから最新ドライバーをダウンロード後で、「ダウンロード」フォルダー内の pkg 圧縮ファイルをダブルクリックします。dmg ファイルをダブルクリックします。例:
- ASIX_USB_Device_Installer_v1.3.0.dmg for macOS 11.x Big Sur
- ASIX_USB_Device_Installer_v2.0.0.dmg for macOS 12.x Monterey
![ASIX Uninstaller]()
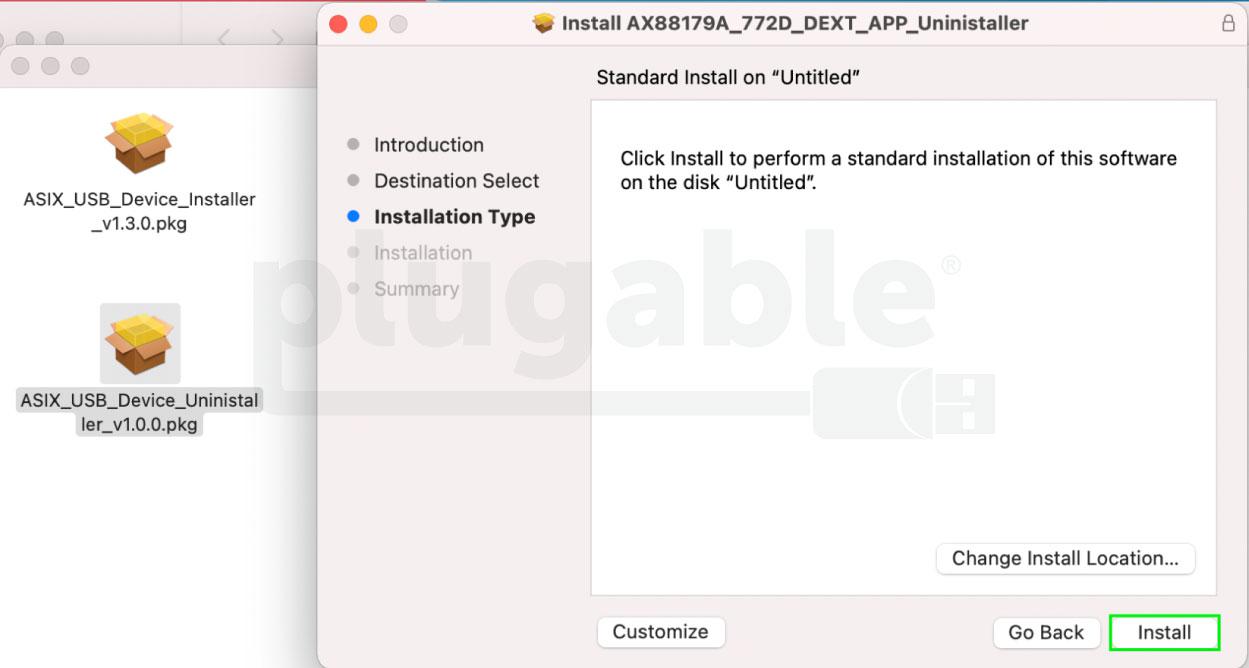
- 新しいドライバー導入の前に、以前のバージョンをアンインストールします。(例)ASIX_USB_Device_Uninstaller_v1.3.0.pkg パッケージをダブルクリックして、アンインストール用のアプリケーションを実行します。画面が表示されたら「次へ」を押します。
![ASIX Uninstaller]()
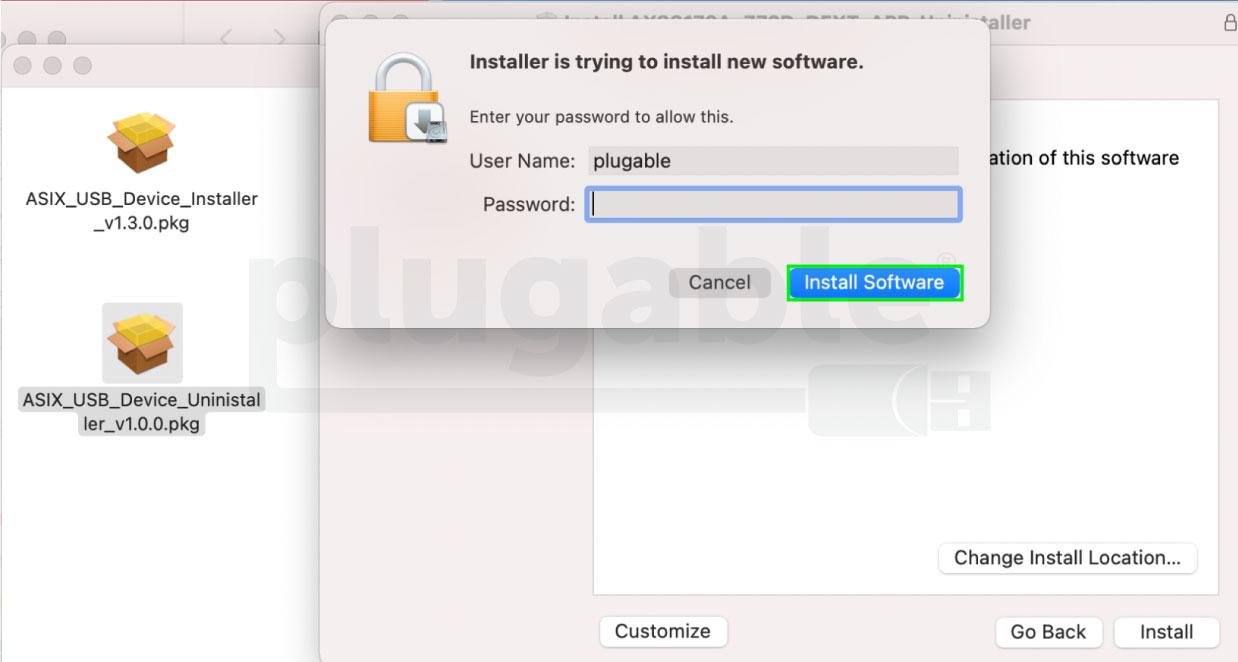
- 「インストール(Install)」を押します。(この後いくつか「インストール」というボタンが出てきますが、実際にはこのボタンを押すと「アンインストール」されますので安心してください。) パスワードを入力くする画面が表示されたら、自分のパスワードを入力します。「ソフトウェアのインストール(Install Software)」ボタンを押します。
![ASIX Uninstaller]()
- 次の画面でも「ソフトウェアのインストール(Install Software)」ボタンが出てきますが、終了するまでこれを押していきます。完了後、一度システムを再起動します。
- システムが再起動したら、圧縮ファイルをもう一度開き、 ASIX_USB_Device_Installer_v2.0.0.dmg ディスクイメージファイルをダブルクリックします。今回はこの圧縮ファイルを実行して更新されたドライバーを導入します。
D. 既知の問題
ASIX 社は下記の問題についてすでに報告を受けており、解決のために問題症状の調査を続けています。この他にもし再現可能な問題が発生した場合は、問題の再現手順を弊社までお知らせください。ASIX 社へ報告し調査依頼をすることができます。またこれらの問題は、新しいドライバにより解消される可能性があります。
-
DHCP リース
- インストール後に、手動でアダプタをネットワークリストに追加したり、DHCPリースを更新したりする必要があることがあります。これらの手順は、こちらのナレッジベース記事に記載されています。問題の症状には下記のものがあります。
- このアダプターはネットワーク・リストに表示されるが、接続できない
- このアダプターがネットワーク・リストに表示されない
- インストール後に、手動でアダプタをネットワークリストに追加したり、DHCPリースを更新したりする必要があることがあります。これらの手順は、こちらのナレッジベース記事に記載されています。問題の症状には下記のものがあります。
-
M1 チップ搭載 Mac システムのスリープ
- M1 システムでは、macOS 11 のスリープ/パワーナップ時に、イーサネット・アダプタの機能に問題が発生することが確認されています。たとえば、スリープ中にネットワーク接続が維持されないこと、スリープから復帰した後に有線 LAN 接続が正しく復元されないことが含まれています。ほとんどの場合、イーサネットアダプターを一度取り外して再度接続することで問題が解決します。しかし、場合によってはコンピューターの再起動が必要になることもあります。
当情報が参考になるようでしたら幸いです。もし不明な点があったり、ドライバーのインストールやアダプター使用時などに何か問題がありましたら、Plugable 社技術サポート nihongo@plugable.com までご連絡ください。
