
This article will cover how to connect your Plugable docking station in broad strokes. Some of our docks are different in design, USB placement, video output options (for example, some have HDMI, DVI, DisplayPort, etc.), and much more. This article may not cover every aspect of your device, but should broadly translate well enough to get you connected to your dock.
If you should ever run into any issues, please feel free to reach out to us at support@plugable.com or https://plugable.com/pages/support.
(Before starting the below steps) Depending on the type of docking station/graphics adapter, and laptop-- your dock may need software installed to function properly. If you see “DisplayLink” anywhere on your device, you will need the DisplayLink drivers developed by Synaptics. You can find these and legacy drivers here: https://plugable.com/pages/displaylink
If using an Apple-based product (such as an MacBook Air M1/M2/M3), there are specific instructions found here: DisplayLink for macOS 11/12 or DisplayLink for macOS 13+
Some of our devices do not have an indicator on the device to denote which drivers are needed, but may still need some installed. Be sure to check the included pamphlet to see what software, if any, is needed. A common example of such a device are our Silicon Motion-based devices. You can find downloads for these drivers and legacy drivers here: https://plugable.com/pages/siliconmotion
As mentioned before, Apple-based products will require specific instructions for proper installation.
To start, unbox your docking station or graphics adapter and make a note of all the components. Most of our docking stations will come with a small pamphlet that details what should be in the box. If you suspect that you are missing components, feel free to reach out to our support team and we’ll do our best to help!
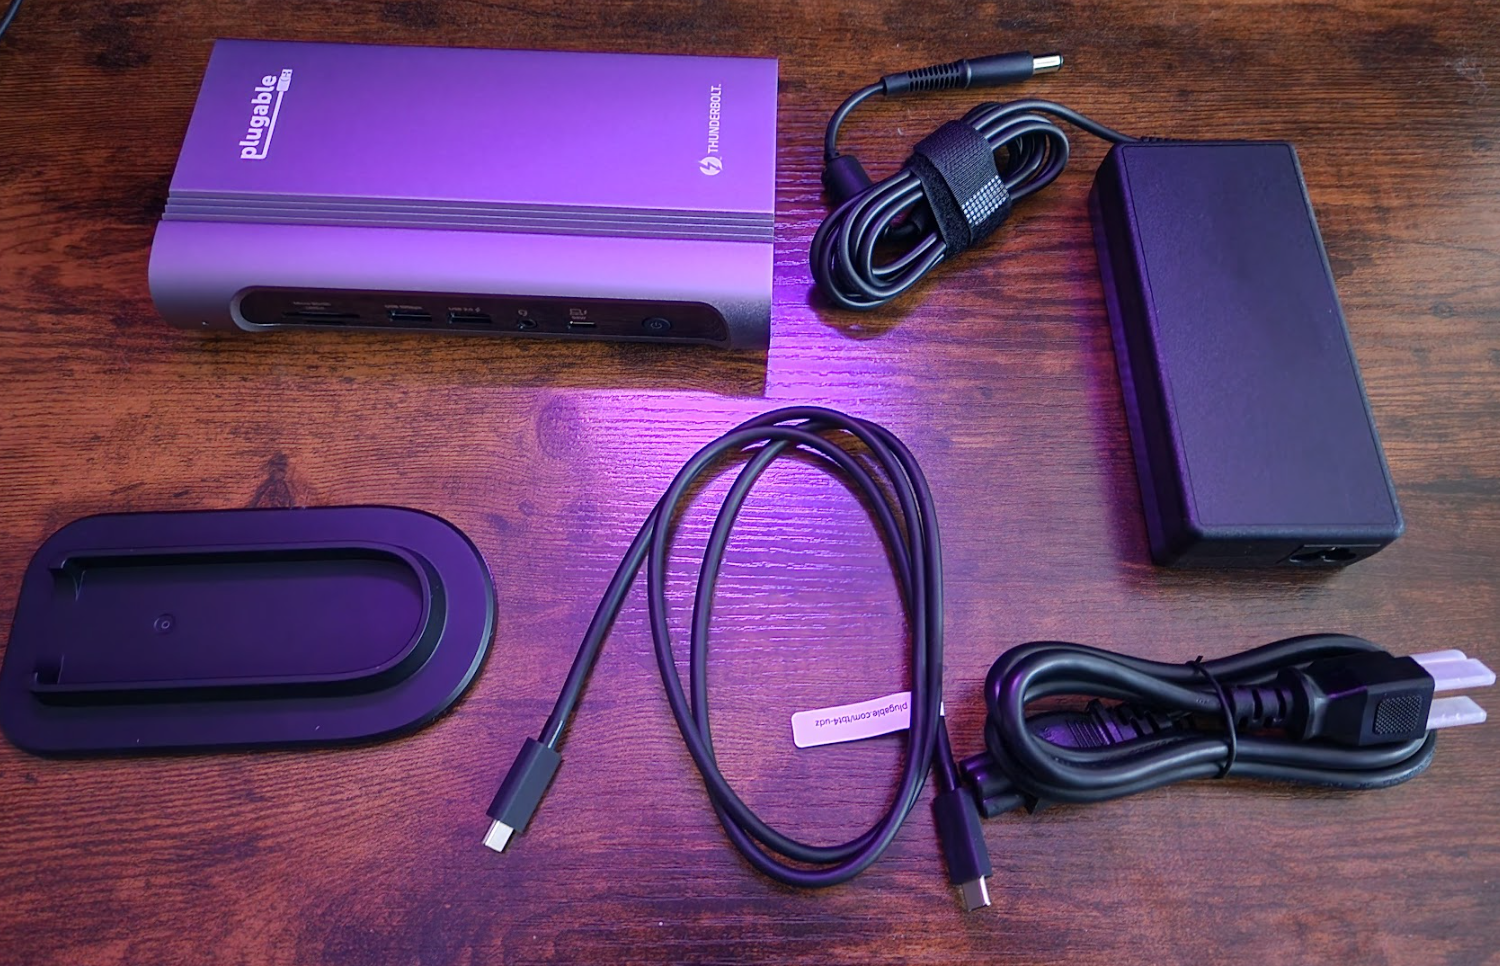
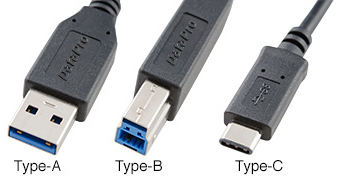
Using the included USB/Thunderbolt cable, connect the dock to an available port on your laptop/computer. See below for common cables that come with our devices for this purpose. In this case we’re using our TBT4-UDZ which includes a Thunderbolt (which uses the same physical shape as a USB-C cable).
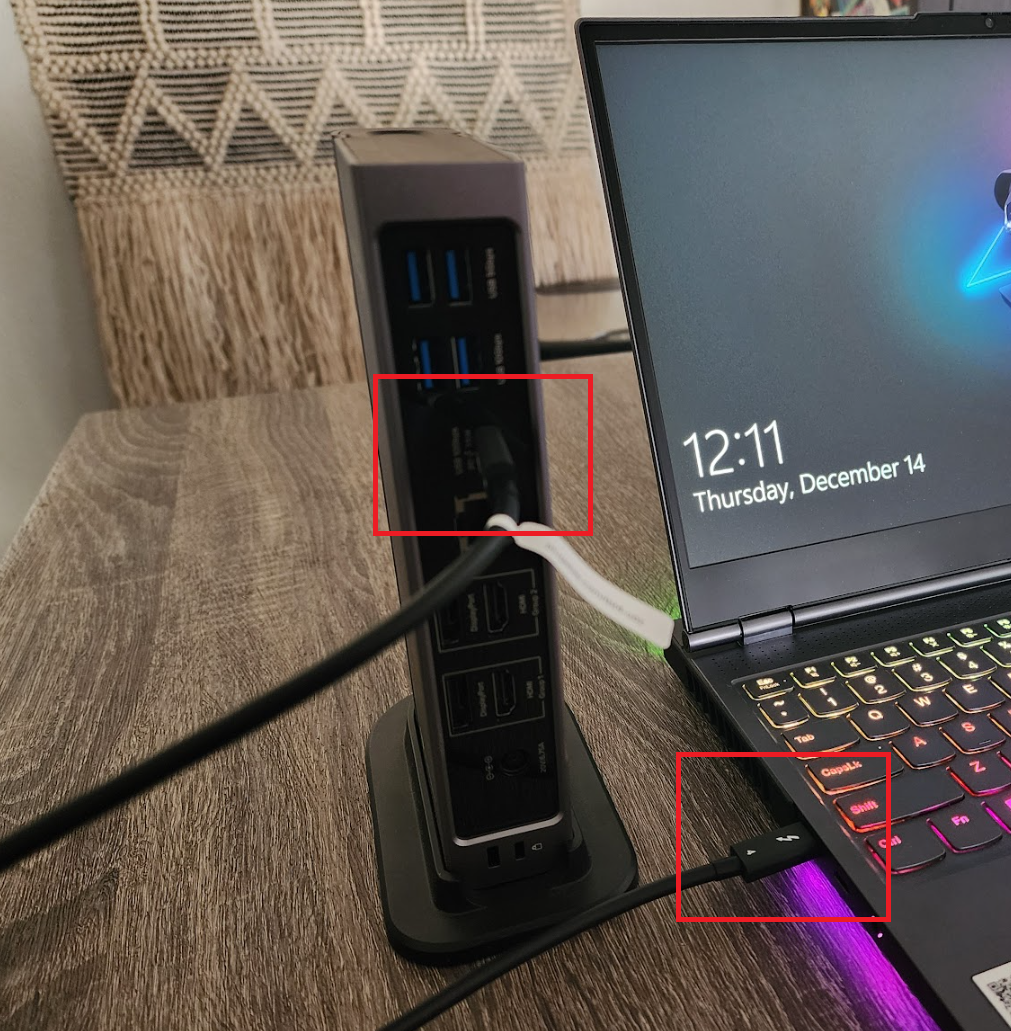
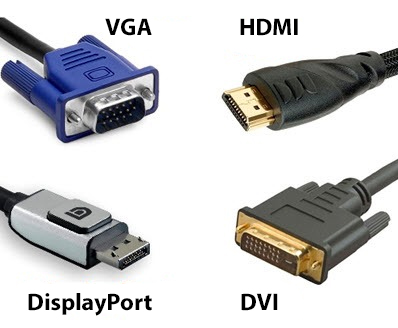
Then connect the docking station to a power outlet or surge protector via the included power adapter. If your docking station is capable of delivering power to your laptop/computer, it will generally come with a power brick and power cable. Examples can be found below. Now connect any displays/monitors you would like extended. There are a number of different cable interfaces or “styles”.
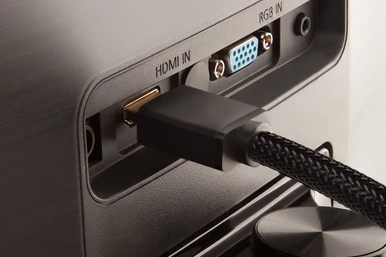
Modern displays/monitors use HDMI or DisplayPort, but there are also some older interfaces such as DVI and VGA. NOTE: THESE CABLES ARE NOT INCLUDED WITH OUR DOCKS
Now connect any peripheral devices. Typically, our docking stations (less so on graphics adapters) will include additional USB-A and USB-C ports, audio jacks (3.5mm), wired ethernet ports, and more. Some examples can be seen below.
Hopefully, with all these steps taken, you should now have a functioning Plugable docking station and extended functionality. If you still require additional support with your device, please feel free to reach out to our support team at support@plugable.com and we will be happy to assist.
