
How to Manually Add a Plugable USB Ethernet Adapter to macOS Network Settings?
Our Plugable USB Ethernet adapters are a great way to add wired Ethernet connectivity to your MacBook via USB! Once drivers are installed and the adapter is properly plugged in you should get a connection. But, sometimes there are exceptions, and you may need to manually add the adapter to your network devices to be able to use it. This is easy to do, so let's get started!
Manually add the adapter
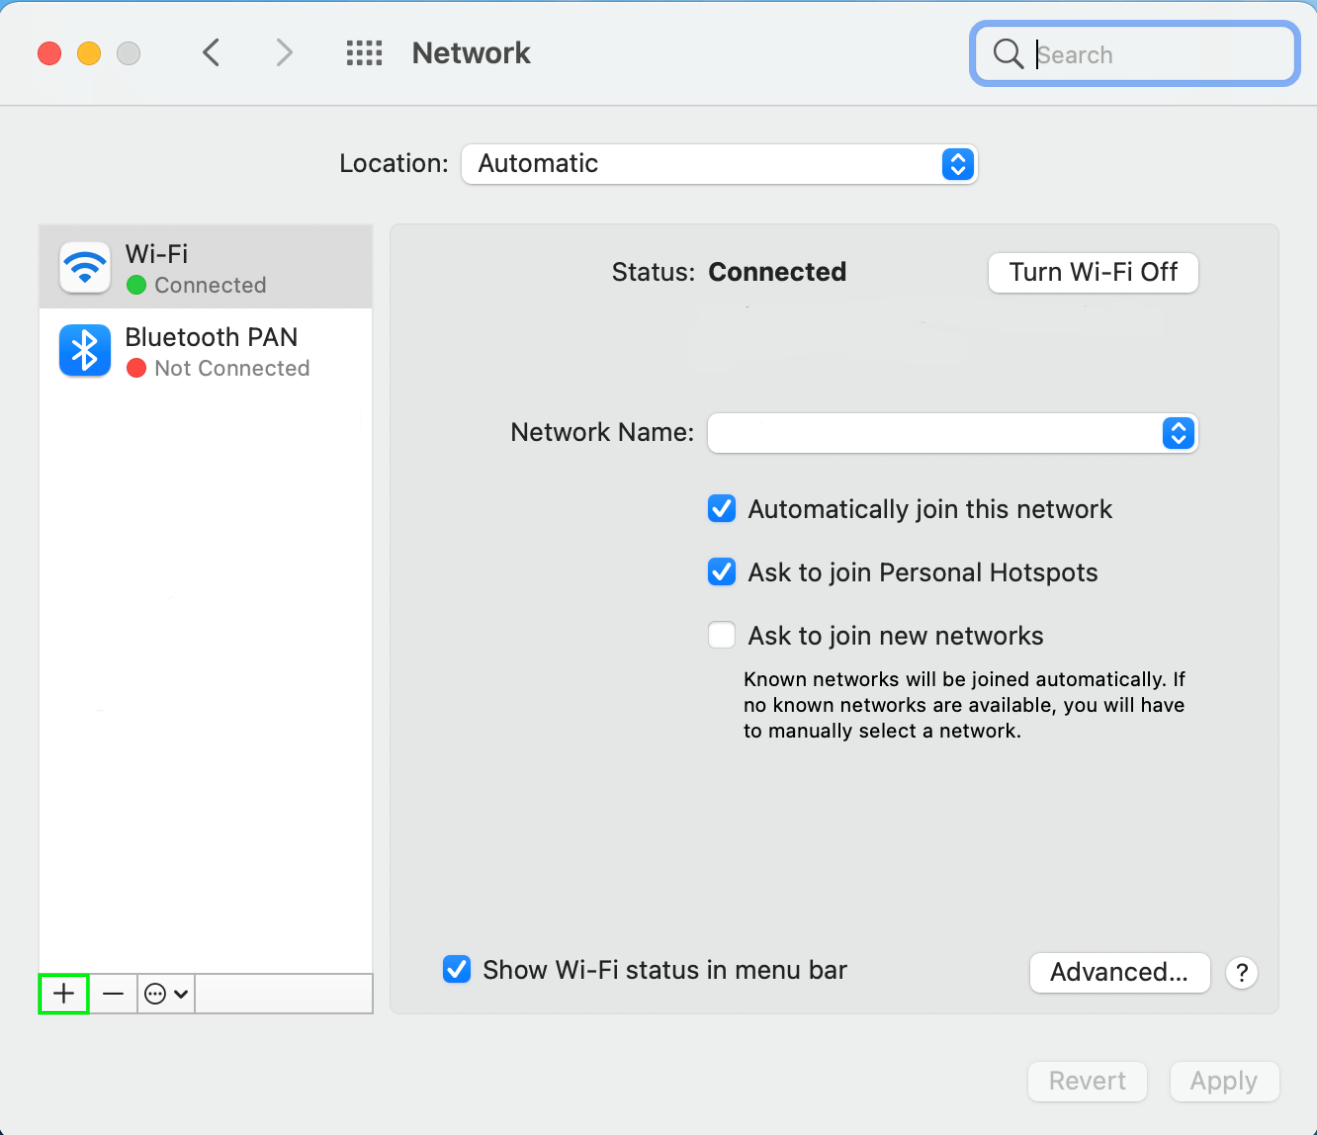
- Plug the adapter into your mac, and go to the Network Pane by clicking on the Apple Menu >System Preferences > Network. Then, click the plus button in the bottom left corner of the screen which will open a box to add the new adapter.
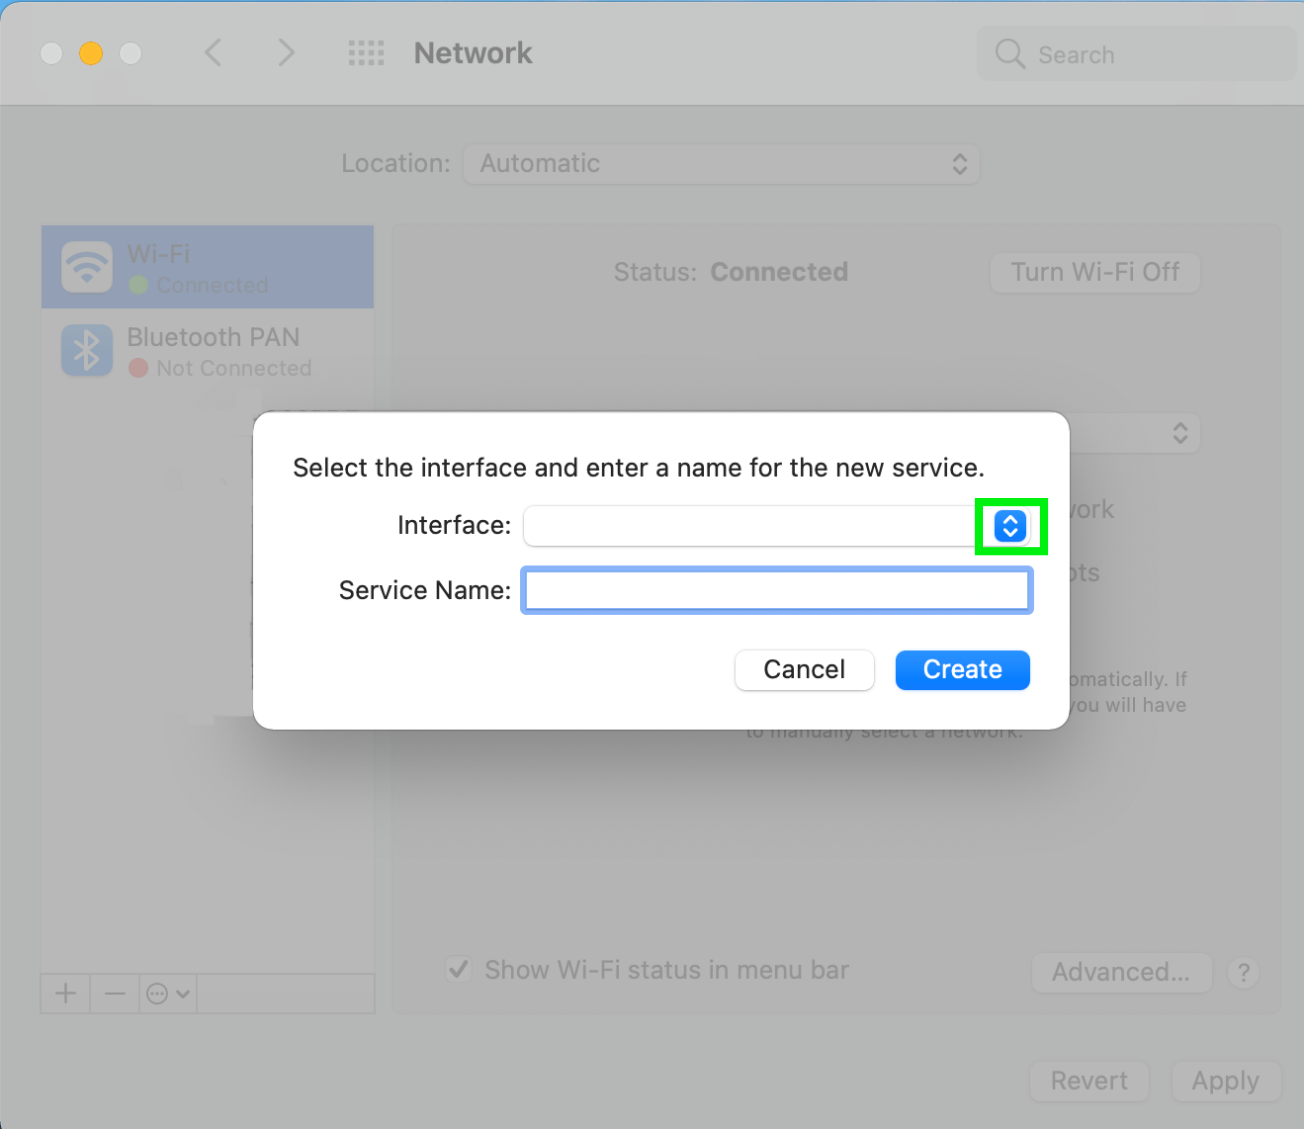
- Click the dropdown menu to open a list of available interfaces (devices).
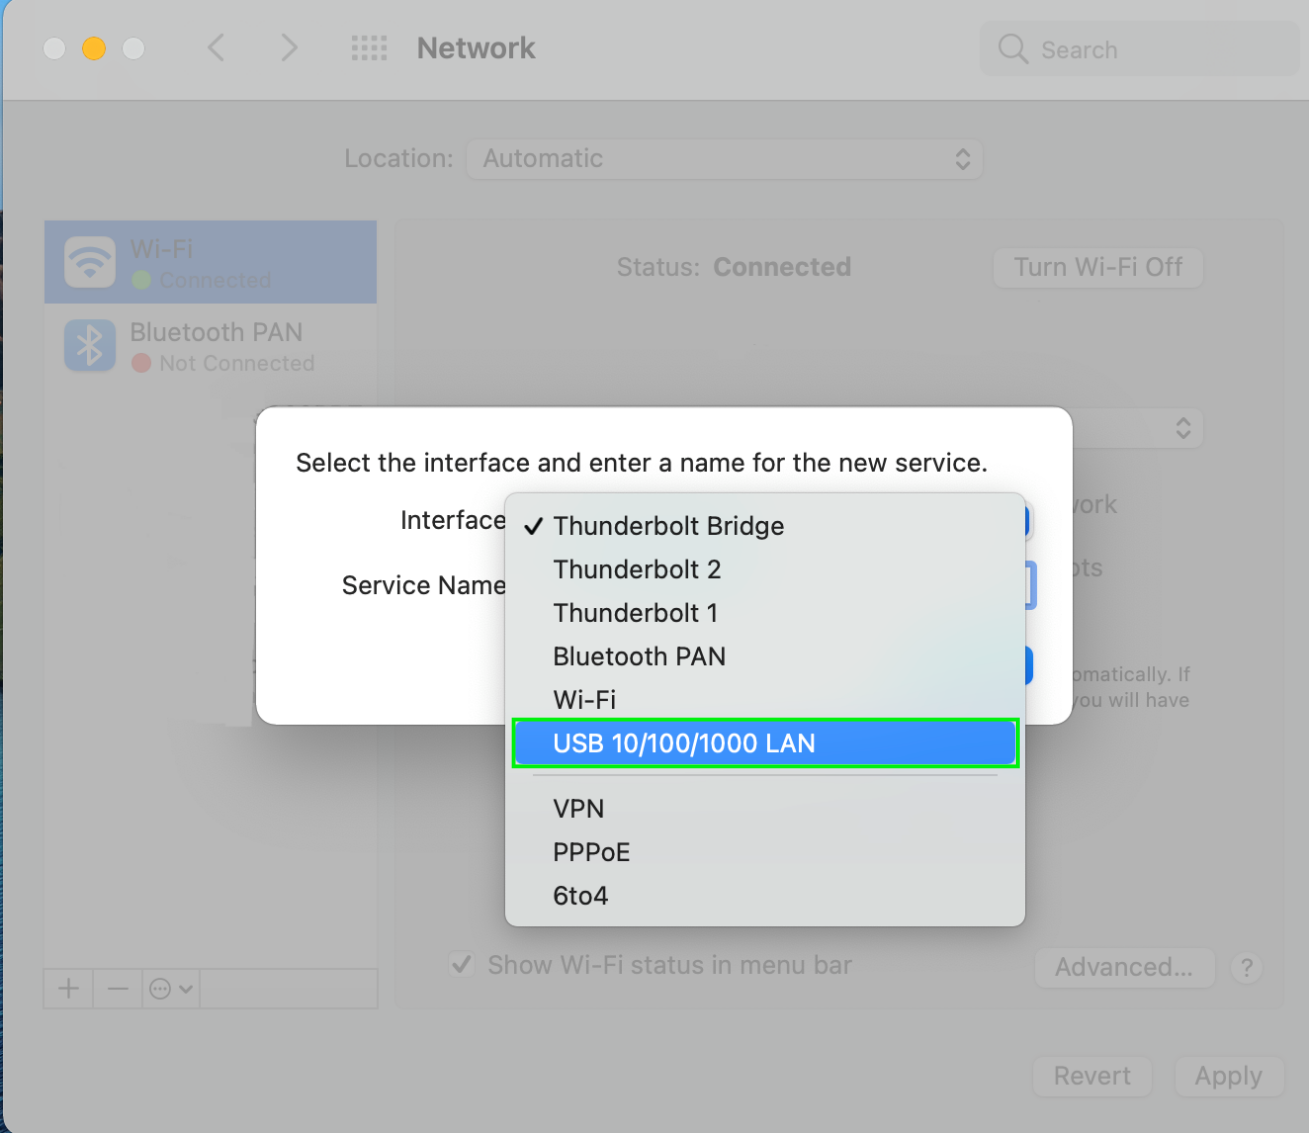
- The adapter should show up as USB 10/100/1G/2.5G/5G, 10/100/1G/2.5G or 10/100/1000 LAN, but may also show up as USB Ethernet, or AX88179 if you're using our USB3-E1000 or USBC-E1000 adapters. Click on it to move on.
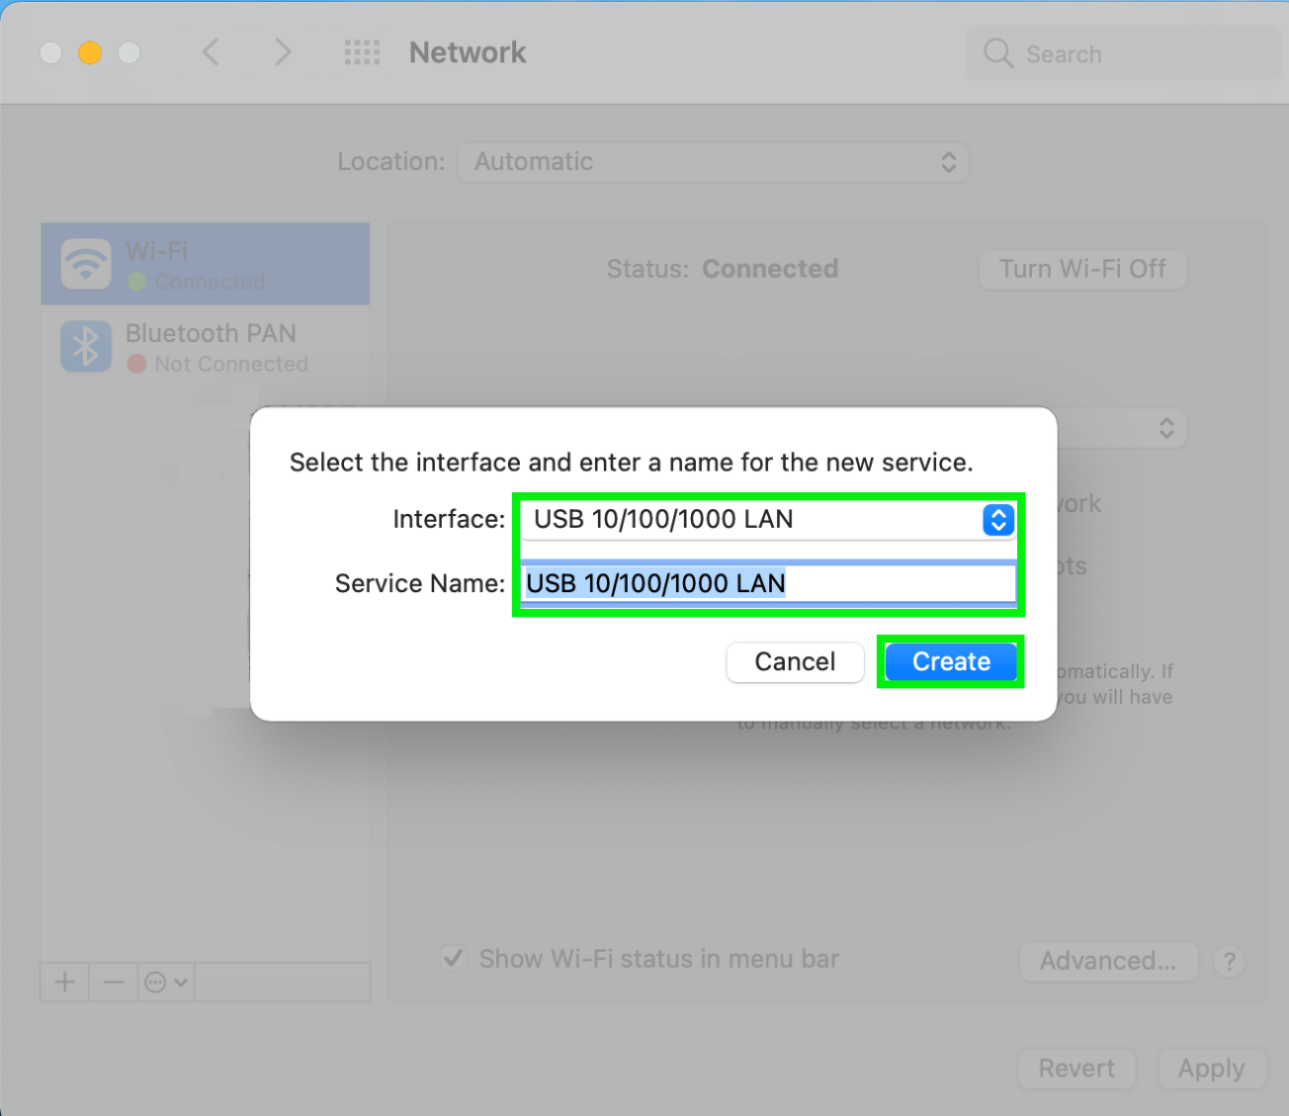
- Now, you should see it listed as both the Interface and Service Name. Click Create to move on.
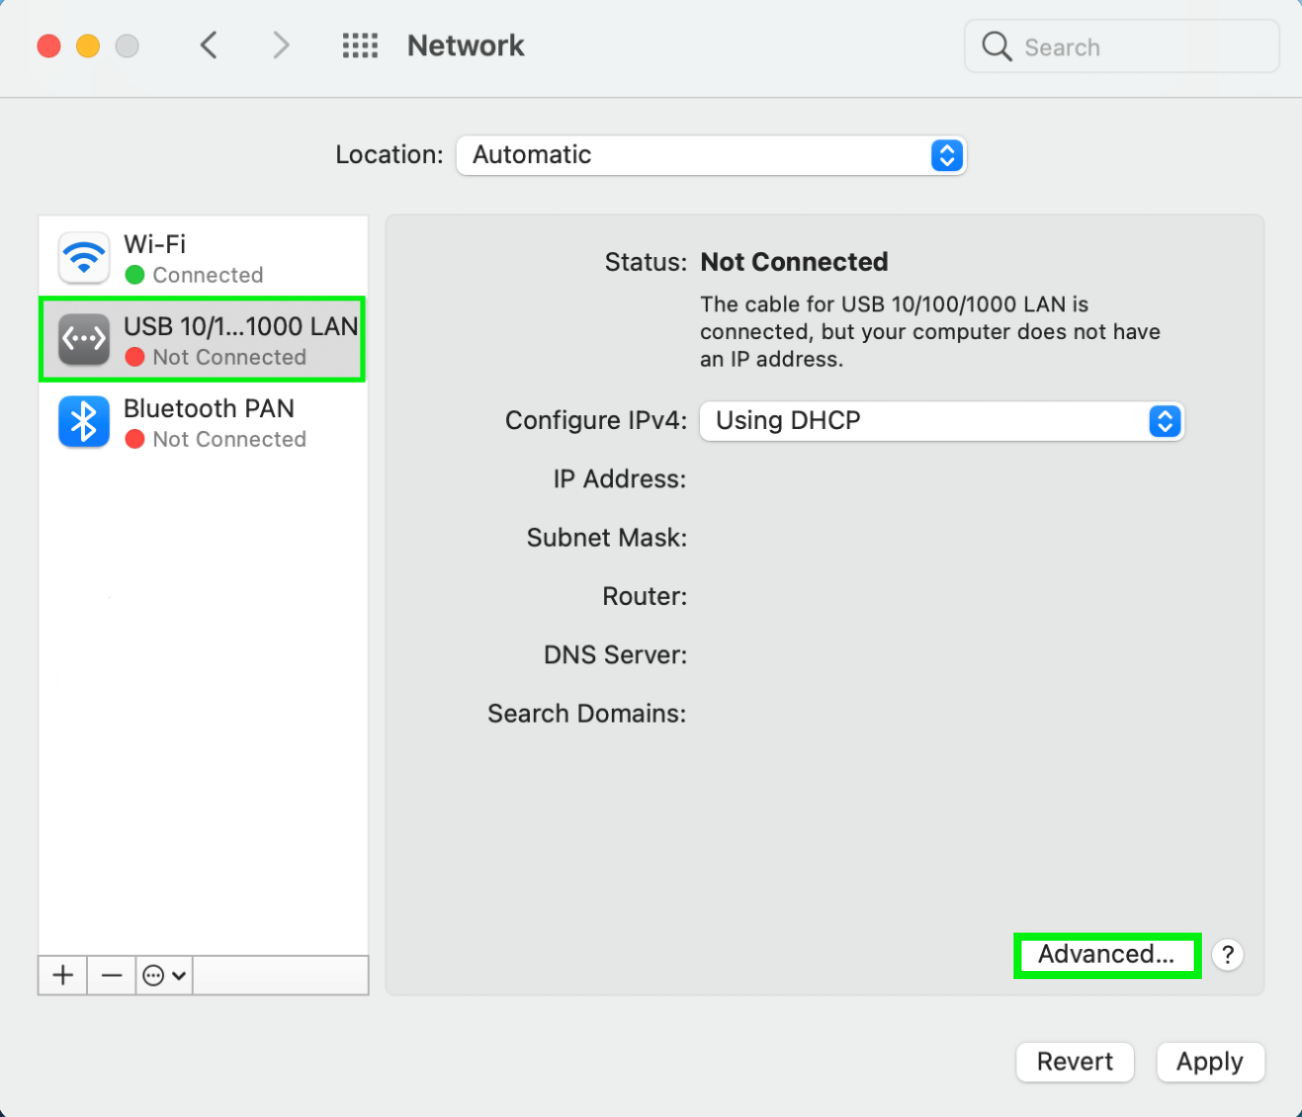
- Now we see the adapter listed in the device listing on the left. Check to see if it shows up as Connected. But, it may show up as Not Connected. If this is the case, click the button for Advanced... down in the bottom right corner of the screen to open a new window with options.
Renew the DHCP Lease
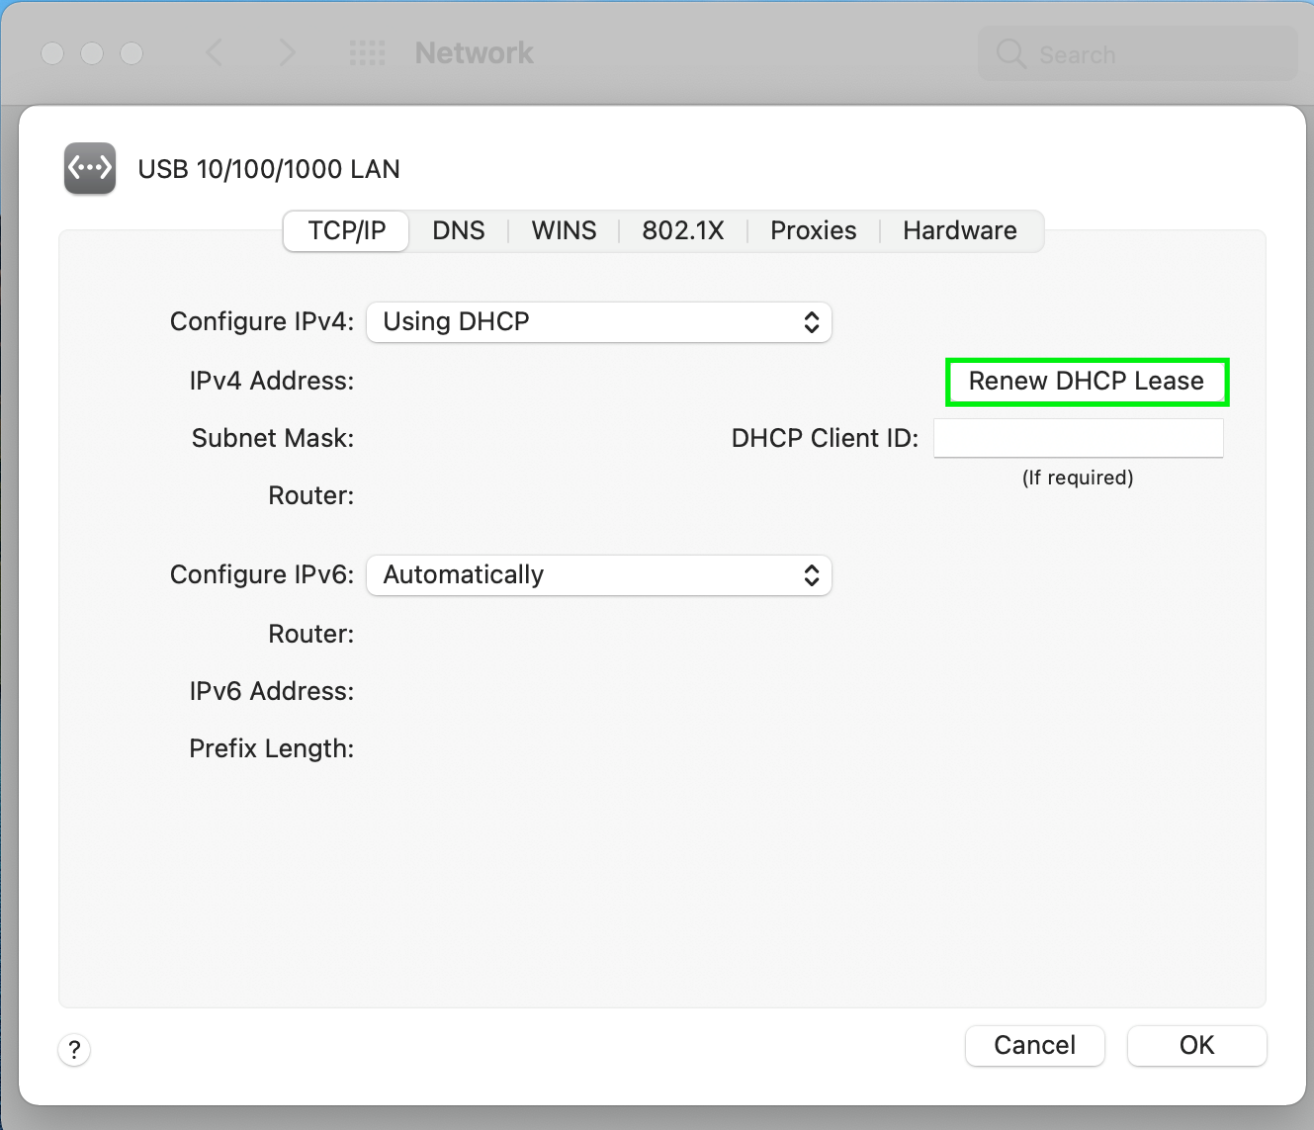
The Dynamic Host Configuration Protocol (DHCP) should automatically request and assign an IP address to the adapter when its plugged in, but this isn't always the case. Renewing the DHCP Lease will manually request an update to the IP address configuration to let you get online using the adapter.
- Open the Apple Menu > System Preferences > Network > Advanced...> TCP/IP. Then, click Renew DHCP Lease.
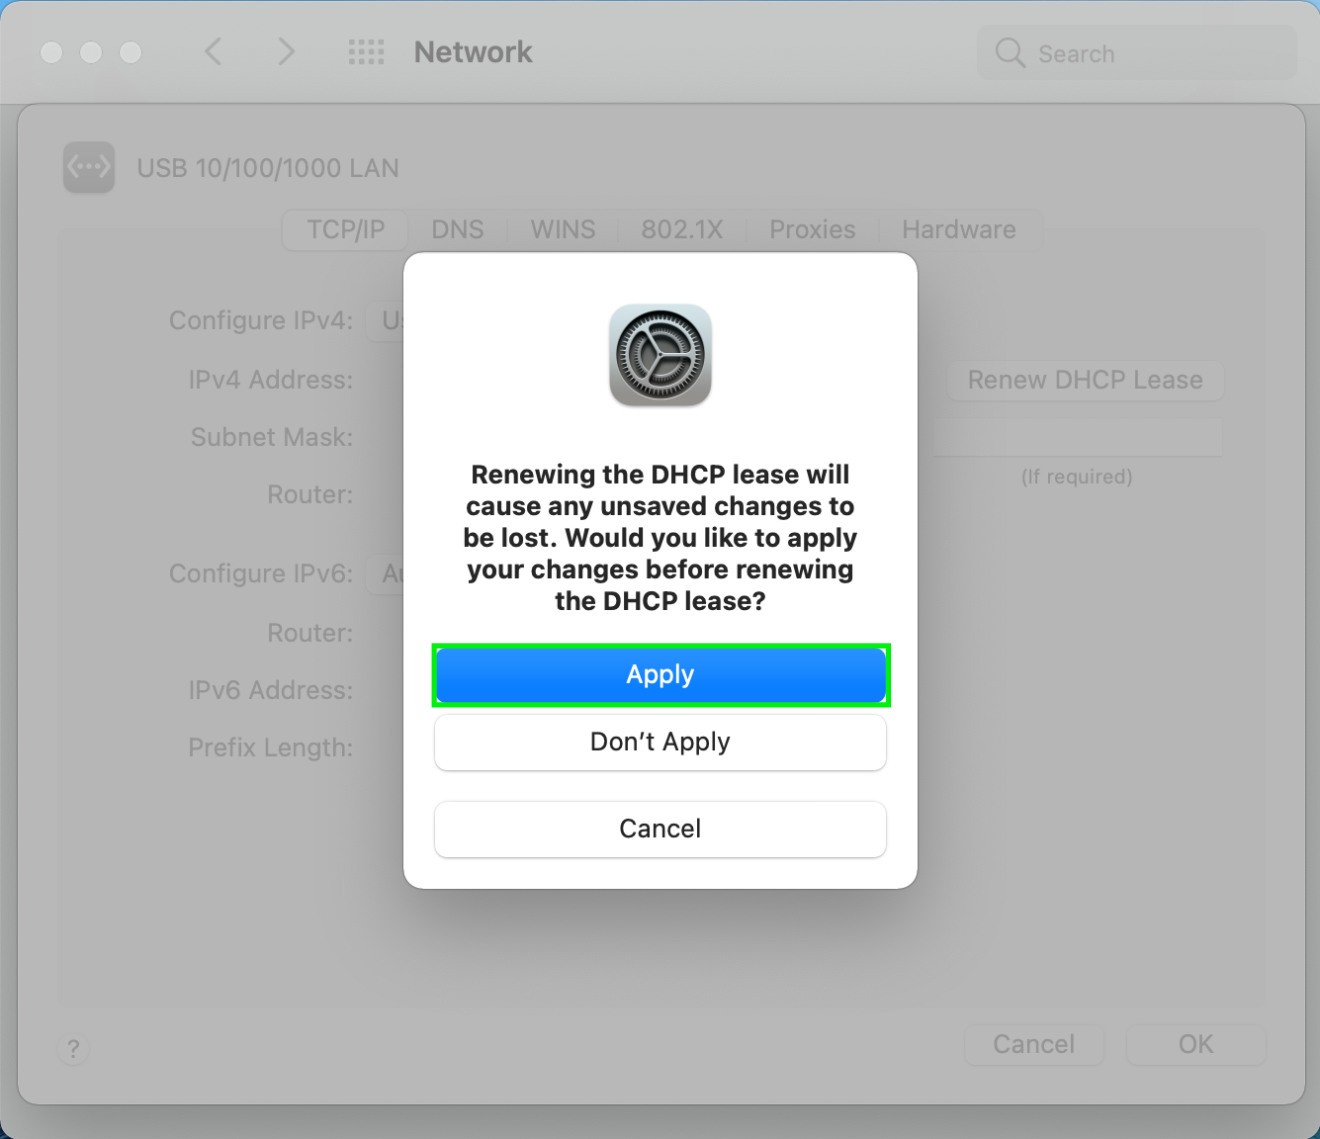
- A message will pop up stating that: "renewing the DHCP lease will cause any unsaved changes to be lost." Make sure you've saved any documents, safely close any open programs, and then click Apply.
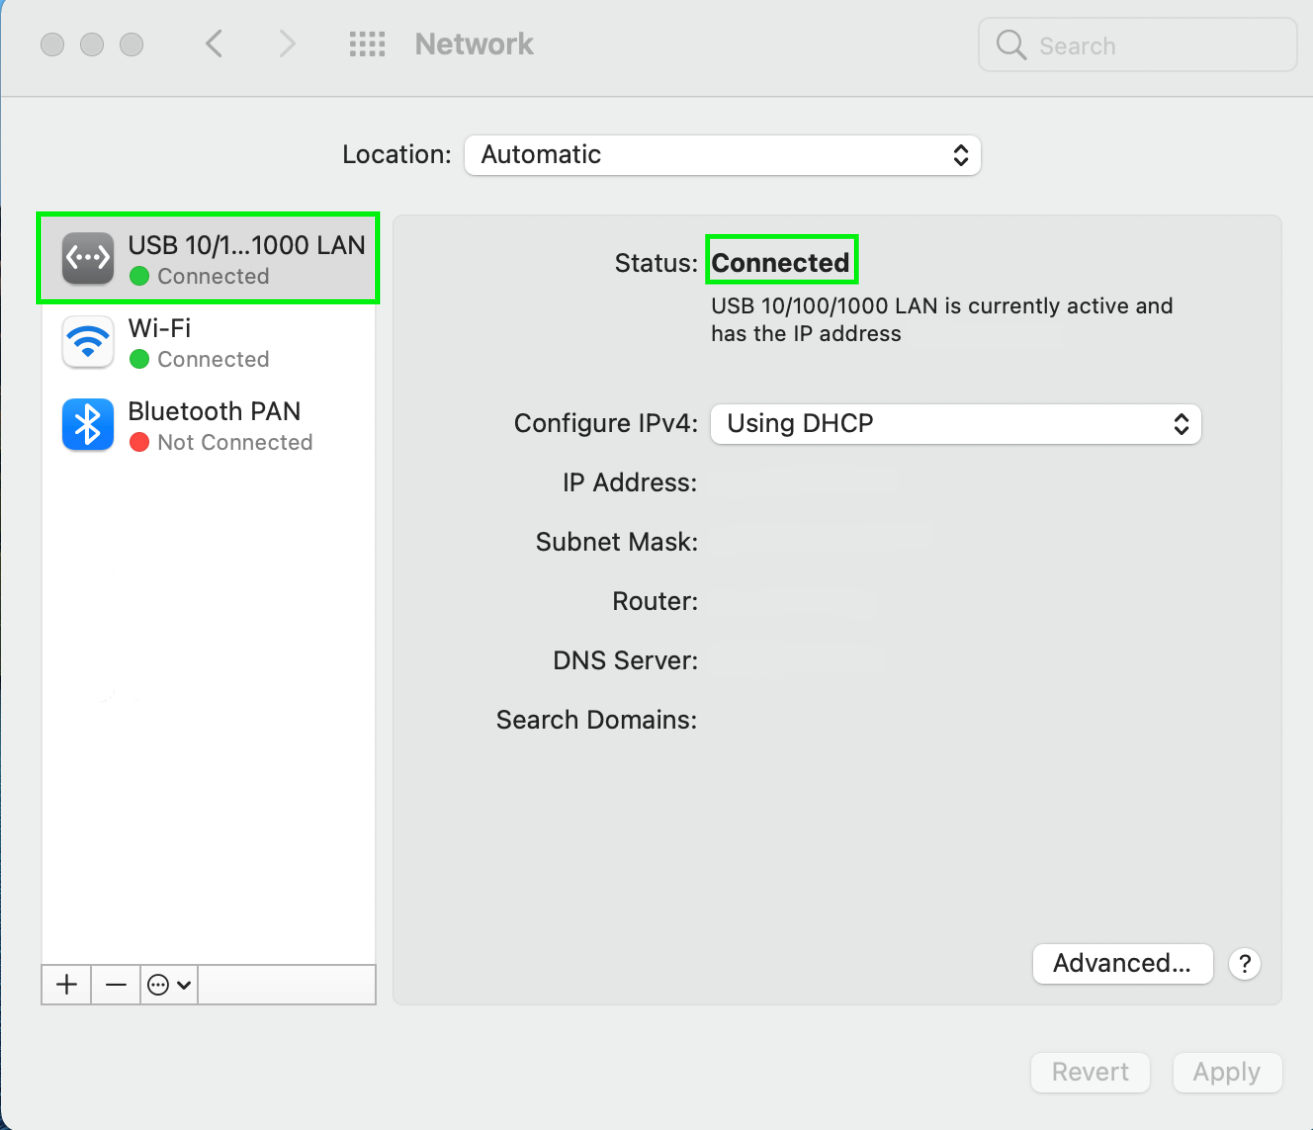
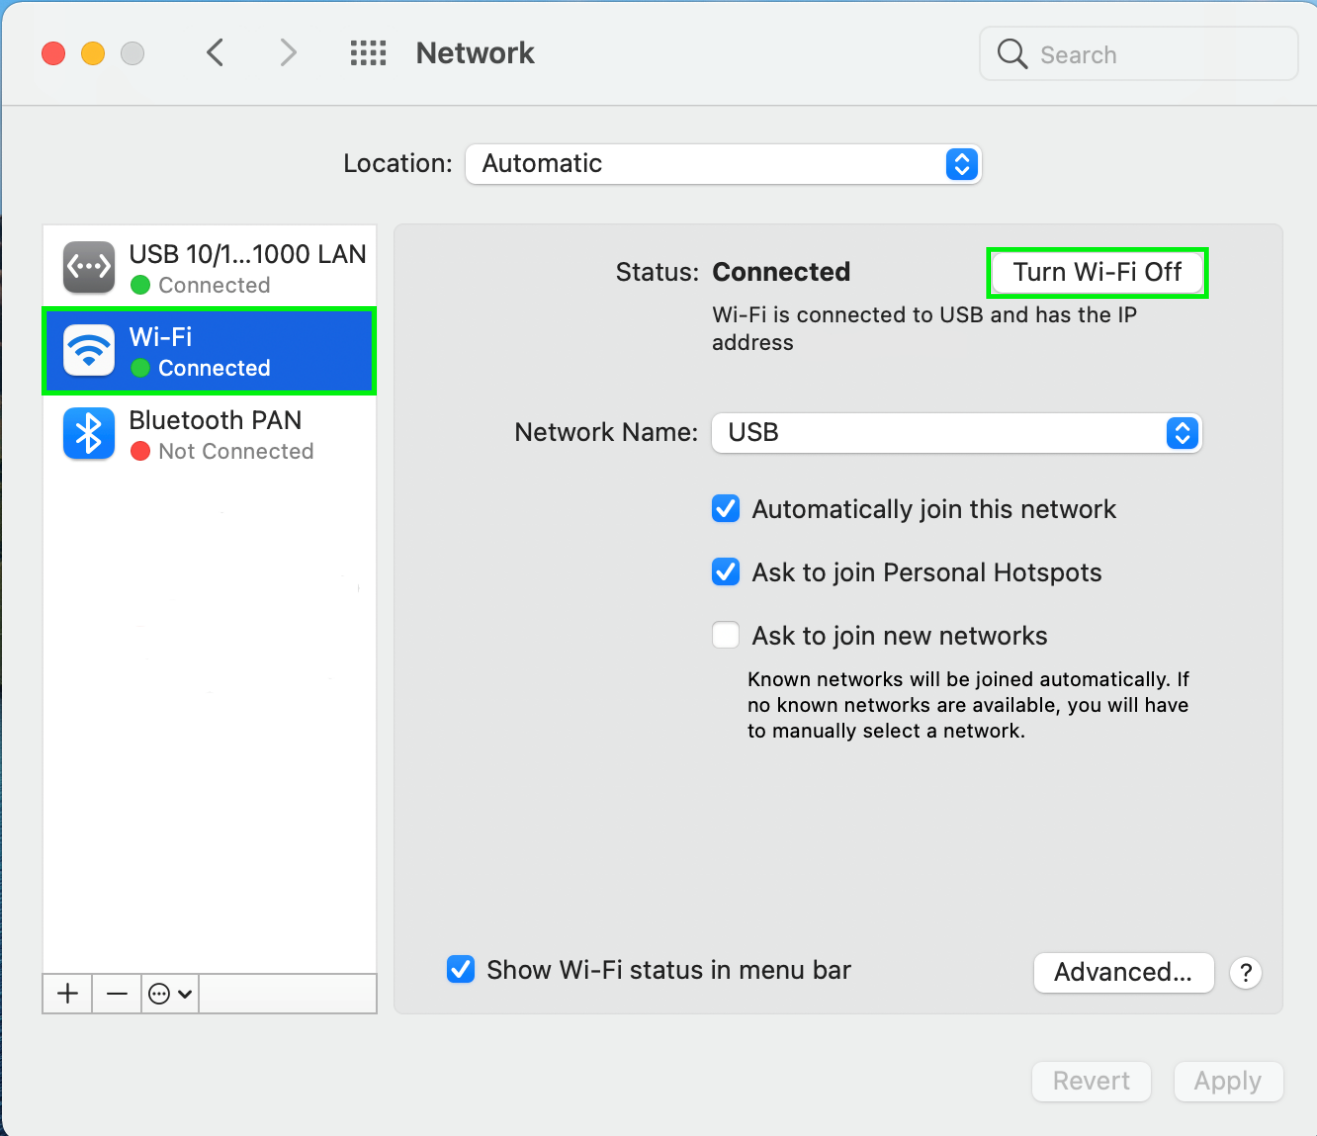
- Now, you should see the adapter is connected! But, your mac is likely still defaulting to the Wi-Fi connection.
- We would suggest to turn off Wi-Fi while using the adapter for best results. Click Turn Wi-Fi Off, to turn it off.
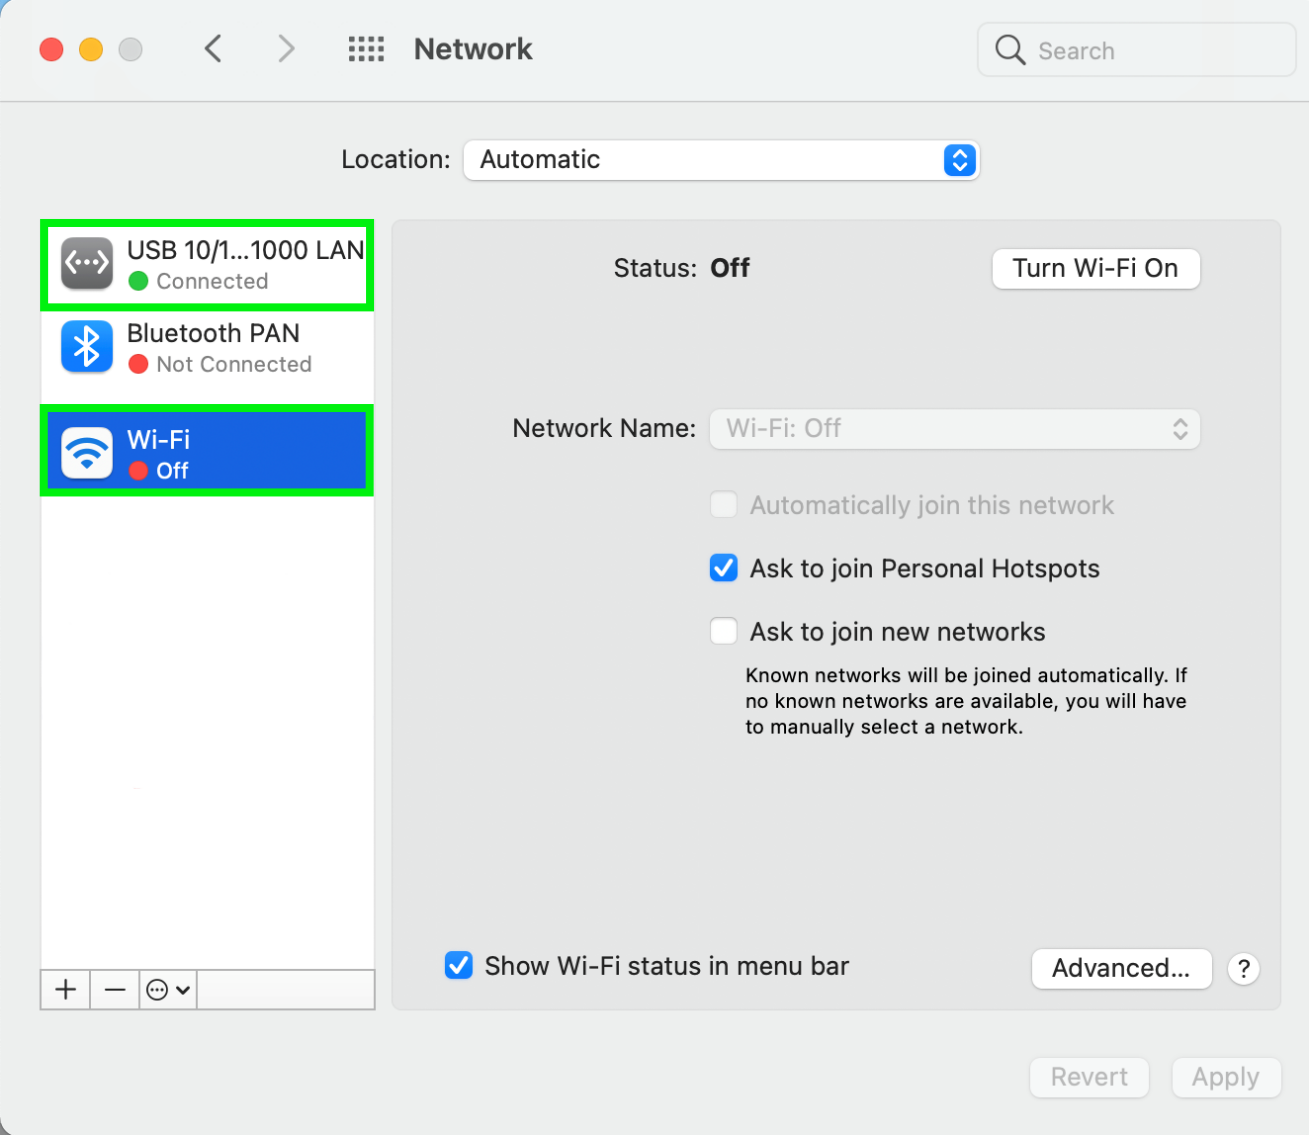
- Now, the Wi-Fi connection should be off and the wired adapter should be on and connected. You can always turn the Wi-Fi back on when you need to switch back.
If there any issues
Feel free to reach out to us directly at: support@plugable.com, if you have any questions or concerns.
Applicable To
Plugable USBC-E5000, USBC-E2500PD, USBC-E2500, USBC-E1000-2M, USBC-E1000, USBC-TE1000, USB3-E1000
