
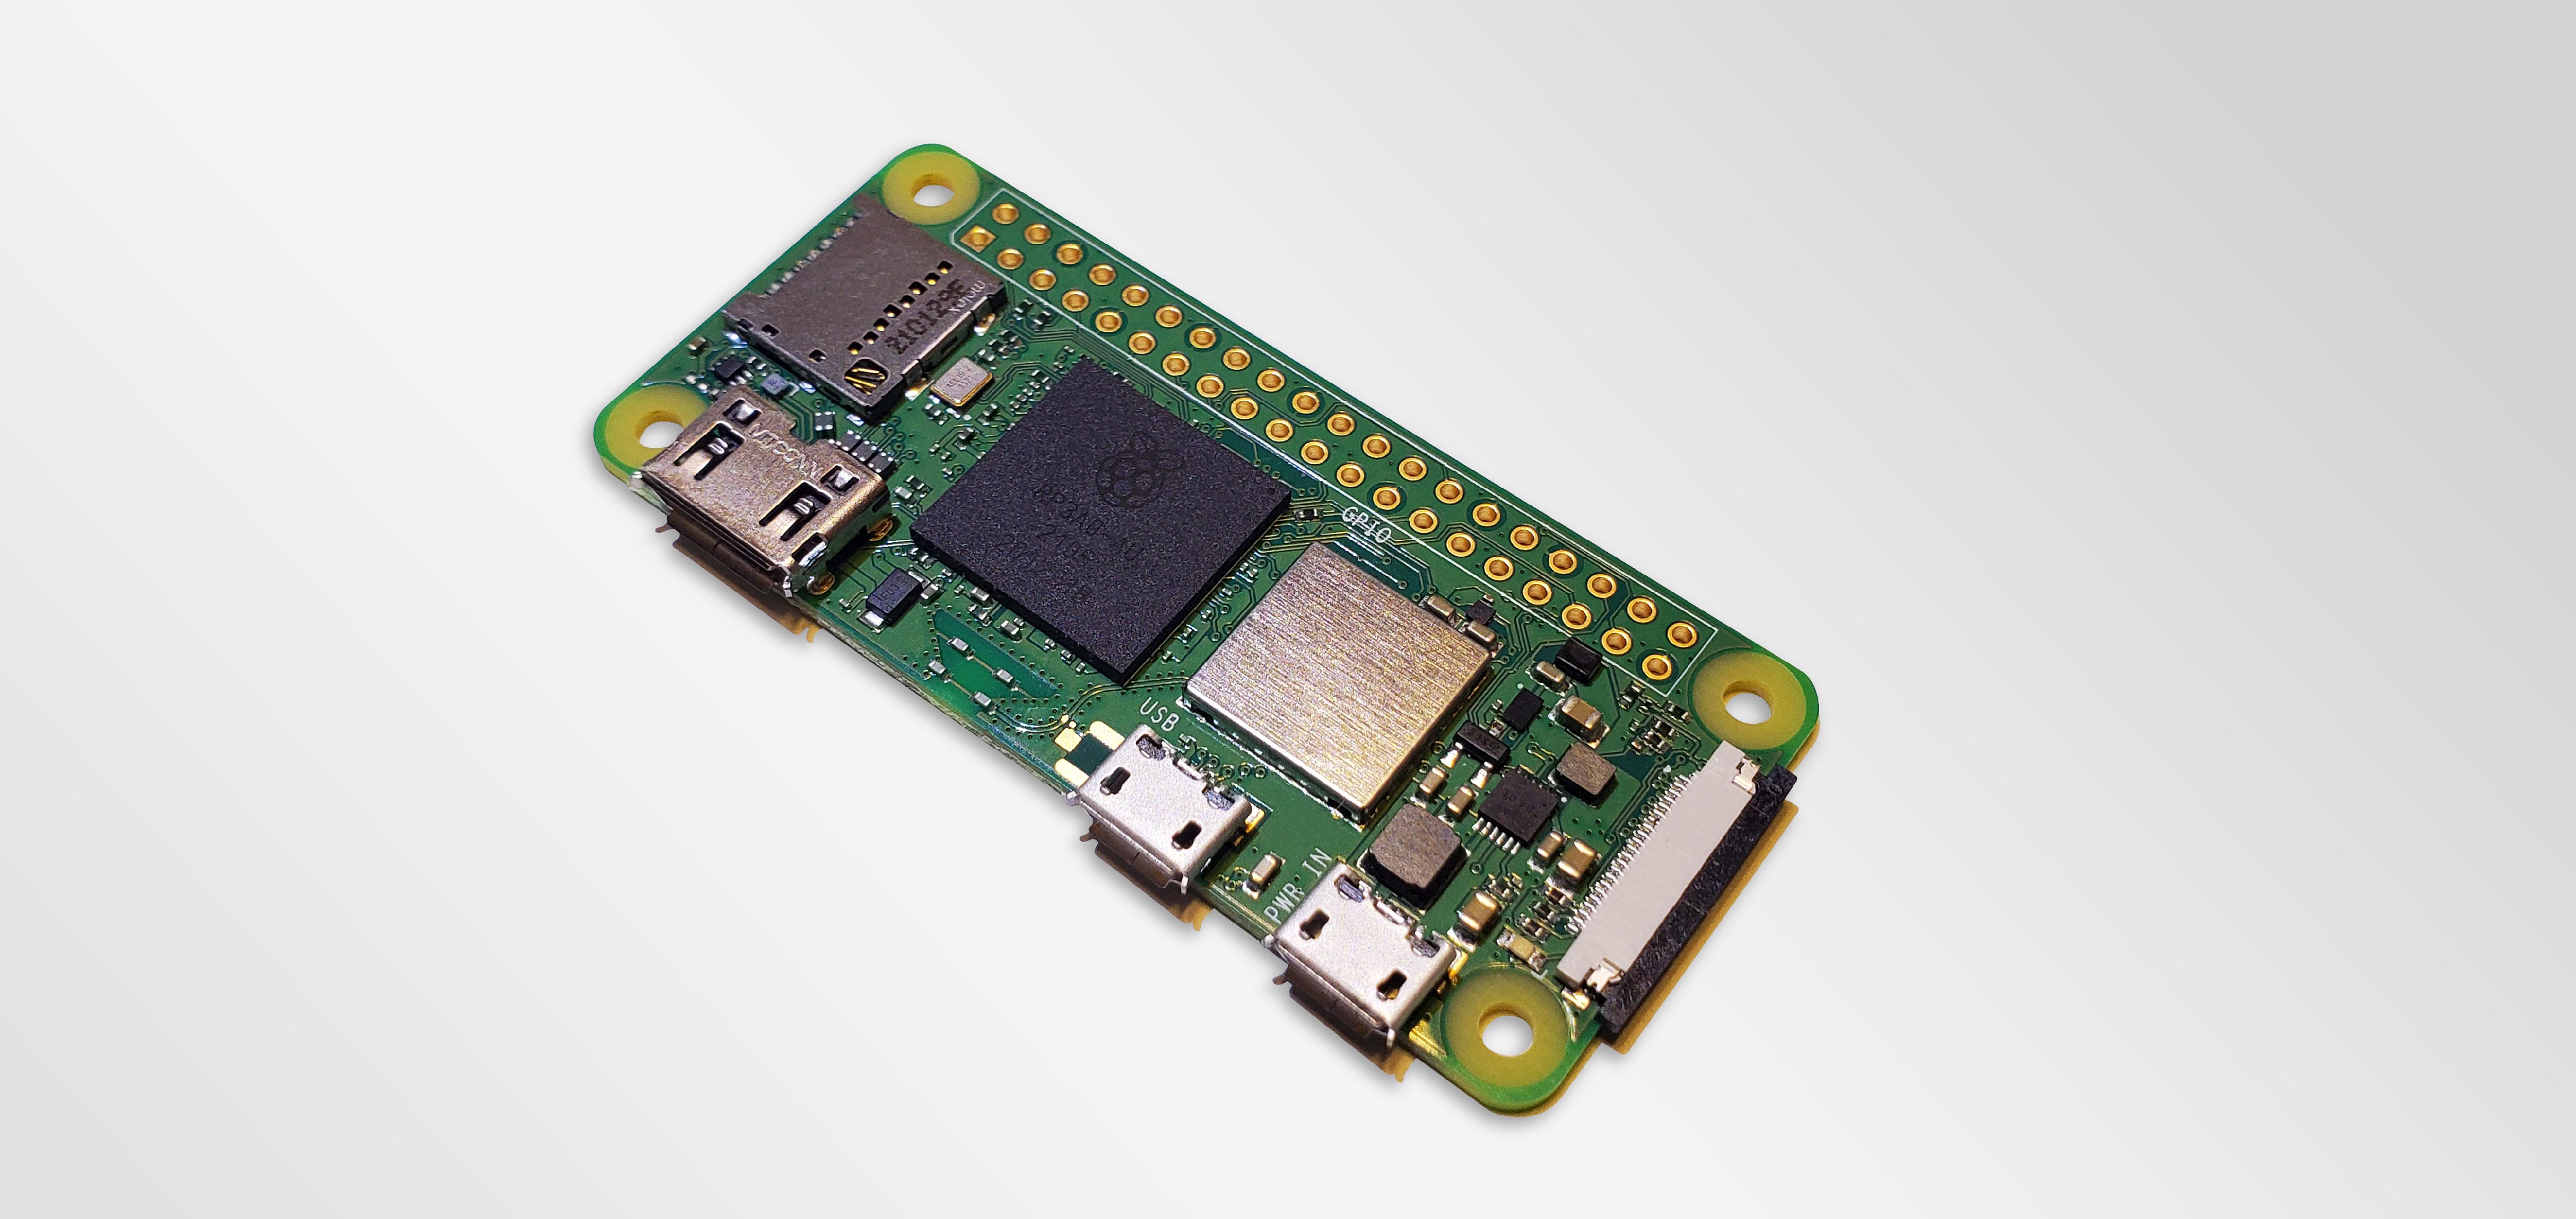
The Raspberry Pi Zero 2 W is a versatile single-board computer that can be used for a variety of projects and by people of varying skill levels. The compact form factor and ability to use open source operating systems and software make for a great learning tool, and we were able to pick one up!
This guide will show you how to set up a headless wired Ethernet connection on your new Raspberry Pi Zero 2 W (and legacy Raspberry Pi Zero) computers with our Plugable USB2-OTGE100 wired Ethernet adapter.
Why use Wired Ethernet?
Adding a wired Ethernet adapter may help improve data transfer speeds, improve device connection stability, and reduce wireless traffic. Whatever the goal, our 10/100mbps USB2-OTGE100 adapter can provide wired Ethernet access to Raspberry Pi Zero boards via USB Micro. The adapter uses an ASIX AX88772A chipset with drivers that are included in Raspberry Pi OS, which can make the setup process easier. With that said, we still need to do a little work to get things going, so let's get started!
Note
All steps and tests were completed using:
- A Raspberry Pi Zero 2 W board
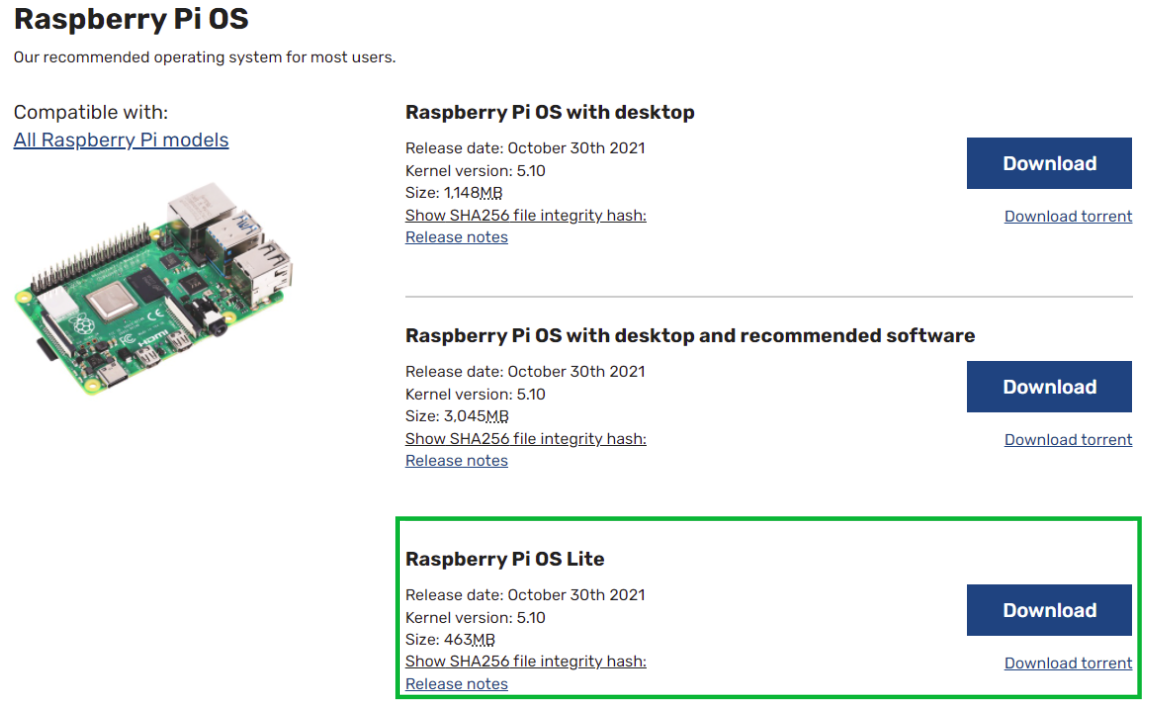
- The official Raspberry Pi Lite OS
- Our Plugable USB2-OTGE100 wired Ethernet adapter
We cannot guarantee compatibility with other operating systems or add-on equipment. Check with the developer/manufacturer of your operating system/add-on equipment for help with additional setup. The Raspberry Pi Forums are a great source of information and community!
First, we need to download the Raspberry Pi OS image, which you can get from this link: Raspberry Pi Operating system images. We're going to use the Raspberry Pi OS Lite version for these steps, but, you can also use the full Desktop versions as well. Download the image and get ready for the next step.
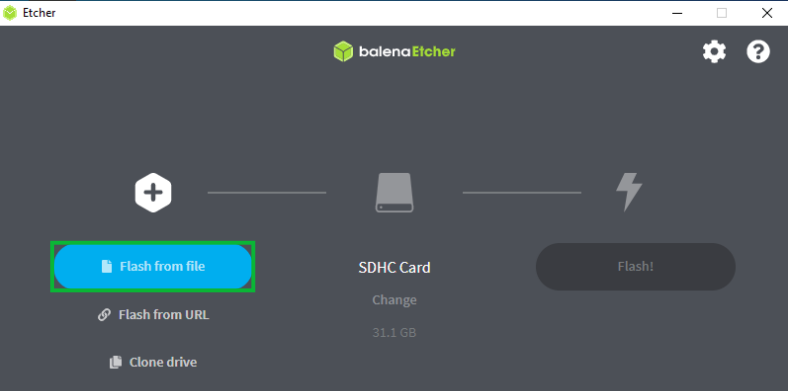
Now, we need flash the image to the Micro SD Card. Let's use Etcher, which is an open source tool for creating bootable drives and is available on Windows, Mac and Linux! You can get official information and download Etcher from this link: Official Etcher information and Download.
After you've installed Etcher
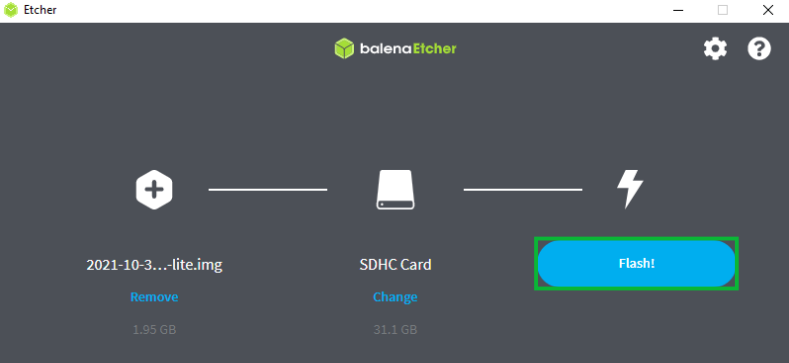
- Open Etcher and click Flash from file, which will open a file explorer window.
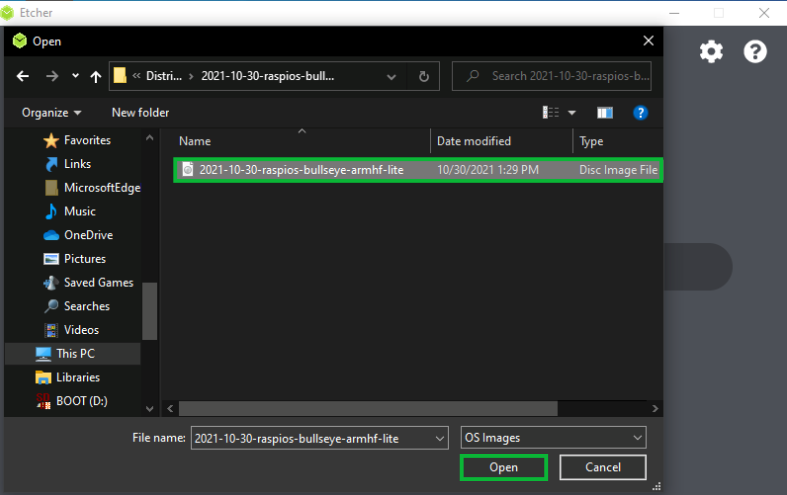
- Then, click on the operating system image that you downloaded, and then click Open to move on.
- Now, we can see that we have the image picked and ready to be flashed onto the SD Card, so go ahead and click Flash! to begin.
-
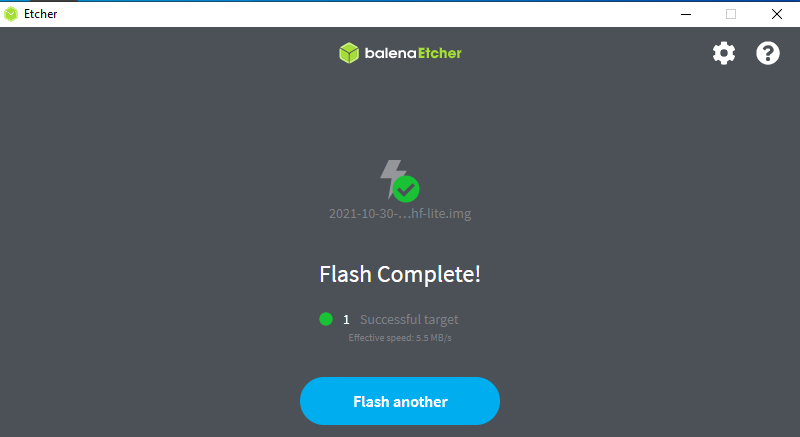
Flash Complete! Great, now let's close out of Etcher, and get ready for the next step.
Now that we've finished flashing the image to the card we need to give the Raspberry Pi instructions to use SSH (Secure Shell) automatically when it boots up.
Secure Shell is a network protocol that will allow us to remotely access the Raspberry Pi Command Line Interface (CLI). This is very helpful for our initial setup, and can be used to access the Pi on a regular basis without having to set the Pi up with a mouse, keyboard and monitor.
We'll be using PowerShell here as the program is likely already installed on your Windows computer.
- Open Windows PowerShell, and enter
New-Item .\Desktop\sshinto the terminal. This will create a blank file named "ssh", on your Desktop view which we'll copy over to the card.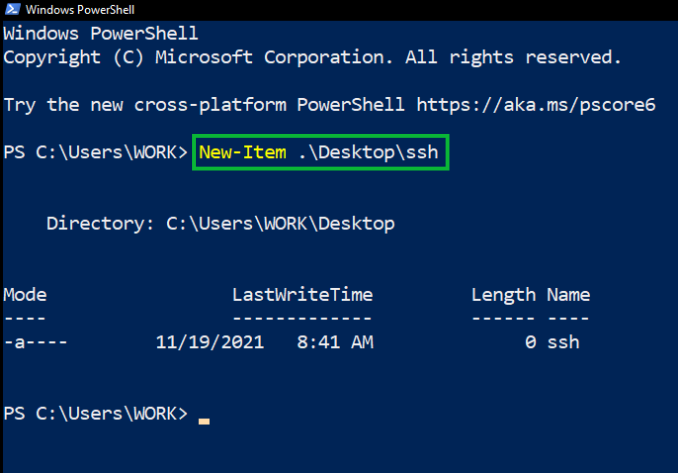
Note
For macOS and Linux, open up a Terminal window, and enter
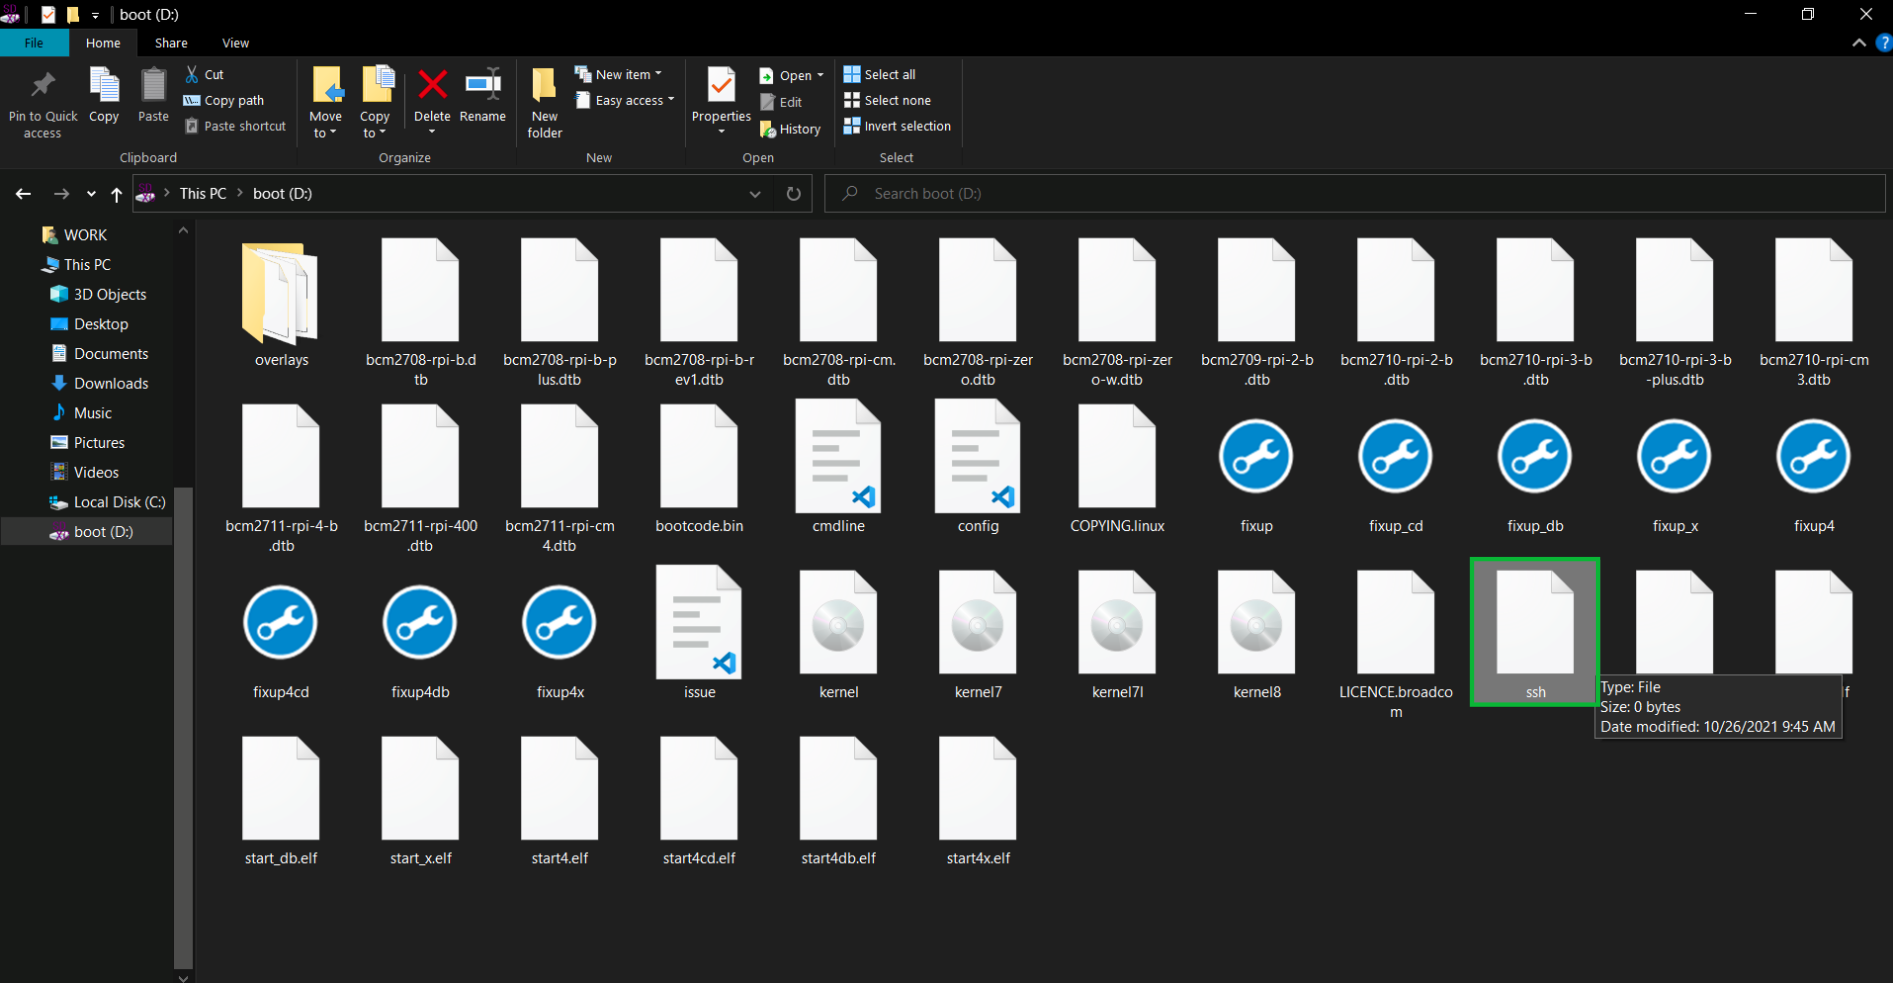
sudo nano Desktop/ssh. This will open up a blank file for editing on the Desktop. Press Ctrl and X to save and exit. This will put a blank file named ssh without a file extension on your Desktop view. - Copy the file on to the card, which will run on boot up and enable SSH automatically.
The next thing that we need to do is to edit the cmdline.txt file on the Micro SDCard itself. This will let us create a special IP address for the Raspberry Pi to make setup easier. Here's how:
- Open up the SD Card, and right click on the cmdline.txt file and choose Open. This will open up your default text editing program where we can edit the file. For this example, we're using NotePad on Windows.
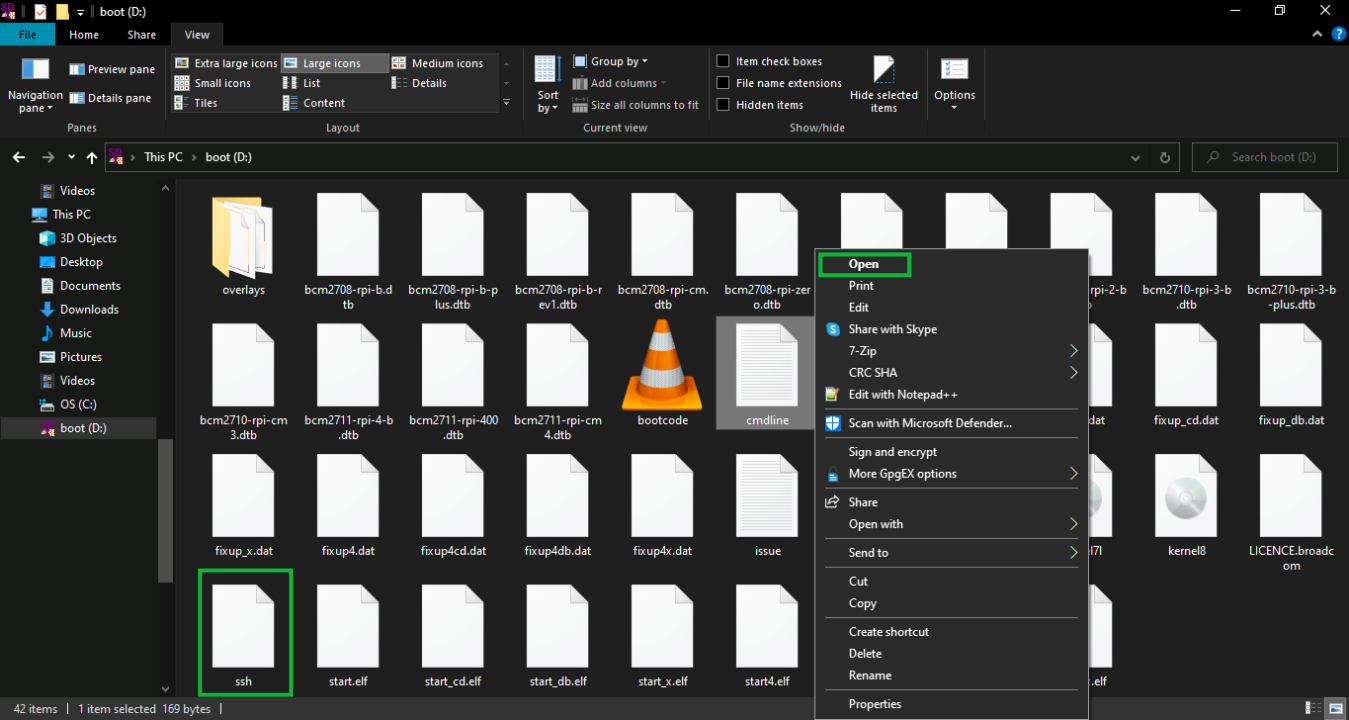
- You'll see a string of text at the top which we should leave as it is. Go down to the next line, and type in ip=raspberrypi.local. Then, save and close the document.

Now, we are ready to communicate with the Raspbery Pi using ssh! We're going to use PowerShell on Windows, and the default terminal on macOS and Linux to get this job done. There are many other ssh clients available such as PuTTY and Termius, and more. You may want to take some time later to find the best program for you.
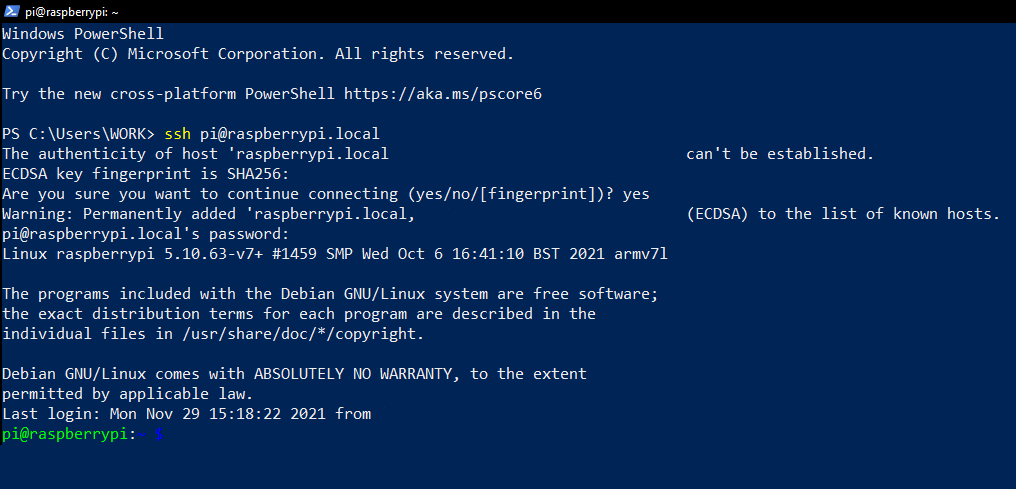
- Open PowerShell, and enter
ssh pi@raspberrypi.localinto the terminal. - A message will pop up stating that the authenticity of the host can't be established. This is normal when you try to make a new connection, and will happen the first time you connect to the Raspberry Pi.
- You'll be asked if you want to continue connecting. Type yes into the terminal, and press enter. This will add the Raspberry Pi to the list of known hosts for your computer.
- Finally, type the default password in which is
raspberryand press enter to login. (NOTE - the password won't actually show up here for security)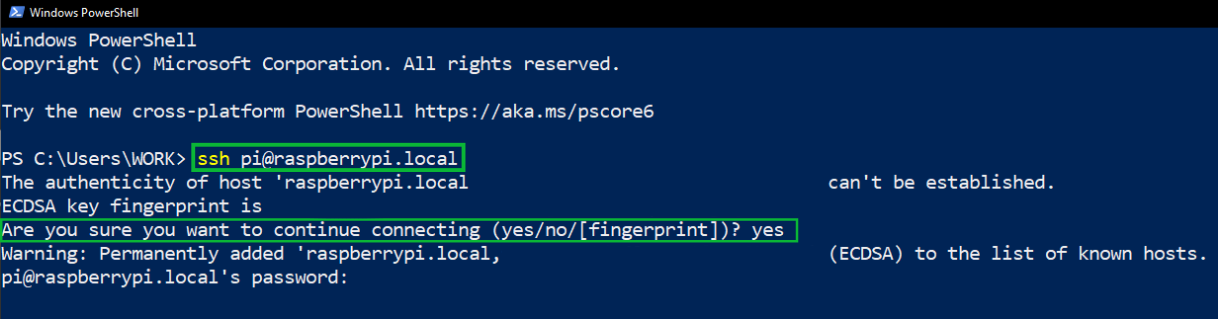
Now that you're logged in you can start using your Raspberry Pi! Here's a few suggestions of things you'll likely want to do to complete your setup:
-
Change your password. Enter
passwdinto the terminal (no, that's not a typo!). This command will let us change our password. NOTE - by default, you will not see the password characters as you type.- You'll be asked to enter the current password, which is
raspberry
- Then, enter a new password, you'll have to re-type it to make sure it matches. Once you have a match you'll have successfully changed the password
- You'll be asked to enter the current password, which is
-
Use the Raspi-Config tool for further system setup. Enter
sudo raspi-configinto the terminal and you will be taken to the Raspberry Pi Software Configuration Tool menu. -
Edit the cmdline.txt file if you'd like so you can use an actual IP address. Enter
sudo nano /boot/cmdline.txtinto the terminal. Delete the line that says ip=raspberrypi.local, or comment it out by putting a # before the line, like this,#ip=raspberrypi.localThis will change the color of the text and comment it out, or essentially disabling it without having to delete. Then, press Ctrl and x at the same time to save and exit the file. -
Set a static IP address. You may want to set a static IP address that doesn't change, which will make it easy to identify your Raspberry Pi. Enter
sudo nano /etc/dhcpcd.confinto the terminal which will open the configuration file for our Dynamic Host Configuration Protocol (DHCP) settings. Follow the sample instructions in the file to create static information for your Raspberry Pi.
An Iperf test will help us test the network throughput of the connection to see where our speeds rate. We see an average of 94.5mbps for download speeds, and 94mbps for upload speeds. These results were taken from a 2-minute test registering the speed at every second, which is definitely on target for 10/100mbps! Here's a handy chart for visualization.
Your speeds may vary

If you'd like more information on setting up an Iperf test of your own please see our blog post about Understanding and Troubleshooting Network Performance.
We hope this was helpful and fun! Feel free to reach out to us directly at support@plugable.com. We'd love to see what Raspberry Pi projects you're working on!
