
Often it can be helpful to have access to a folder or external hard drive from two computers. Instead of unplugging an external hard drive and physically moving it to the second computer it may be more efficient to share the driver over the network.
Windows file sharing includes password based authentication and can be easily configured to share specific folders or entire drives over the network, providing access to the same data from multiple computers, while slower than a directly connected USB 3 hard drive it can be more convenient.
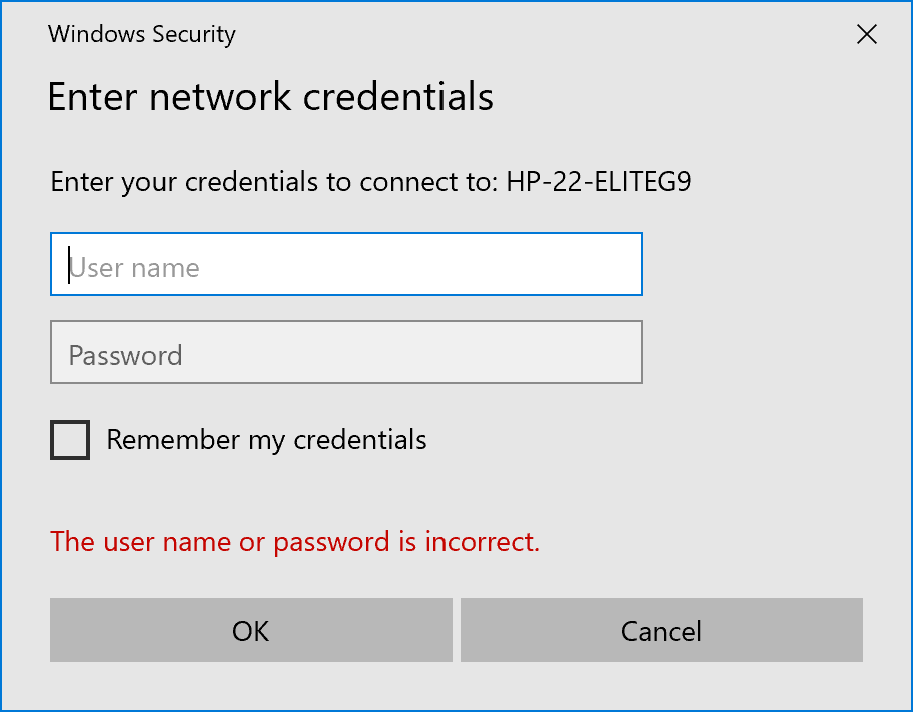
This article will demonstrate how to share the file system from an externally connected SATA SSD over the network for access from other Windows workstations. We will use the computer's local user account and password for authentication.
Definitions:
- Server - The server will be the computer with the USB attached SSD, this can have Windows 10 or 11 with an administratively privileged user account
- Client - The computer connecting to the shared driver over the network, this can have Windows 10 or 11
Hardware to replicate this setup:
- 2x Windows computers, the process is very similar for Windows 10 and Windows 11 to act as Server and Client
- 1x SATA Vertical Hard Drive Dock with USB-C connection USBC-SATA-V ( https://plugable.com/products/usbc-sata-v )
- 1x SATA SSD or Hard Drive
- Network with both Server and Client - recommended a wired network for best performance, however wireless also works
Setting up the file server
1 - Connect the hard drive to the Server, if not already formatted the partition and format the drive with an NTFS file system, ensure the file system is detected and accessible under your user account.
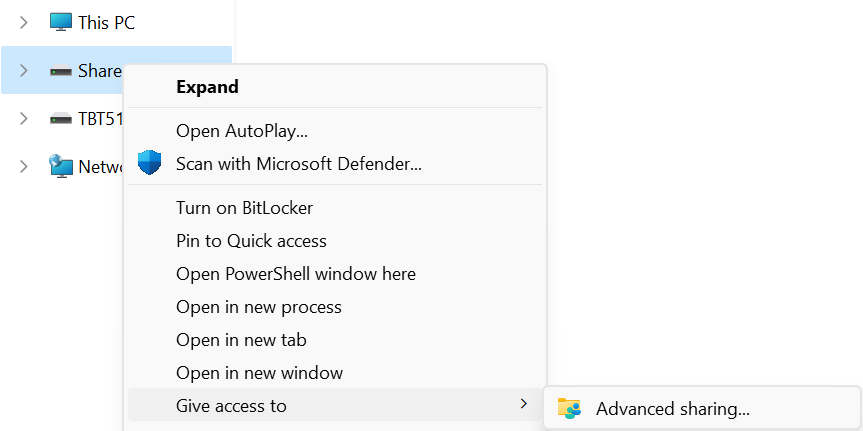
2 - Open Windows File Explorer, holding down the Shift key, right-click on the drive or folder to be shared, hover over “Give access to” and select “Advanced sharing…” to open the “Advanced Sharing” window
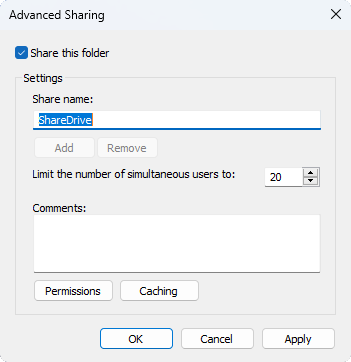
3 - Under the “Advanced Sharing” subsection, select the “Advanced Sharing” button, this requires local administrative permissions

4 - Under the “Settings” subsection, select the “Share this folder” checkbox", then select the “Permissions” button to open the “Permissions for <sharename>” window.
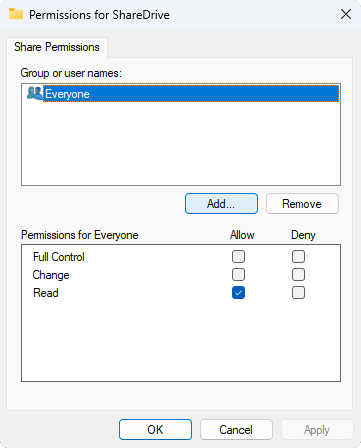
5 - Under “Group or user names:” subsection, select the “Add…” button to open the “Select Users or Groups” window
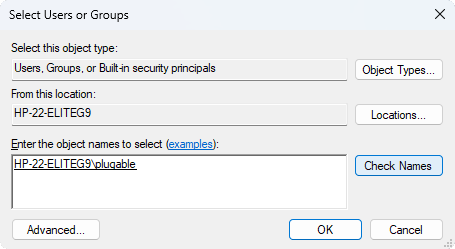
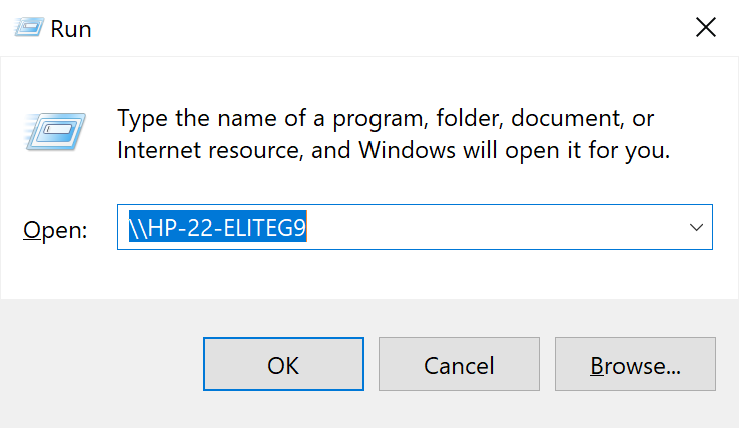
6 - In the text box in the “Enter the object names to select (examples):” heading, type in your user account name, in this example “plugable”, then click the “Check Names” button to automatically complete the field, the first part of this name is the computer's host name ending before the back slash “\”, noted this down for connecting to this computer, when done select “OK” button
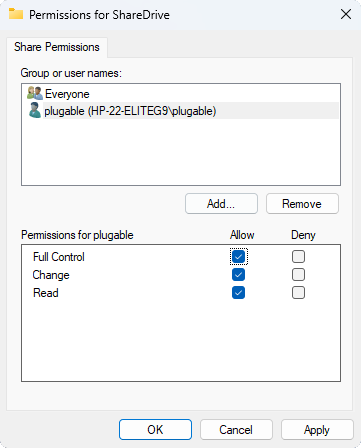
7 - On the “Permissions for <sharename>” window, under the “Group or user names:” subsection, select your username, then under the “Permissions for <username>” subsection, check the “Allow” boxes to provide both read and write permissions to the shared drive, click on “OK” when complete
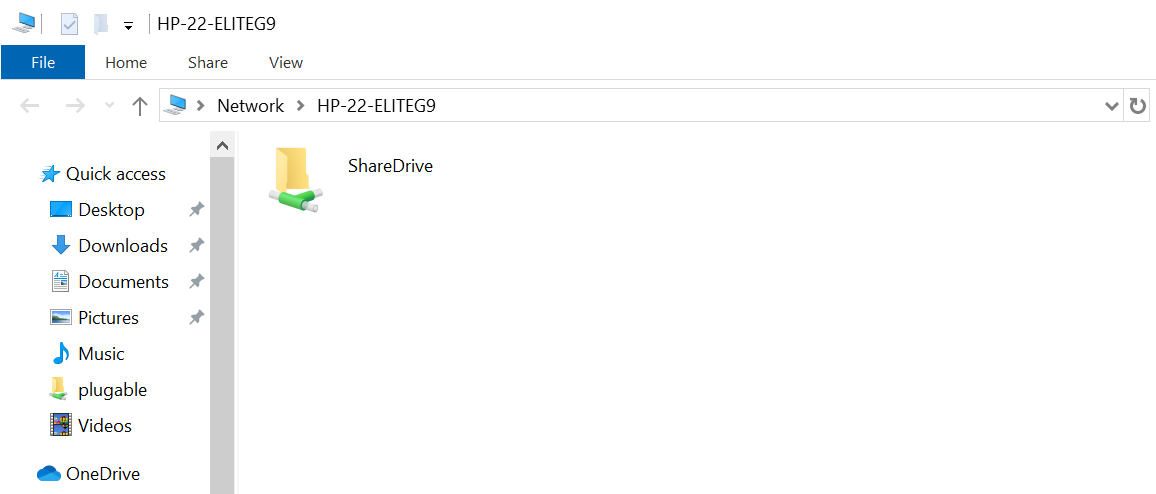
8 - The drive or folder should now be shared and available for any Windows host connected to the same network - one note, this does require the computers to be on the same subnet ( for example connected to the same WiFi or same Ethernet switch/router ) and for the Windows Firewall to be set to a Private network - additional details here ( https://kb.plugable.com/2600495 )
Connecting to the share for quick access
Assigning a drive letter to a network share
Additional notes
This method of network file sharing requires the Server to be active and on the network for the Client to access the shared files. If the Server is set to enter sleep mode or hibernation when idle the network share may become inaccessible.
Network file systems also have reduced performance compared to a directly connected USB external hard drive, depending on the network, drive type, and connection to the Server this can be anywhere from 1/10th the speed to nearly the same speed.
Applicable to
- Plugable USB 10Gbps SATA Hard Drive Dock
- Plugable USB Type 10Gbps NVMe Enclosure
- Technologies: NVMe SSDs and SATA SSDs
- Features: Windows File Sharing
If you have any questions please feel free to contact us at support@plugable.com and we'll be happy to help!
