Originally authored by: Joshua Henry, March 12, 2015
This legacy article includes details about partitioning and formatting hard drives fro Windows and macOS from 2015, many or all of these steps are still applicable for Windows 11 and macOS 26+. We also have video guides on our YouTube channel for formatting a drive in Windows and macOS:
Customers often ask us why their new blank hard disk drive (HDD) or solid state disk (SSD) doesn't show up on their computer, is the docking station or SSD enclosure not working? No - most often the drive just needs to be initialized, partitioned, and formatted, while macOS will normally prompt the user a new drive has been detected, Windows will not show any outward signs a drive has been detected and requires manual intervention. In this post we present a step-by-step guide for doing this.
Quick Instructions
Reminder: Do not proceed if there is important data on the drive, this process will "start fresh" making data recovery more costly or potentially impossible.
Windows
- Logged in as an administrator, open the Windows Disk Management Console by pressing Windows + R to open the Run dialog box. Type diskmgmt.msc and press Enter.
- The Disk Management Console should automatically detect a new non-initialized drive ask to initialize it.
- Select either Master Boot Record (MBR) or GUID Partition Table (GPT). Click OK.
- Right-click on the unallocated space, and select “New Simple Volume”.
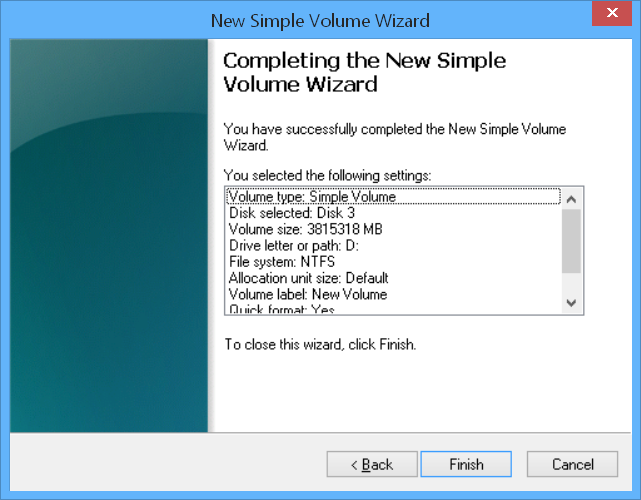
- After clicking New Simple Volume complete the New Simple Volume Wizard to format and assign a drive letter.
Mac
- Open the Disk Utility located within the Utilities folder inside of Applications.
- Select the drive to initialize on the left.
- Click on the partition tab.
- Click Options and select the partition scheme. GUID (GPT), Apple Partition Map, or Master Boot Record (MBR). Click OK.
- Choose the partition layout, enter the desired size of the partition(s), and rename the partition(s) if desired.
- Choose the drive format: APFS, MS-DOS (FAT), or ExFAT are most common, then click Apply.
What is initialization, partitioning, and formatting?
Initializing prepares the drive to be used by the computer, partitioning sets aside specific areas of the disk for data, and formatting sets up the framework the computer uses to store that data. We'll cover the most common scenarios we run into, starting with Windows and finishing with macOS instructions. Partitioning and formatting a drive will overwrite existing data and may make data recovery more difficult, more costly, or potentially impossible. This should only be performed on new drives, or drives where you have all important data backed up to another location.
Windows
For Windows XP, Vista, 7, 8/8.1, 10, and Windows 11, the experience is basically the same, and we'll focus on using the Windows Disk Management Console. This console shows all of the drives connected to the computer and information about how they are currently configured. It lets you create partitions on your new blank hard drive so Windows can make use of it for data storage and recognize it as a drive letter in Windows Explorer.
The quickest way to open the Disk Management Console in any Windows version is to press the Windows and R keys together on your keyboard to open the Run dialog box:
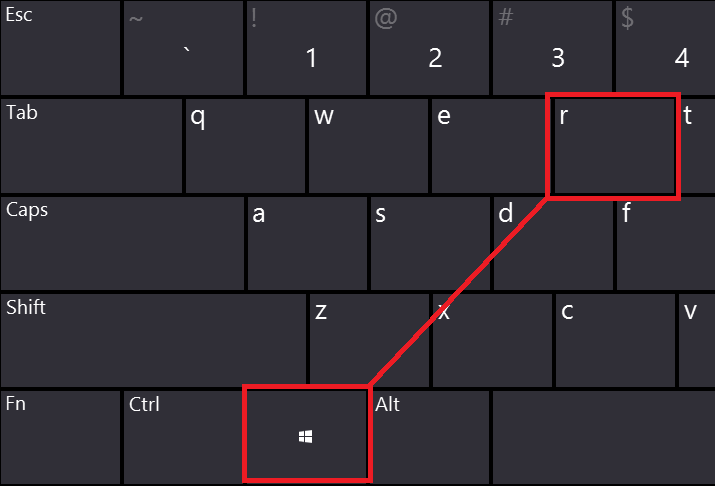
For Windows 11 you can also right-click on the Start menu icon and select Disk Management from the pop-up window.
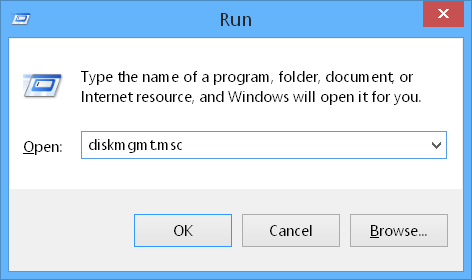
Once open, type diskmgmt.msc and press Enter (make sure you are logged in as an Administrator or the program may not run):
When the application opens, the Disk Management Console should automatically detect a new non-initialized drive and display a pop-up window asking if you'd like to initialize it:
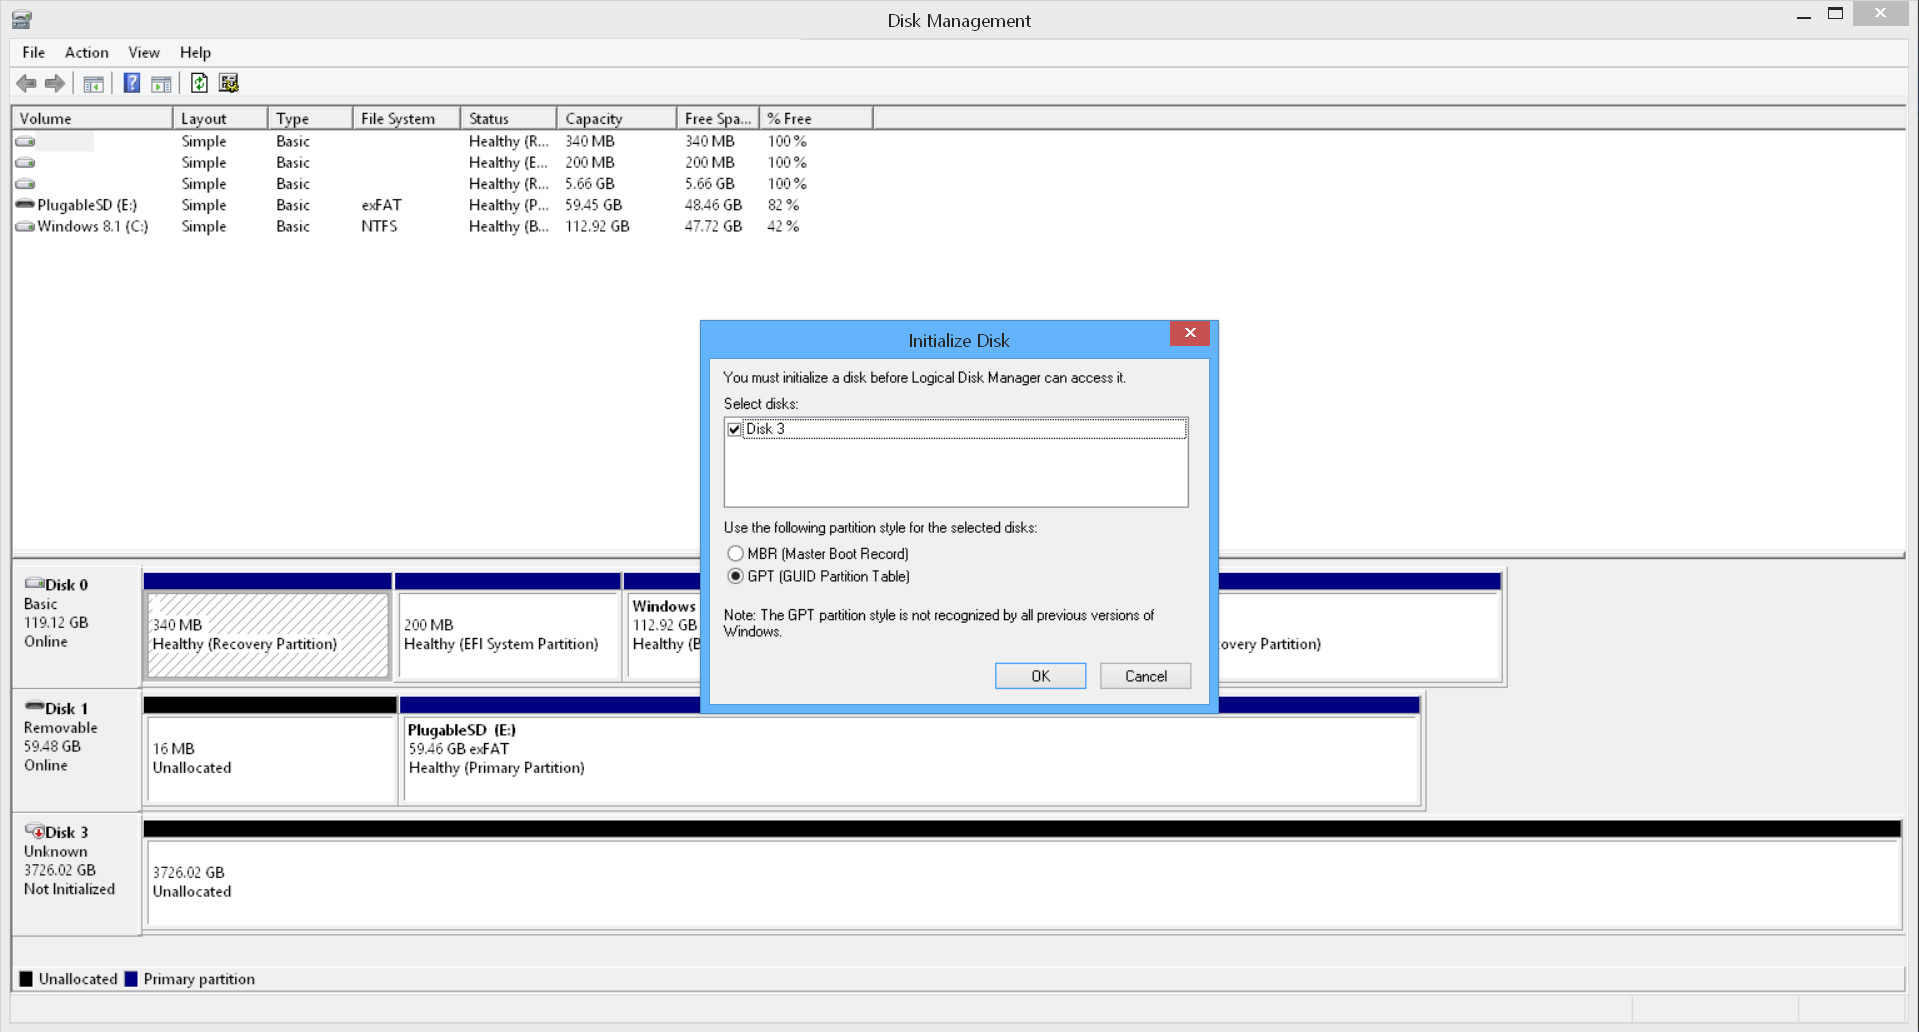
If no pop-up appears, take a look at the console. Each disk Windows recognizes is given a number and a horizontal bar representing the capacity of the disk and any partitions that exist. The new drive you are looking for should be listed as “Not Initialized.” Right-click on that drive and select “Initialize Disk”:
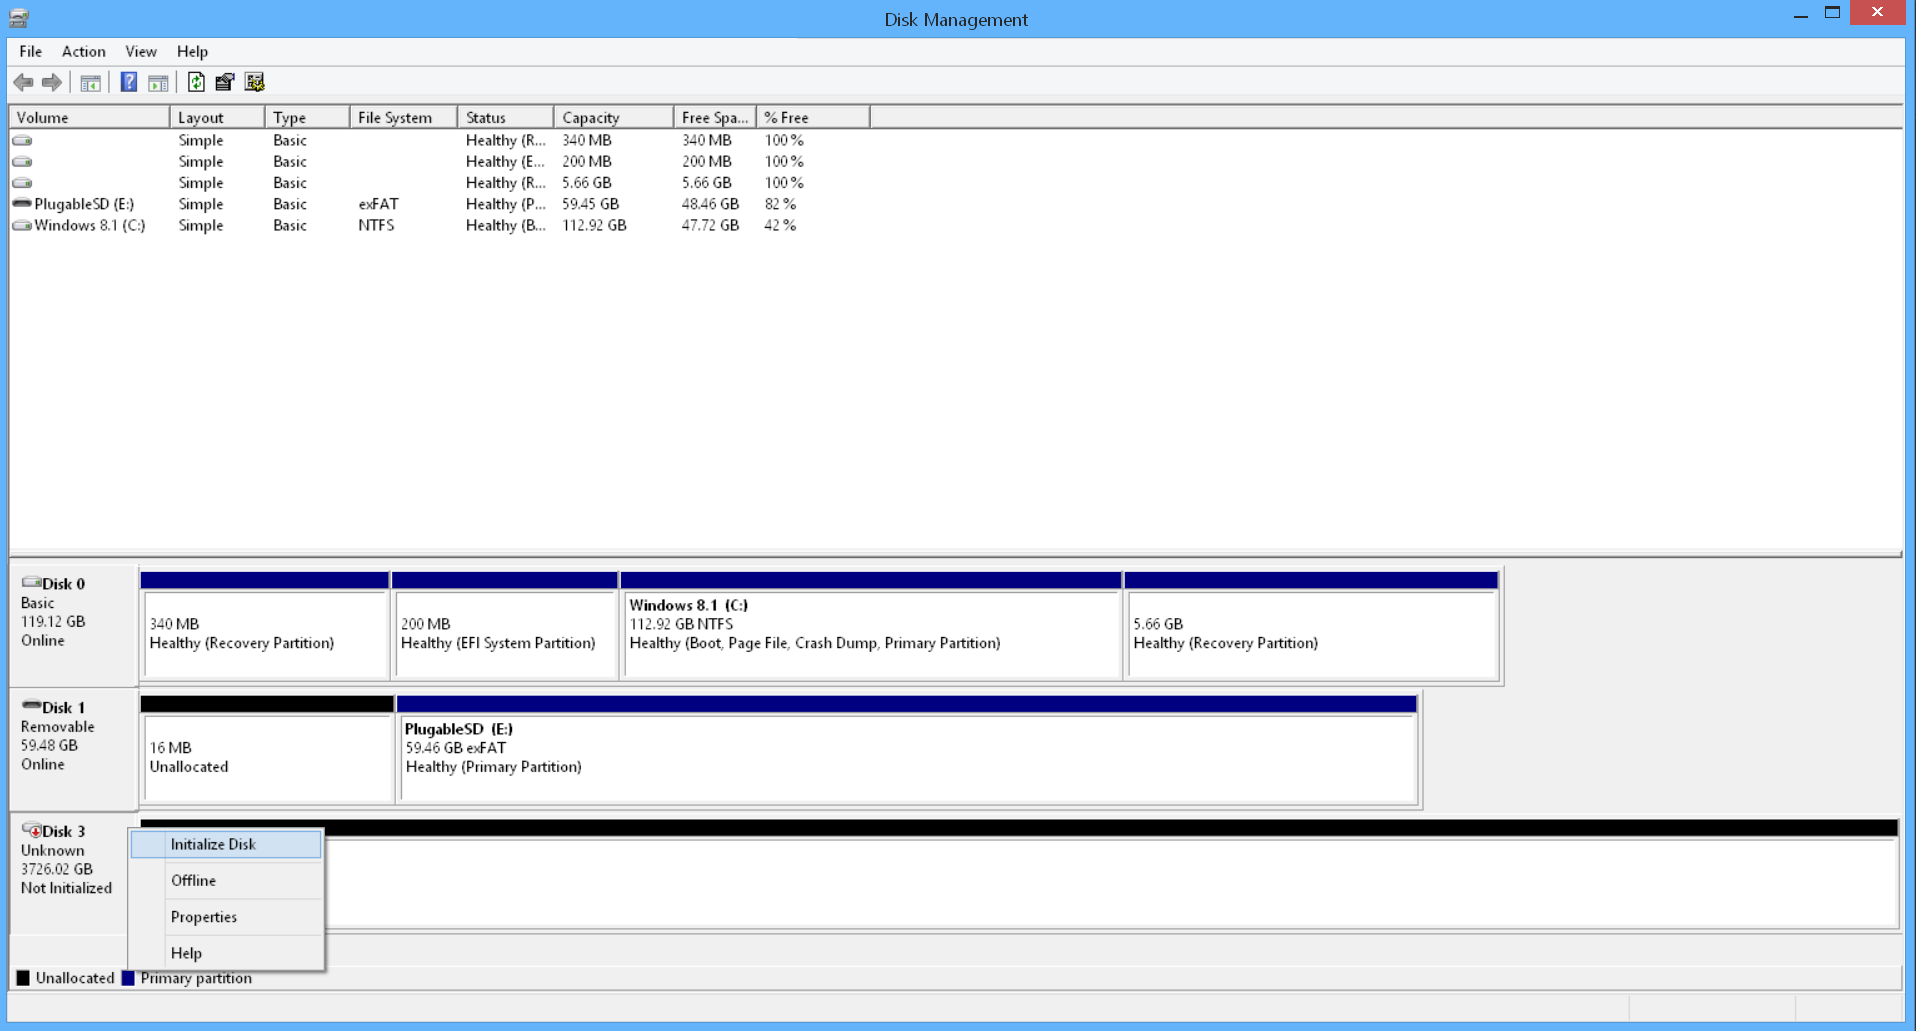
In either case it is extremely important when using Disk Management to make sure that you are working with the correct hard drive. The last thing you want is to accidentally delete important data!
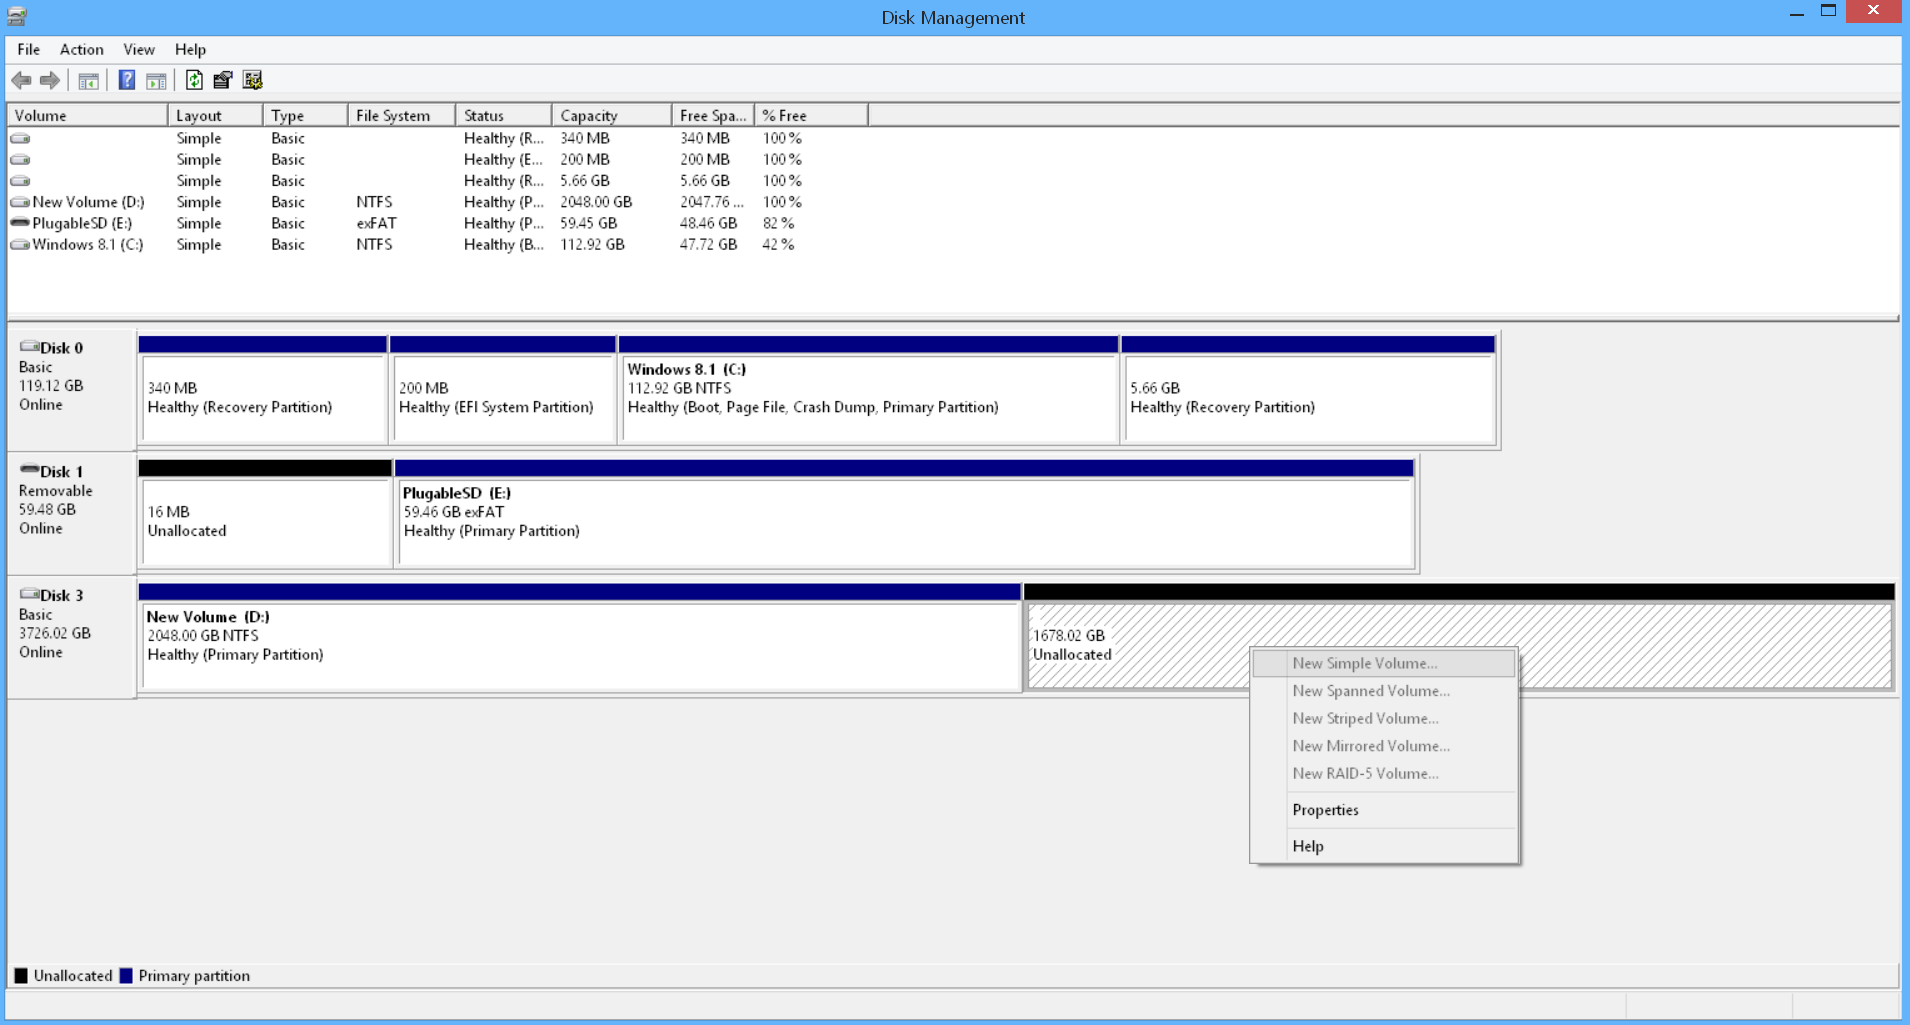
There will be two options to initialize the drive: Master Boot Record (MBR) or GUID Partition Table (GPT). MBR is the older legacy method of initializing drives, and is only necessary if you need to access the drive on a Windows XP system (XP cannot recognize drivers initialized with GPT). GPT *must* be selected for drives over 2TB in size. If MBR is selected on a drive larger than 2TB, you will only be able to access the first 2TB of the drive, regardless of the drive's capacity. GPT disks should be accessible to Windows systems running Vista and later:
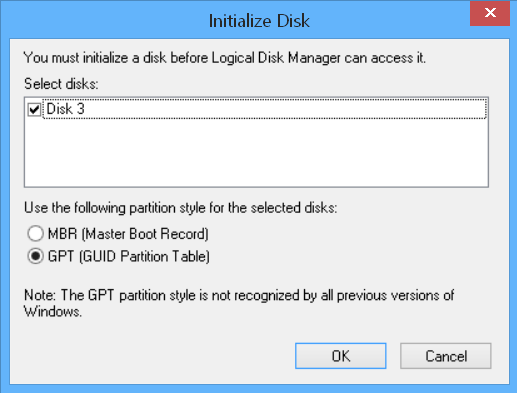
(If you're interested in more information about MBR vs. GPT, Microsoft has a very thorough post here.)
Once you've made your selection and clicked OK to initialize the drive, it's time to partition and format. You can create multiple partitions if you want, but this guide assumes that you, like most people, want to access the entire drive through a single drive letter/partition. As mentioned earlier, each disk that Windows recognizes is given a number and a horizontal bar representing the space of the disk and any partitions that exist. Since we're working with a drive that contains no partitions yet, it should be listed as “Unallocated” space. It's a good idea at this point to make sure the drive size is what you expect it to be. In the following example, we're working with a 4TB GPT initialized drive, which Windows reports as 3725.90 GB (Windows computes disk size differently than disk manufacturers, hence the difference):
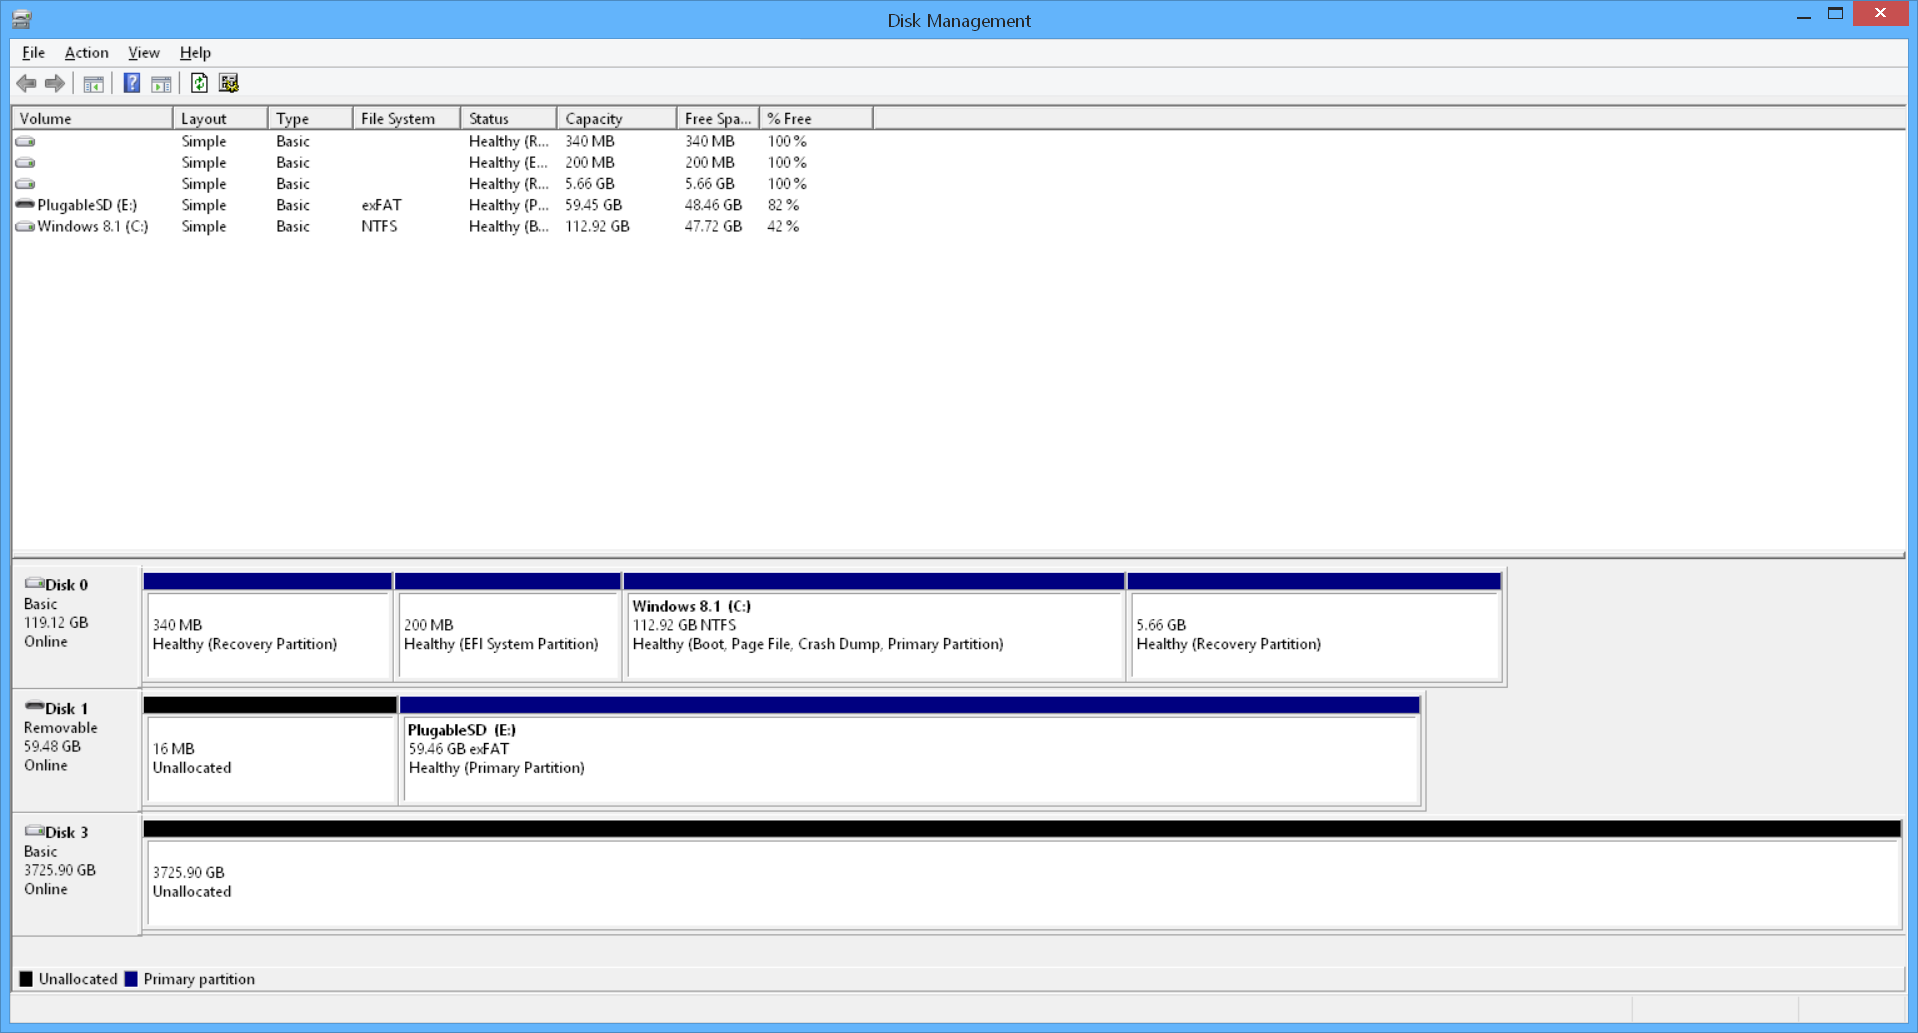
Right-click the unallocated space, and select “New Simple Volume”:
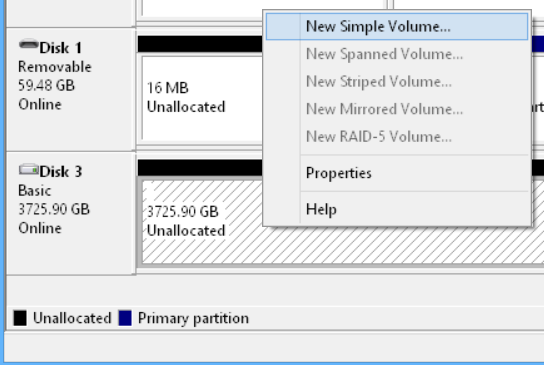
After clicking “New Simple Volume” you will be guided through a series of steps. For the vast majority of users, just accepting the defaults and clicking Next will be fine. The two items you may wish to change are Assign the following drive letter if you'd like your drive to have a specific letter assigned, and Volume label, which will be the name you will see associated with the drive letter in Windows File Explorer:
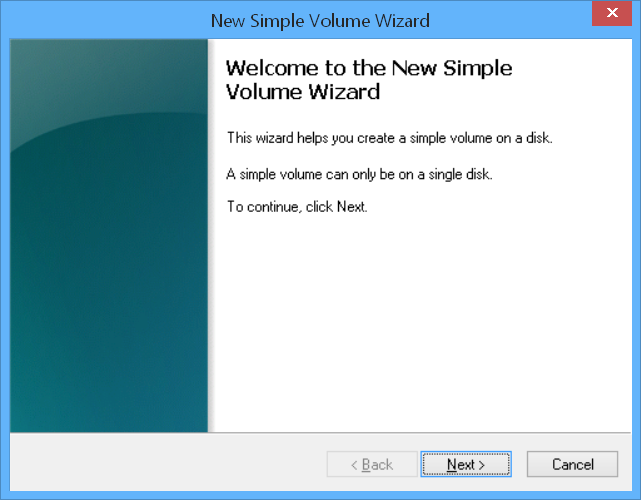
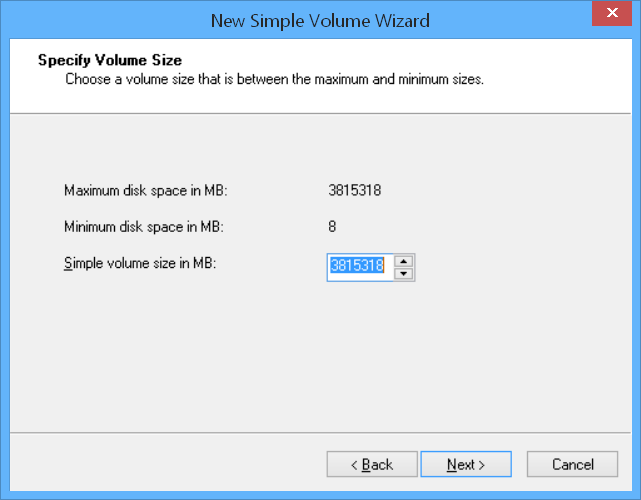
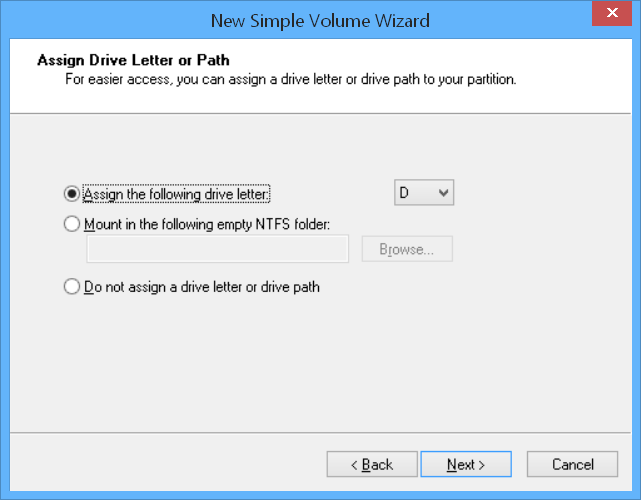
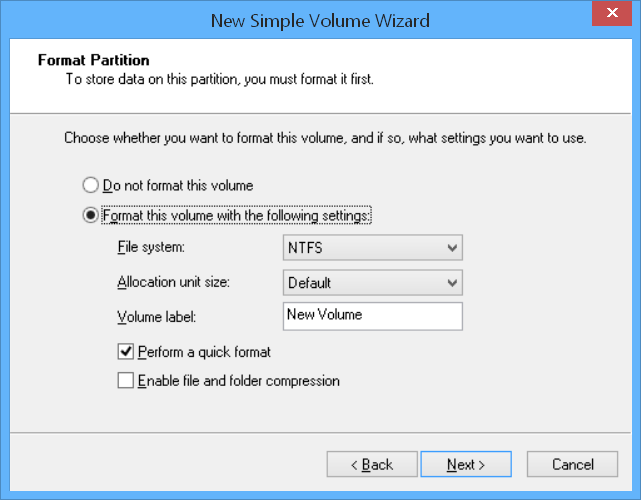
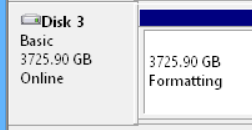
After clicking Finish in Disk Management you will see the drive partition being formatted:
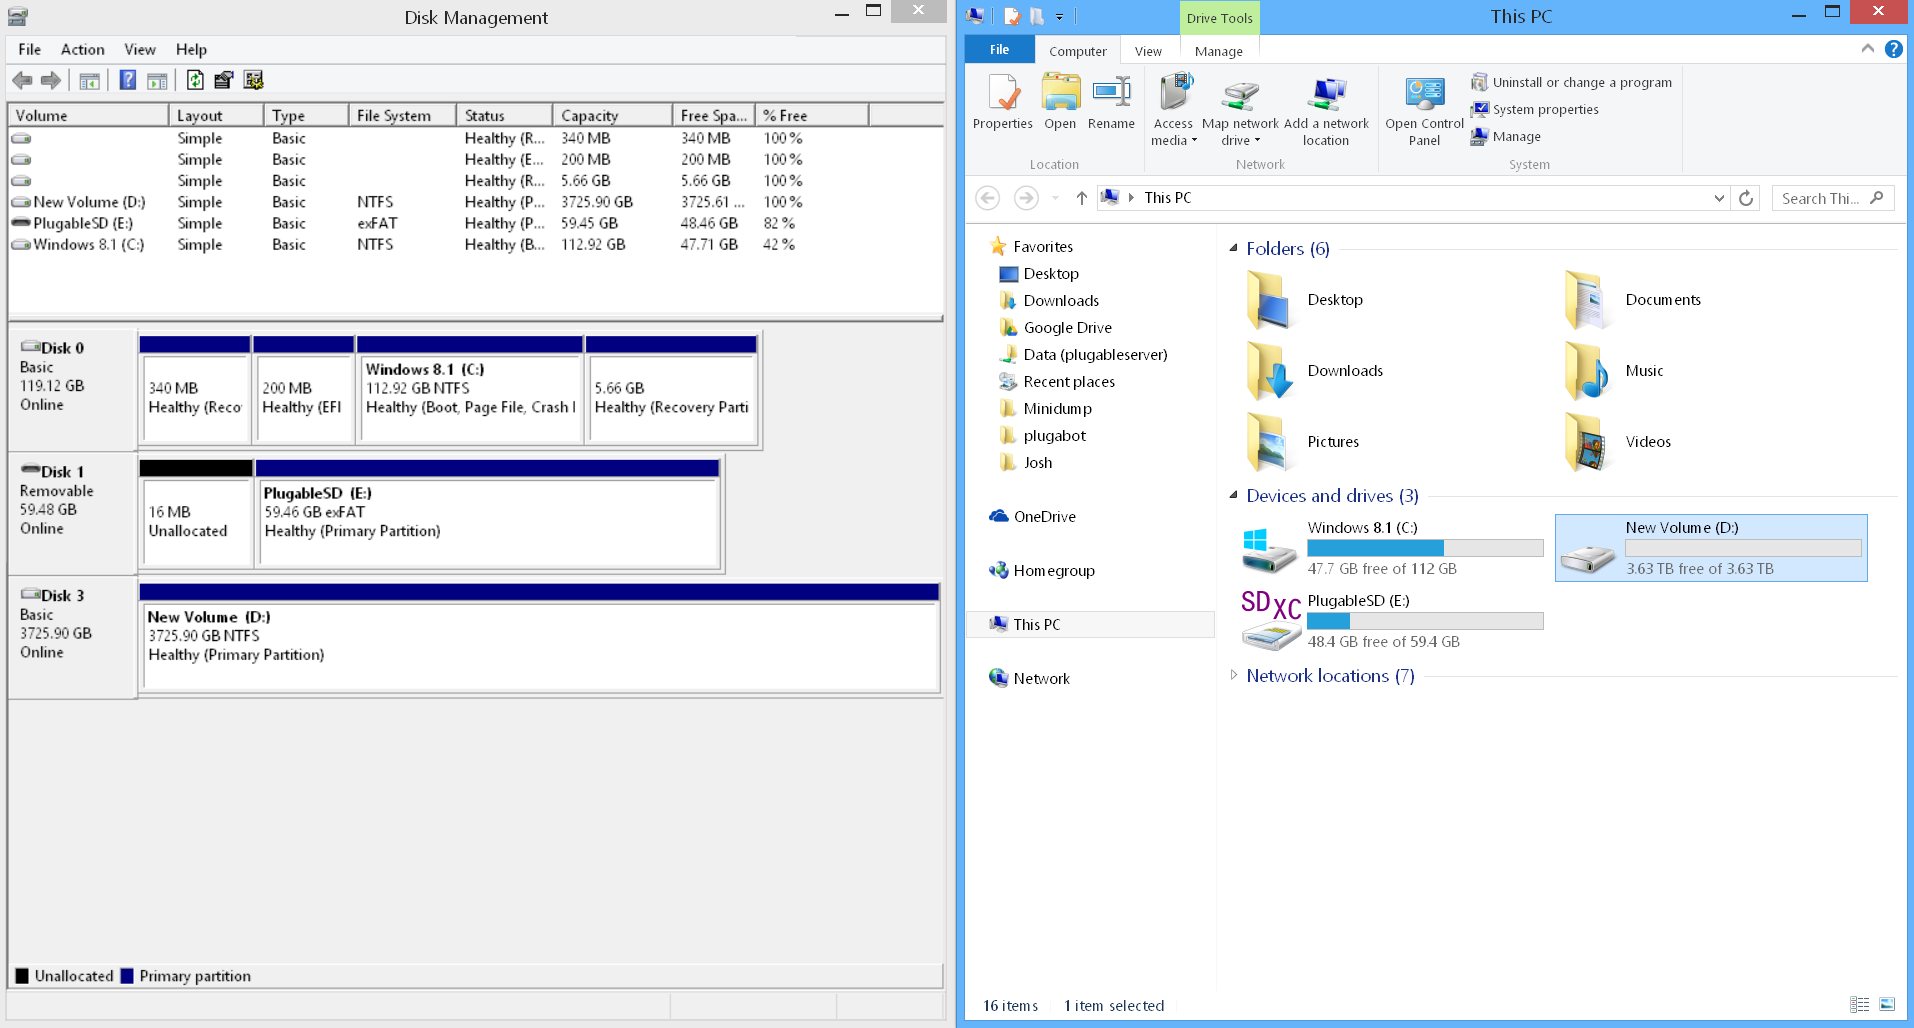
Once the format is complete the partition will have a drive letter and be accessible in Windows Explorer:
Note: If you had manually selected to initialize the drive as MBR and not GPT, or if you are using Windows XP and the drive is larger than 2TB, the drive will be split into two sections and only the first section of 2TB will be usable. Our 4TB drive when initialized as MBR is reported as two sections of 2048.00 GB and 1678.02 GB. A volume cannot be created for the second section, the option is grayed out:
If you have any questions please feel free to contact us at support@plugable.com and we'll be happy to help!