
This document will cover the basic configuration steps for using the Plugable Performance NIX HDMI Capture Card in OBS.
Windows
OBS Configuration
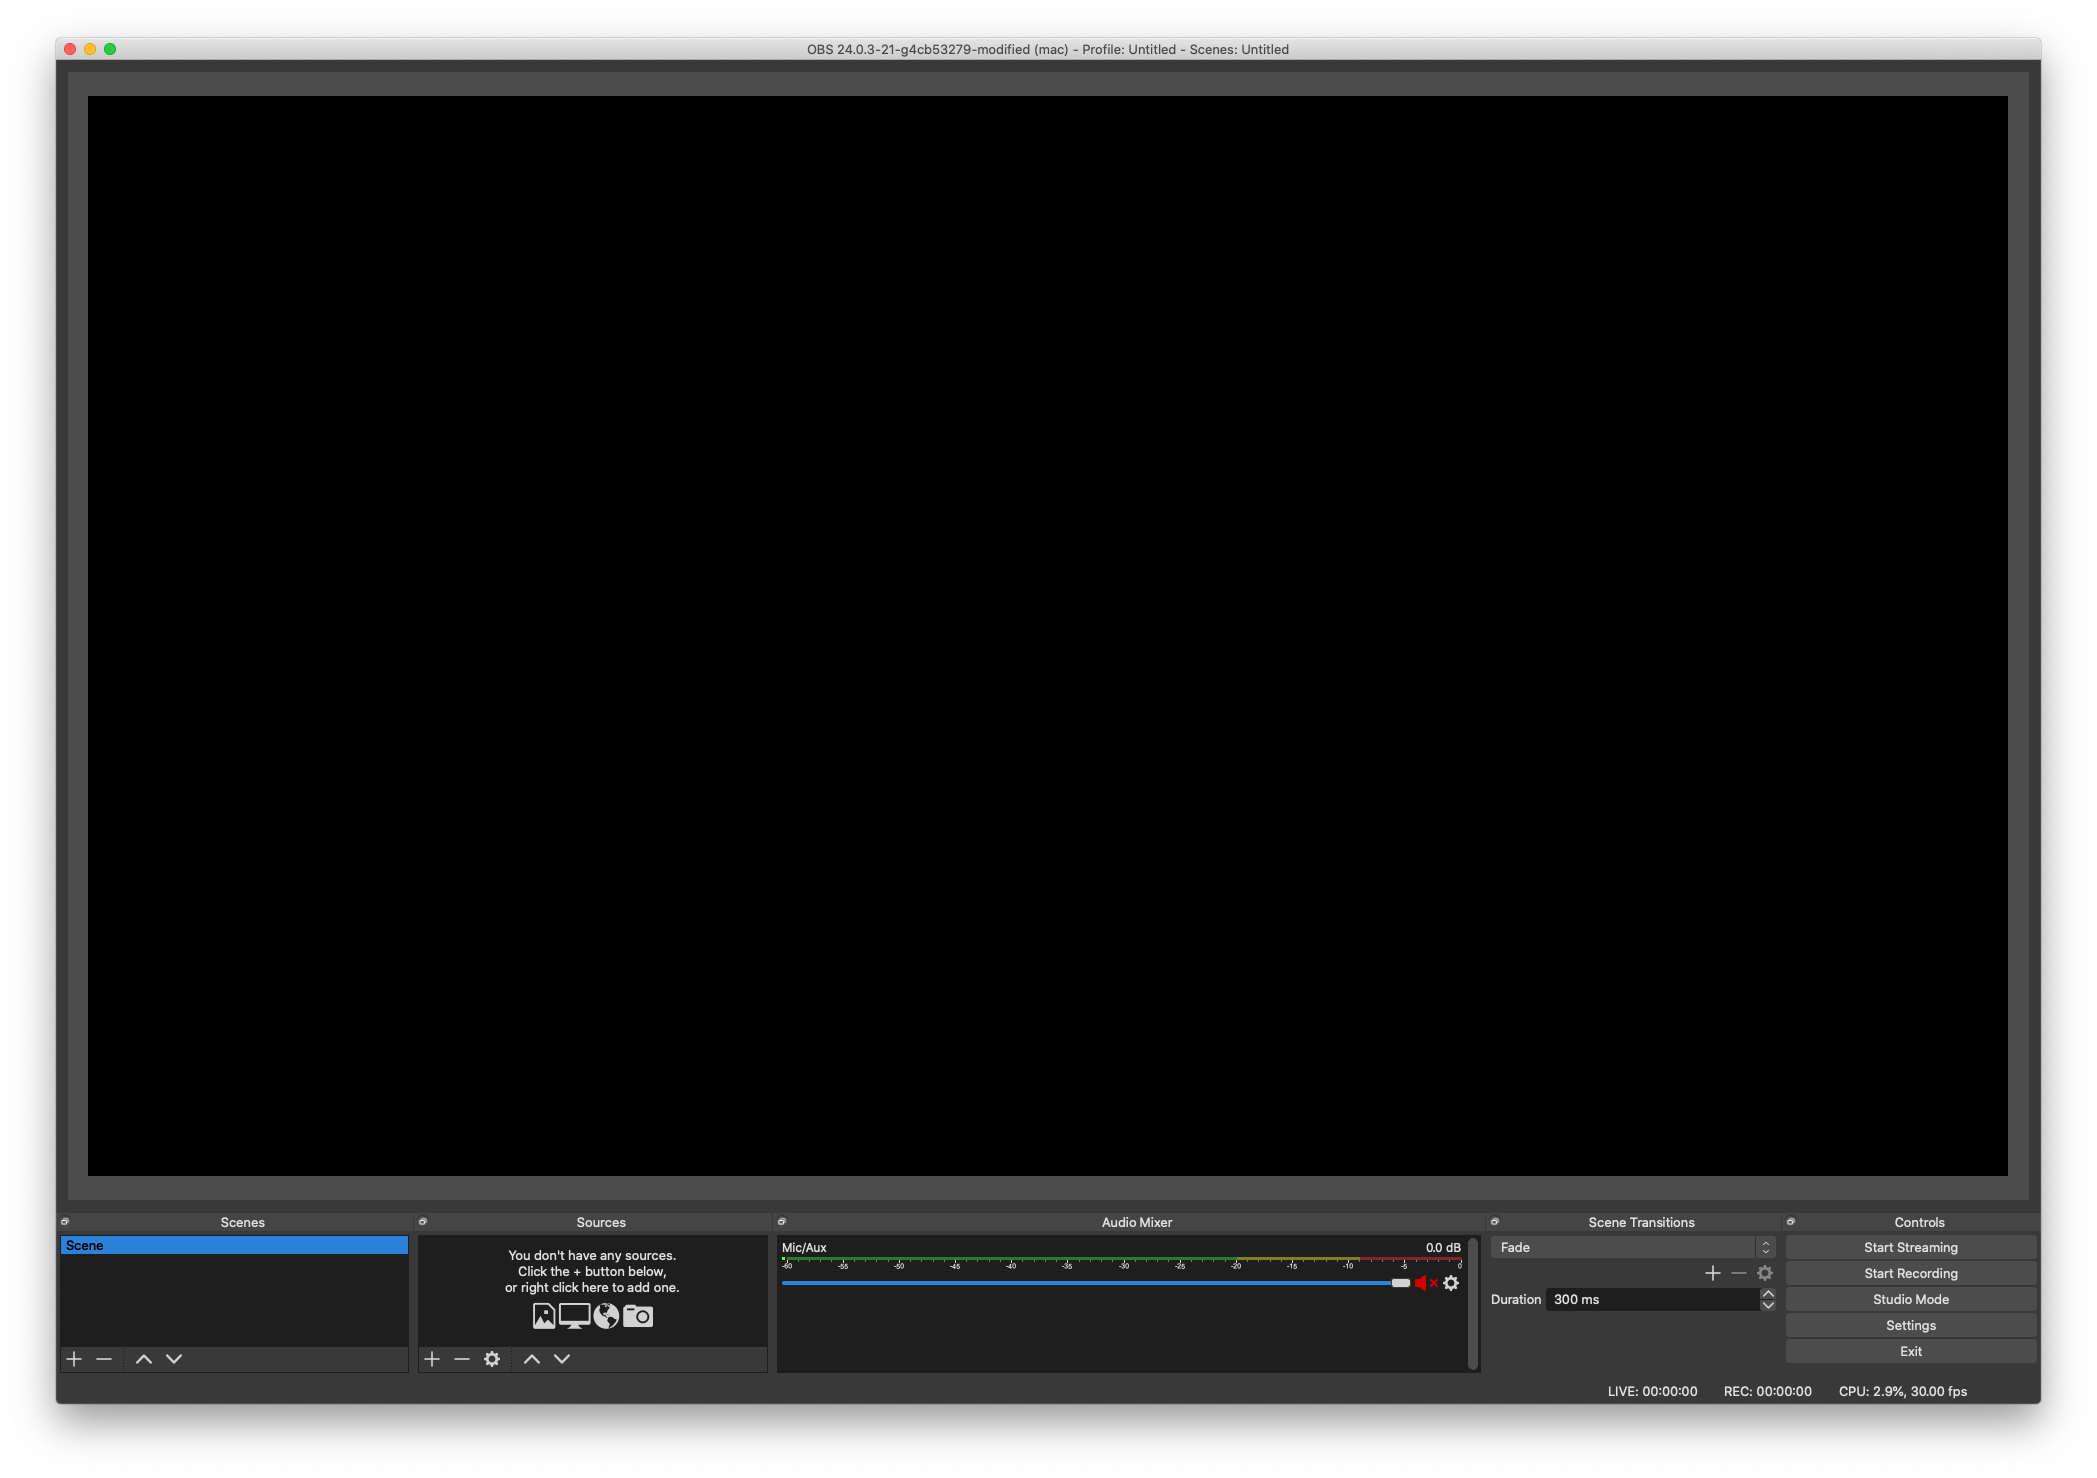
- With the device already connected, open OBS on the PC you are planning on streaming from
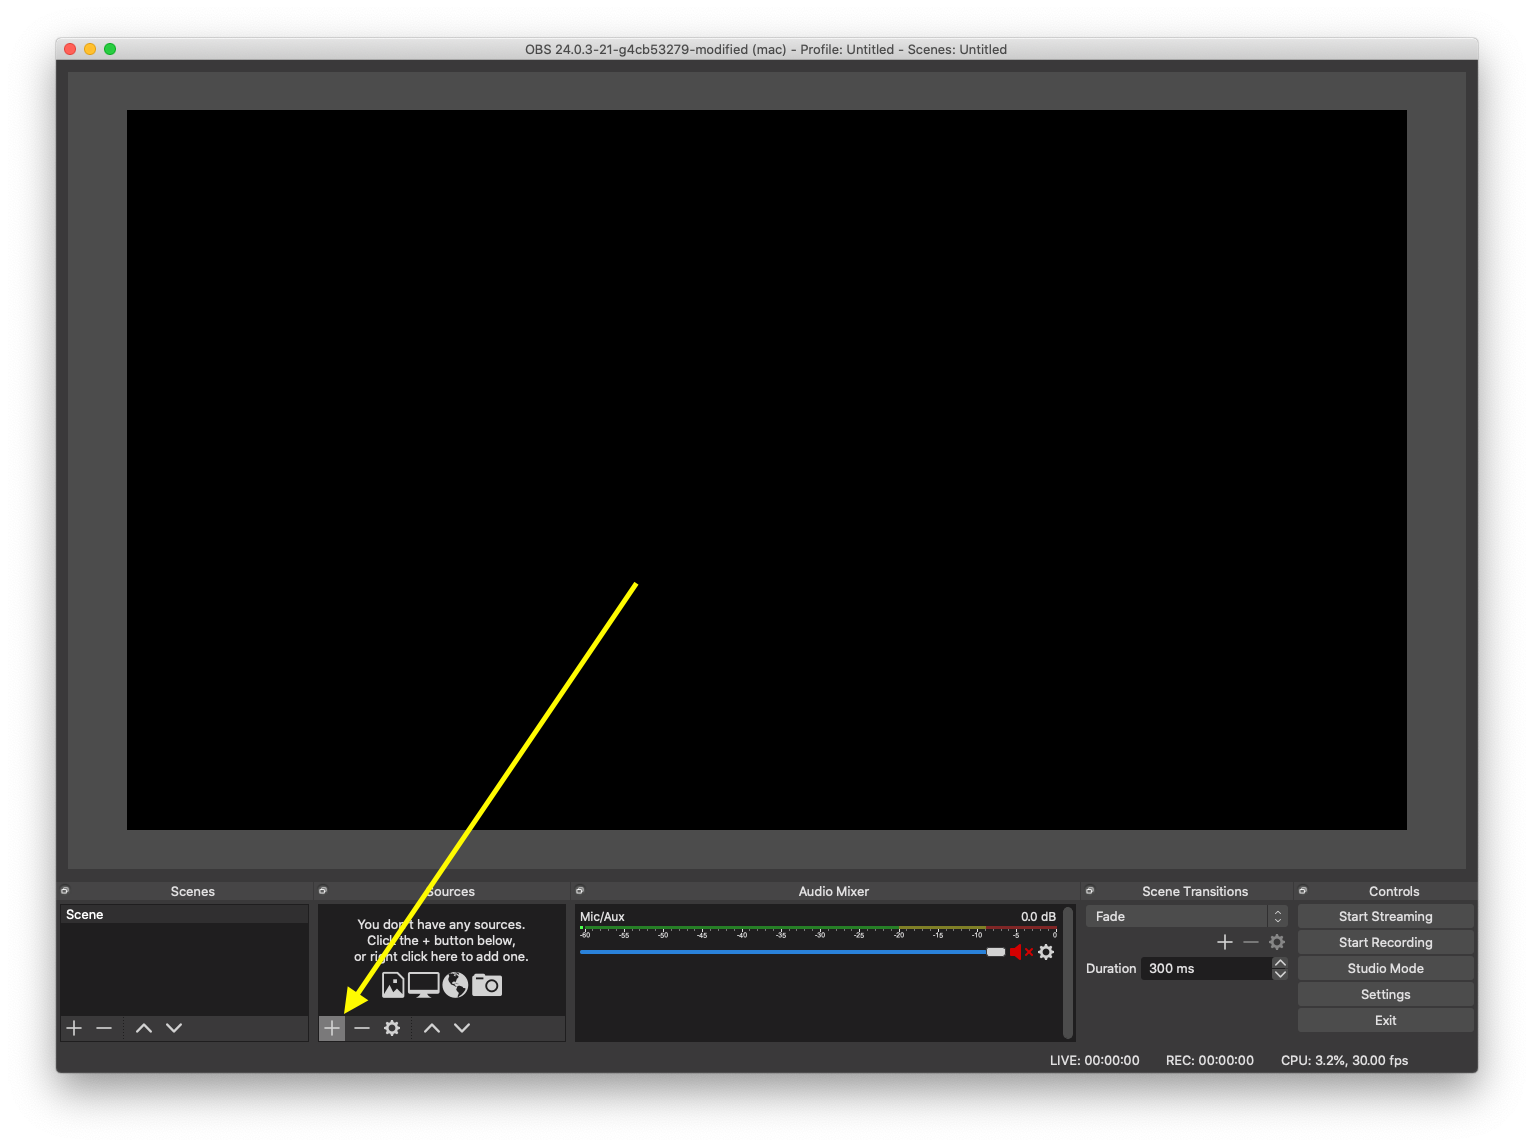
- Once OBS is open, look for the Sources frame in the bottom left of OBS
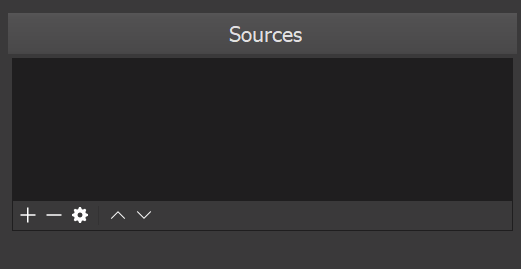
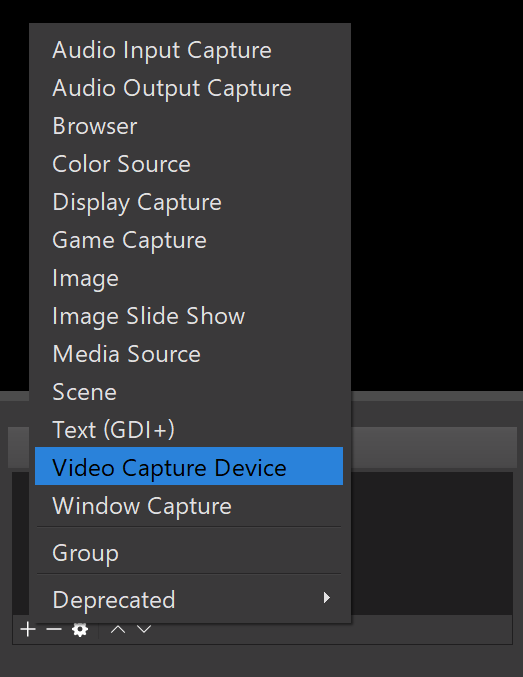
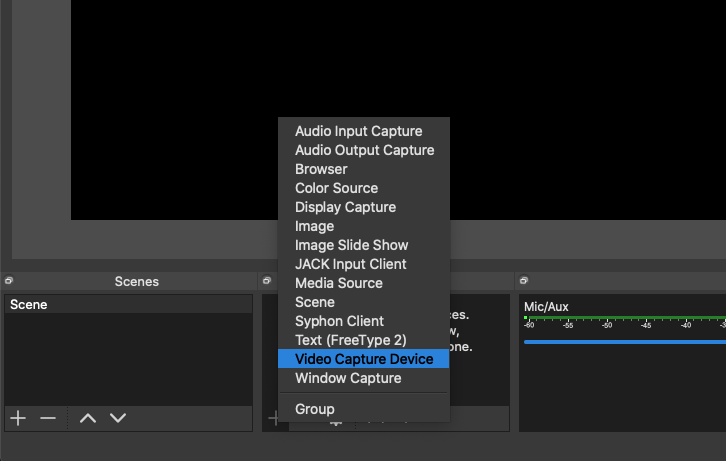
- Click the + button under the 'Sources' section in the bottom left of OBS and select Video Capture Device
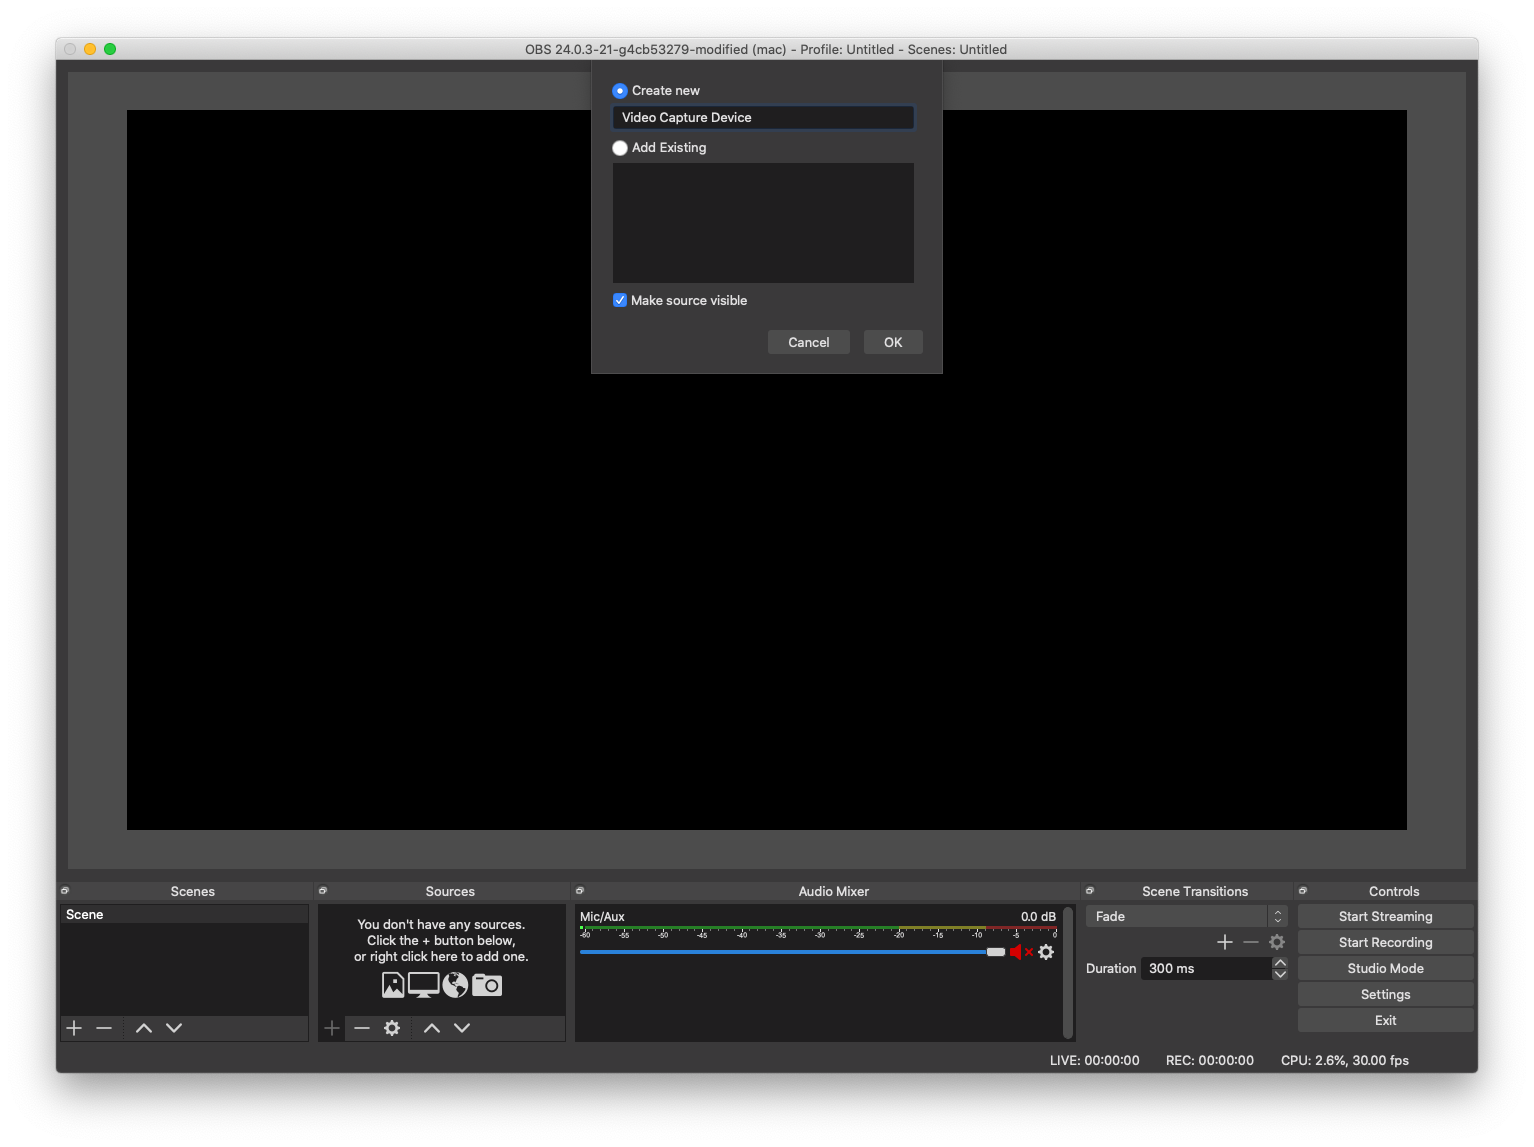
- In the window that appears, input any name you would like to represent the capture card, then click OK
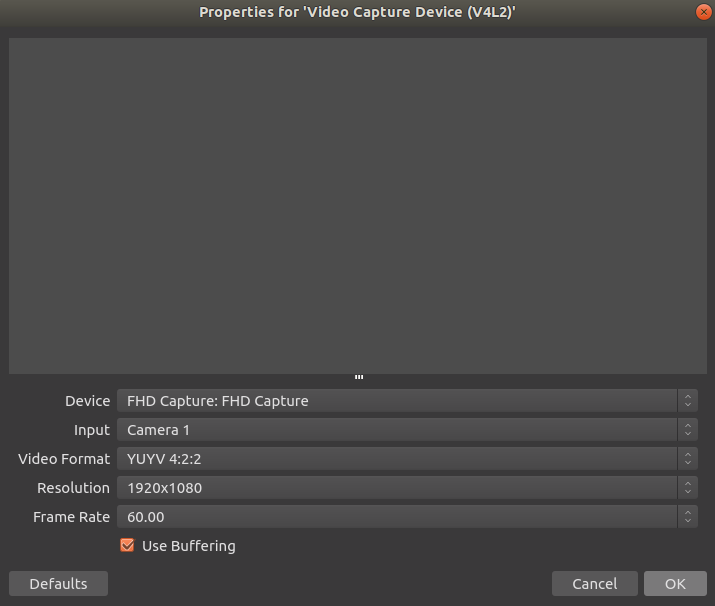
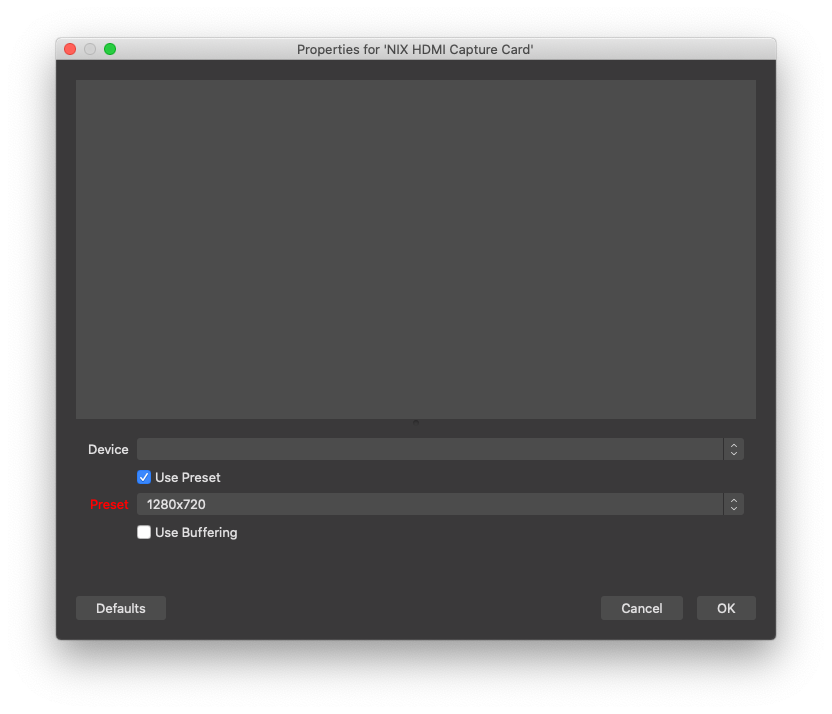
- Another window will appear, this shows detailed video settings for video capture characteristics of the NIX Capture Card and basic audio settings
- If you have already connected HDMI from your capture source (Xbox One, PS4, etc) you should now see an image
- If you have already connected HDMI from your capture source (Xbox One, PS4, etc) you should now see an image
- You may need to tweak these settings, but start with the settings depicted below
If the image looks incorrect, such as washed out dark areas, blown out lighter areas, and/or if there are issues with the colors in the captured image, you may need to do some additional tweaking. Check this article for details.
Audio Configuration
It is important for all aspects of your audio chan to use the same sampling rate for audio. If you have a misconfiguration in those settings, you may get audio that breaks, cracks, or is otherwise distorted in some fashion.
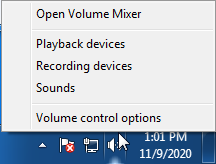
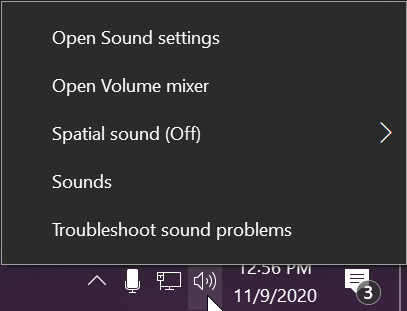
- Right-click on the speaker symbol in the Windows taskbar/system tray
-
Windows 7/8.x—Select Recording Devices. The Sound window will open with the Recording tab highlighted
-
Windows 10—Select Open Sound Settings then click the link under 'Related Settings' for Sound Control Panel, then click the Recording tab
-
Windows 7/8.x—Select Recording Devices. The Sound window will open with the Recording tab highlighted
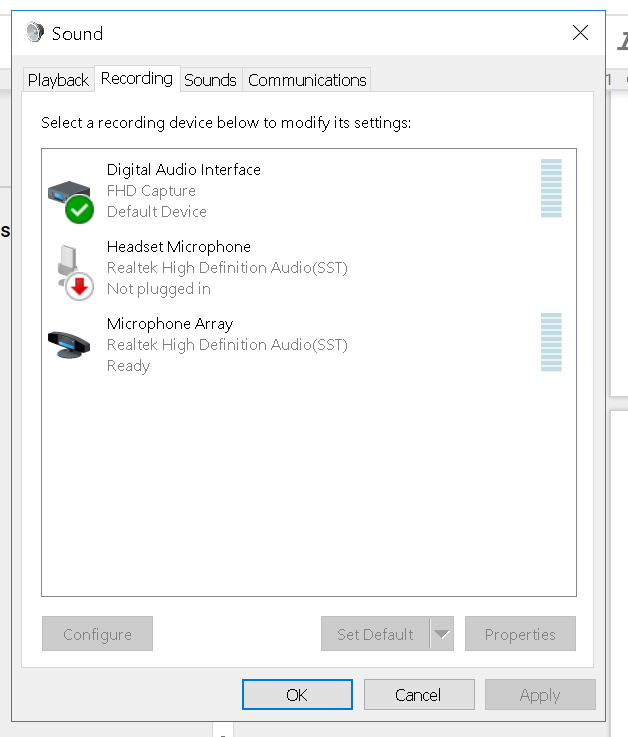
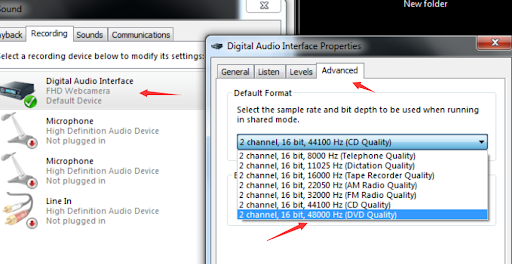
- In the Recording tab, double-click the Digital Audio Interface—FHD Capture device
- In the Advanced tab, change the sample rate to 2 channel, 15 bit, 48000Hz (DVD Quality)
- Back in OBS, go to the Sources frame and click the + icon
- Select Audio Input Capture
- Name the entry whatever you would like, then click OK
- In the window that appears, change the Device dropdown to Digital Audio Interface (FHD Capture) and click OK
- You will now have two entries for the NIX Capture Card in OBS, one for audio and one for video
- In the main OBS window you'll now find audio settings (named whatever you chose in the last step) in the OBS mixer
- On the right side of the mixer, there will be a gear/cog icon , click it and select Advanced Audio Properties
- In the Advanced Audio Properties window, look for row for the NIX Caputure Card and set the Sync Offset value to 470
Provided everything was configured correctly, you should now have the NIX Capture Card ready for streaming via OBS. If you encounter issues, please contact us for help.
macOS
OBS Configuration
Before configuring the capture card, please have the latest version of OBS installed. Recent macOS updates may cause problems with OBS if you are not using the latest version.
This guide will walk through the steps to initially configure OBS's recording and preview settings.
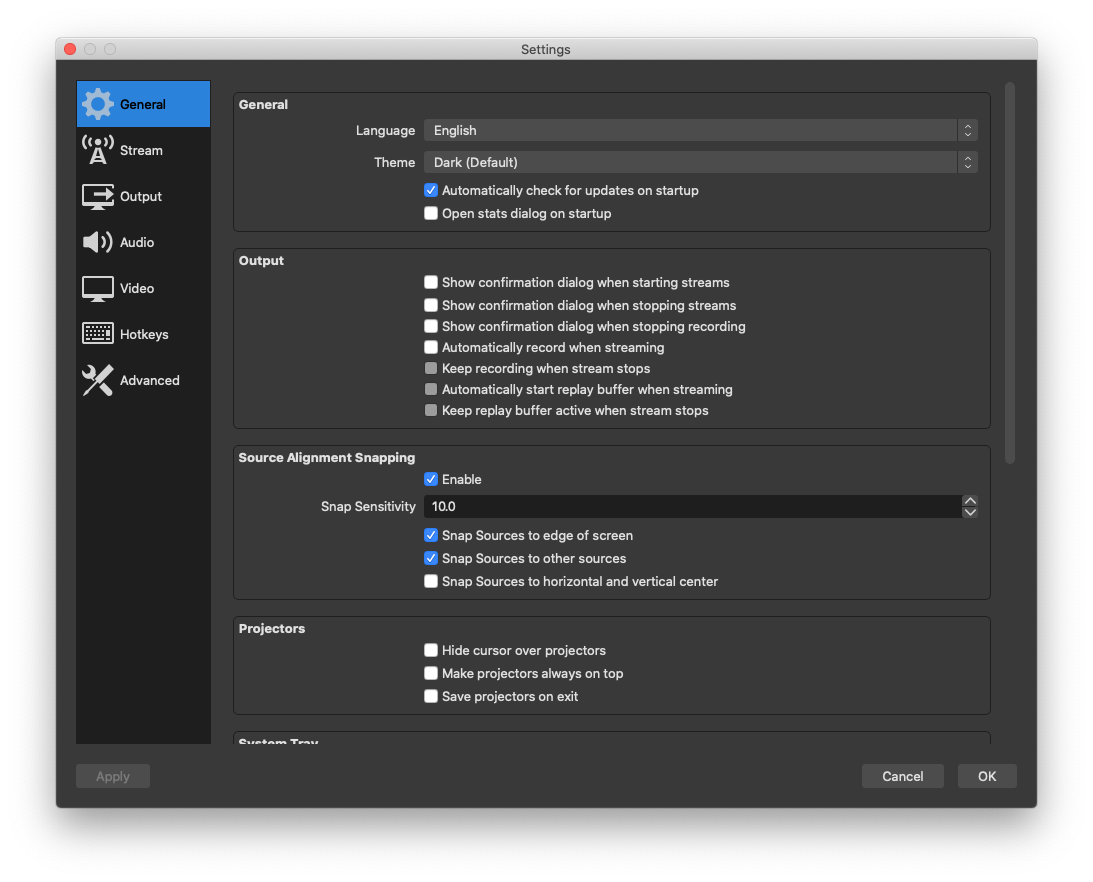
- Enter the Settingsmenu of OBS
- Method 1—Settings button in the lower-right of OBS
- Method 2—In your Mac menu bar, open the Preferences menu and choose Settings
-
Method 3—Press ⌘ + ,
- Switch to the Output section of the Settings window
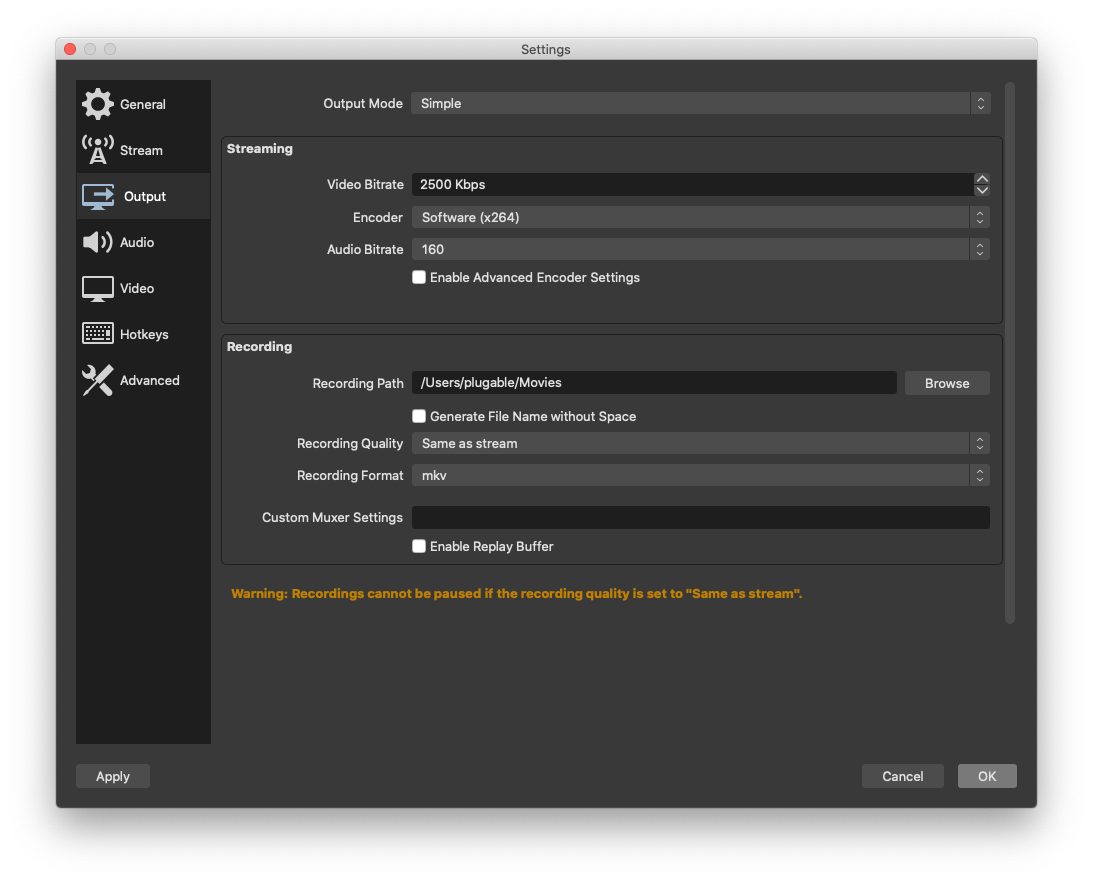
The Video Bitratevalue is one of the most important items to configureBitrate Value Best Use/Notes 2,500 Kbps OBS Default 8,000 Kbps 1080p at 24, 25, or 30 frames per second 10,000 Kbps Max upload for most cable Internet providers 12,000 Kbps 1080p at 50 or 60 frames per second
When streaming video, it is important to keep in mind what your max available upload bandwidth is for your Internet connection. If you are playing an online multiplayer game, maxing out your available upload bandwidth can lead to performance problems in your game.
It is also important to note that the Video Bitrate does not include the additional bitrate of carrying audio. By default, OBS is configured to use 160 Kbps for audio. For example, selecting 8,000 Kbps—with the default audio bitrate of 160—results in a total bitrate of 8,160 Kbps.
If Enable Advanced Encoder Settings is enabled, it is important to note that the Encoder Preset which ranges from ultrafast to slower mostly impacts how much processing work your computer has to do during the capture/streaming process.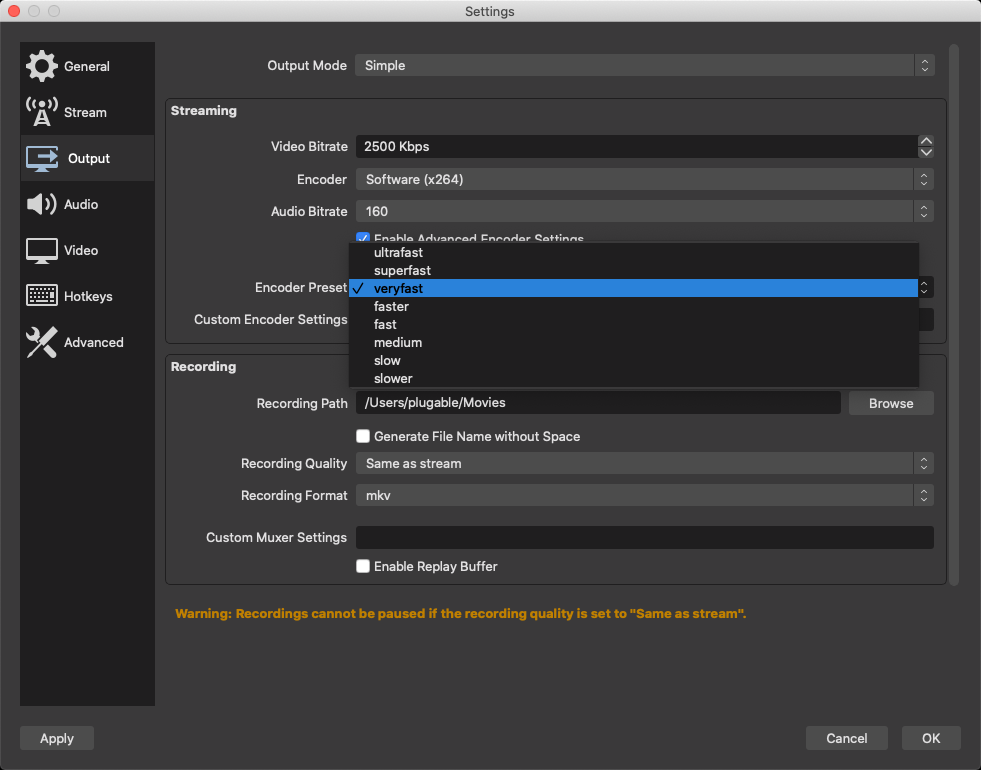
If you are on a high-performance computer, using the slower options may be feasible and will result in better video quality. However, if you are on a lower-performance system, you will likely want to choose one of the first three options. - Switch to the Audio section of the Settings window
- One of the most important settings regarding audio is the Sample Rate setting. If the sample rate between your console, the recording device (the capture card), and OBS are mismatched in any way, it can result in issues like audio popping, audio cutting out, and a variety of other audio issues.
Usually the best approach is to set everything manually to 48KHz, including this option in OBS. Please note, that you must restart OBS for this change to take effect.
Additionally, you will want to enter the Audio MIDI Setupmenu of macOS. This utility can be found by searching Launchpad on your Mac:- Select FHD Capture and make sure the Format is set to 48,000KHz
- On your computer, game console, or other HDMI source that you are capturing audio and video from, make sure to check the audio output properties on that device and manually set it to 16-Bit 48,000Hz audio
- In OBS, click Apply in the lower-left of the Settings window, then click OK
- In the Sources section of the main OBS window, click the + symbol to add a device
- In the menu that appears, choose Video Capture Device
- In the dialog that appears, you may rename Video Capture Device to whatever you want, such as 'Nix HDMI Capture Card'
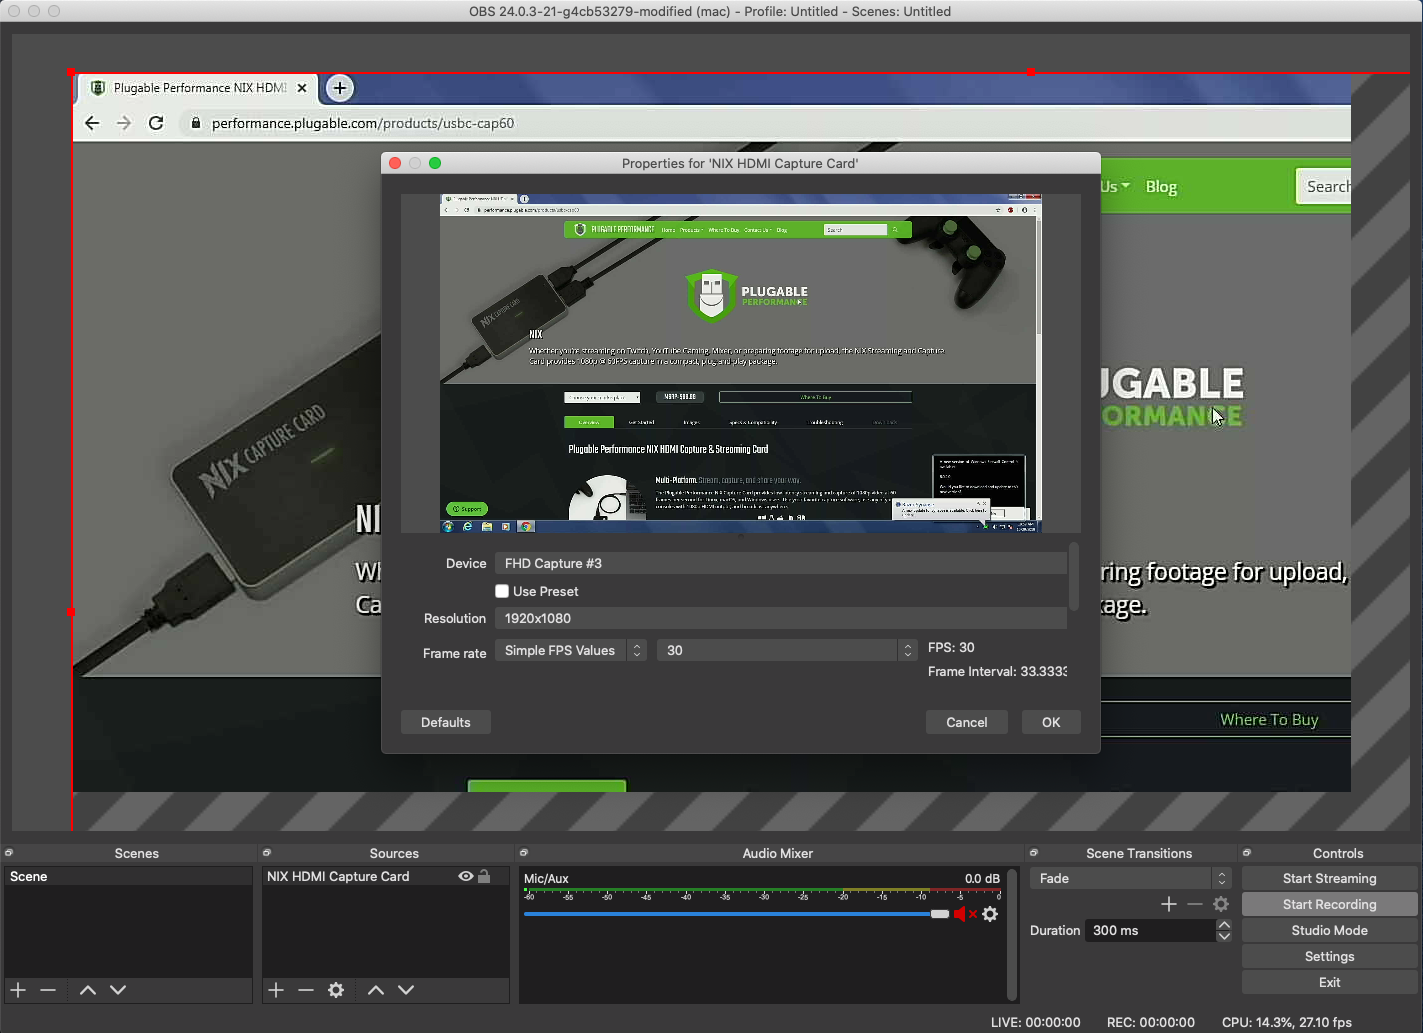
- After clicking OK a new window will appear for the properties of the newly-added video capture device
- Perform the following changes and checks in order:
- Ensure that the device you intend to capture from is plugged into the Inport of the NIX capture card
- Please Note—The NIX HDMI Capture Card does not support HDCP (High-bandwidth Digital Content Protection). Your source must not enforce HDCP. Last-generation game consoles such as the Nintendo Switch and Xbox One do not enforce HDCP for most gameplay and/or on the dashboard/home menu. However, most media playback apps such as YouTube, Hulu, Netflix, Amazon Prime Video, and other video/audio streaming services will cause HDCP to become active. On the PlayStation 4, there is a toggle to switch HDCP enforcement on and off
- Verify that the device you're capturing video from is not in a 'sleep' state, and has a video signal being sent to capture
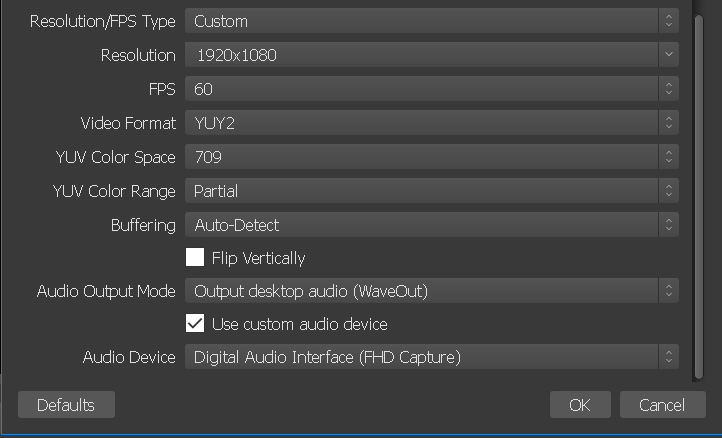
- Uncheck Use Preset
- In the Device dropdown menu, choose FHD Capture
- In the Resolution dropdown menu, choose 1920×1080
- In the right-most dropdown for Frame Rate choose 30 or 60. 30 is recommended for higher detail quality and 60 is recommended for smoother motion in fast-paced games

- After selecting the Frame Rate, video should appear in the current window
- Scroll down to the next options in the Properties window
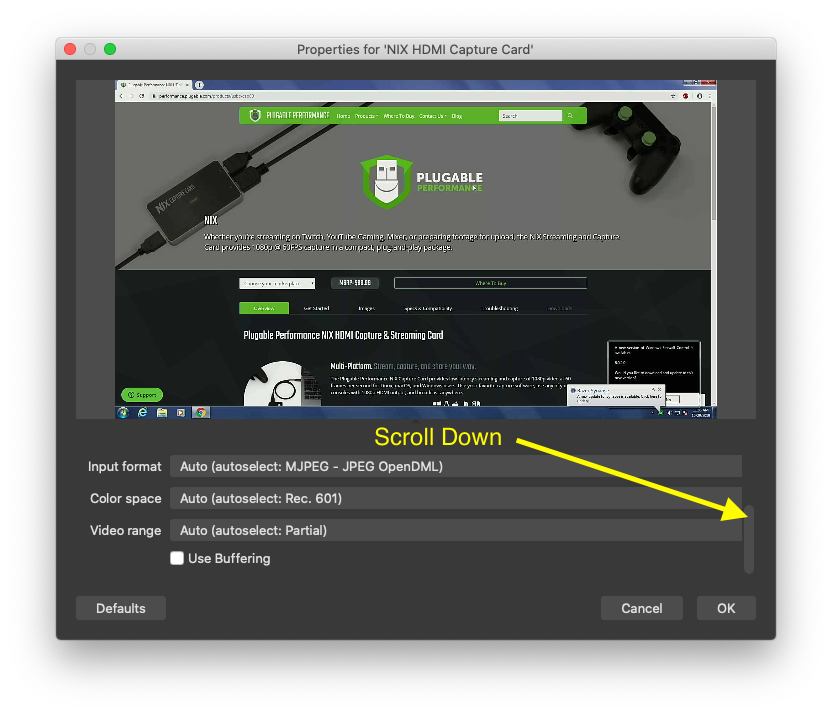
- Make these additional changes after scrolling down:
-
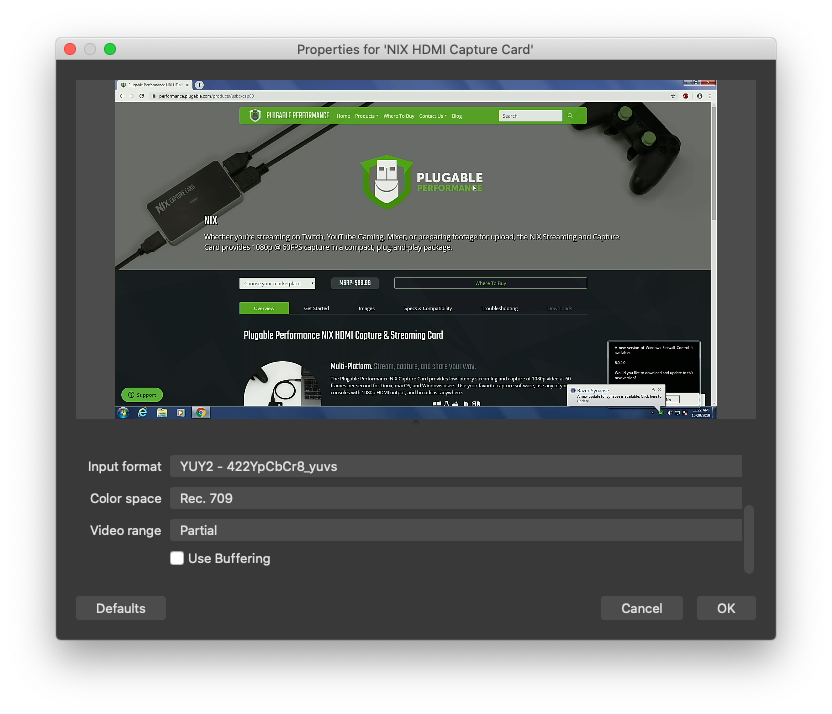
Input format
- By default MJPEG will be selected, this is a very low-quality recording option, and is the only one available if your NIX Capture Card is connected via a USB 2.0 port
- In the dropdown, select YUY2 - 422YpCbCr8_yuvs. This is the highest quality input format, and is only available if your NIX Capture Card is properly connected to a USB 3.0 port
-
Color space and Video range
-
Color space and Video rangeare much more difficult to configure than the other options that have been selected so far. Televisions, and devices designed to connect to televisions, use a somewhat complex system to determine black levels, white levels, and color values when composing and displaying an image. These settings have a dramatic impact on color accuracy, and the brightness, of the image being captured
- On consoles and televisions, color spaceis often given as three options:
- Wide
- Limited
- Automatic
- On consoles and televisions video range is usually given as an HDMI Black Leveloption:
- Low
- High
- On consoles and televisions, color spaceis often given as three options:
- For the best quality in capturing video, previewing the capture, and viewing the passthrough from the HDMI Outport on your monitor or TV, it is very important to test which combination of these settings results in the best image quality. You may need to manually change settings on:
- Your game console or other capture source
- Here in OBS
- On your display connected to the Out port of the NIX Capture Card
- Here are some general tips regarding these settings in OBS
- Start with 'Rec. 709' for the color space
- If black portions of the captured image appear too 'light' or 'gray' select Partial for the Video range
- If black portions of the captured image appear too dark/lacking in detail, select Full
- If the image still seems very incorrect, check the video settings on the device you're capturing video from
-
Color space and Video rangeare much more difficult to configure than the other options that have been selected so far. Televisions, and devices designed to connect to televisions, use a somewhat complex system to determine black levels, white levels, and color values when composing and displaying an image. These settings have a dramatic impact on color accuracy, and the brightness, of the image being captured
-
Input format
- Once the image color has been corrected, click OK
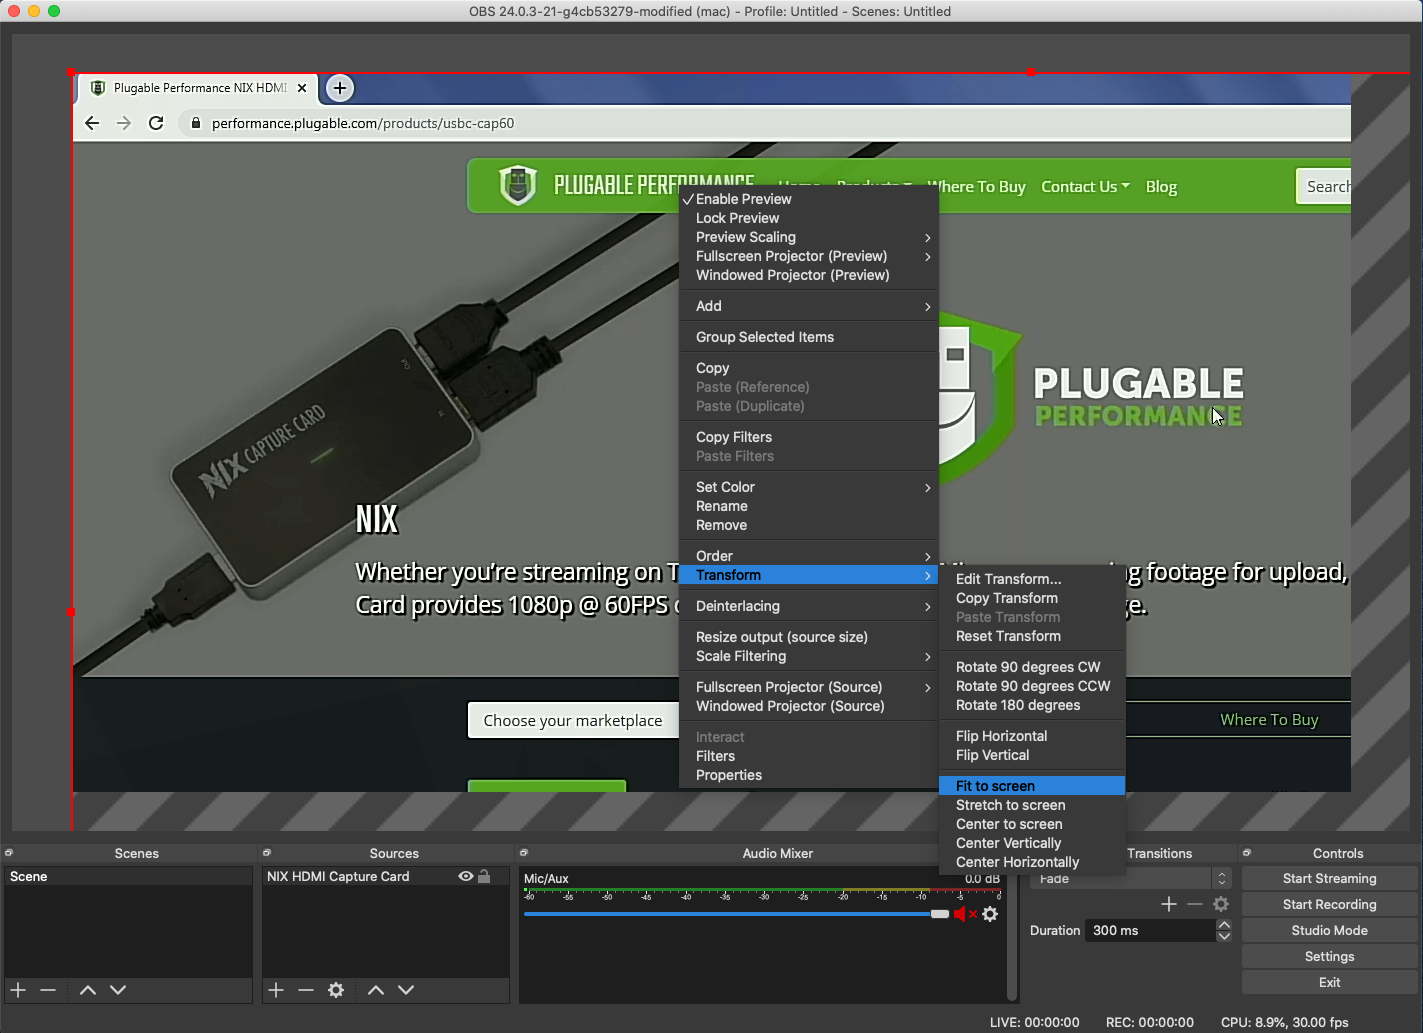
- You may notice the video is too large to fully preview in OBS, as shown below, or that the image doesn't fit correctly in the canvas area
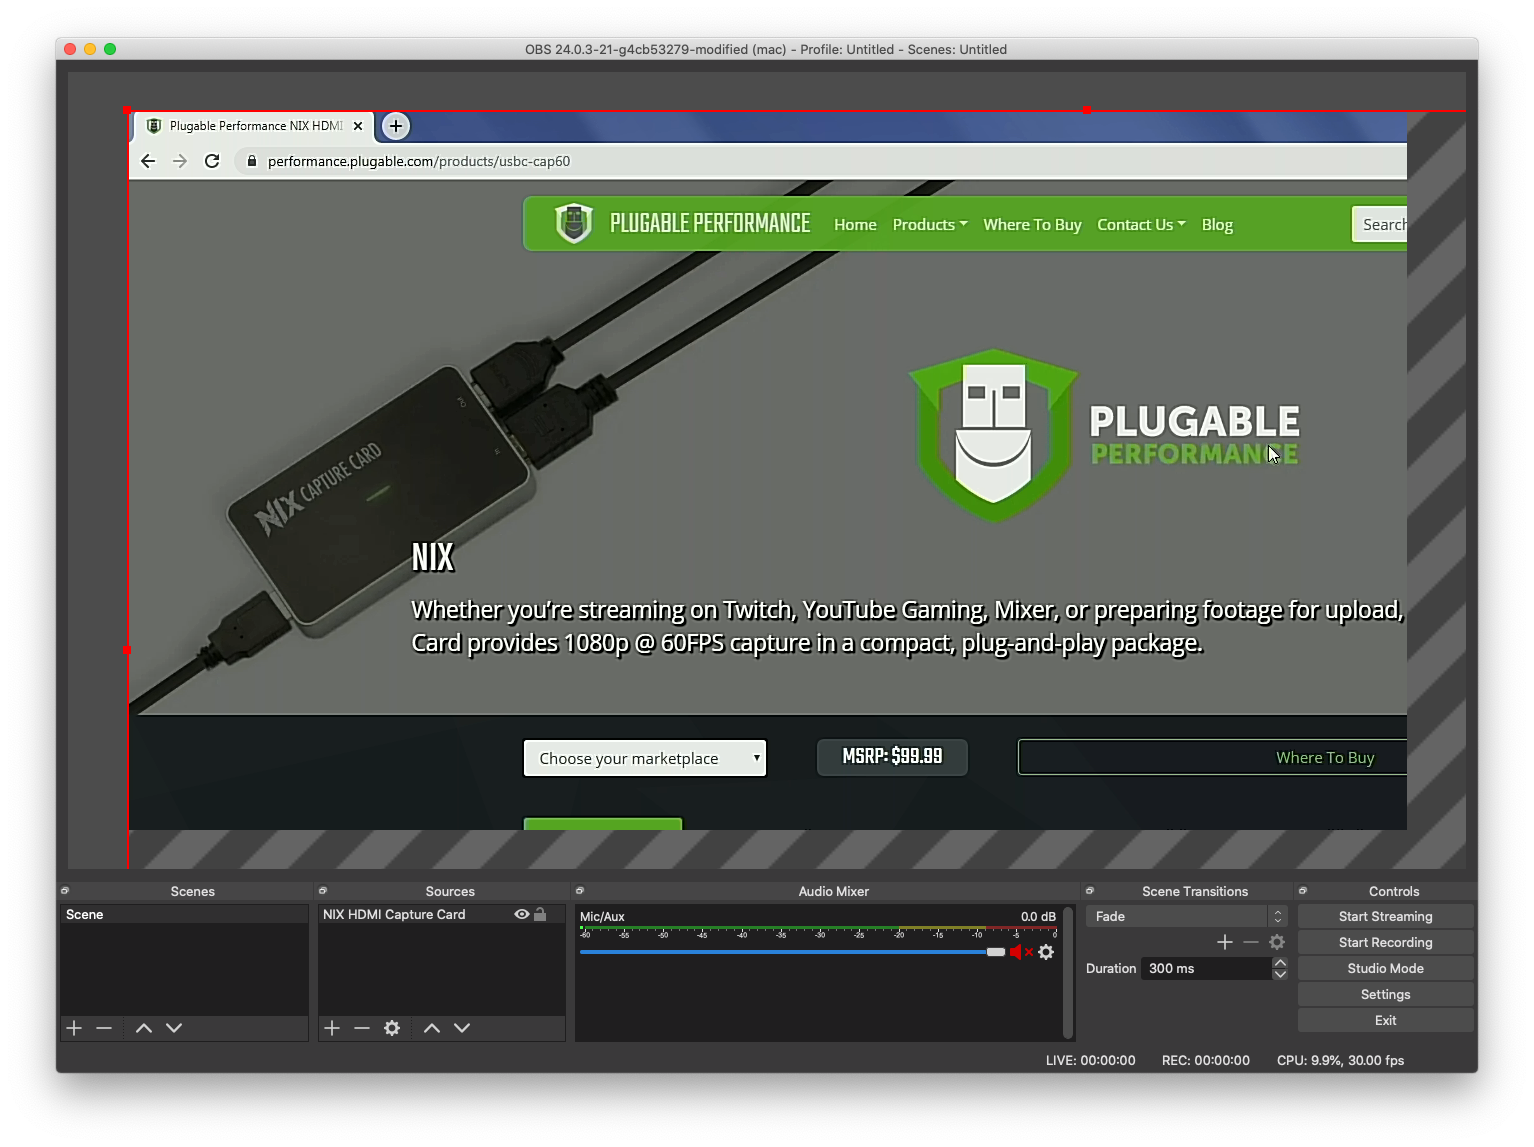
- Right-click the video capture preview and choose Transform then Fit To Screen
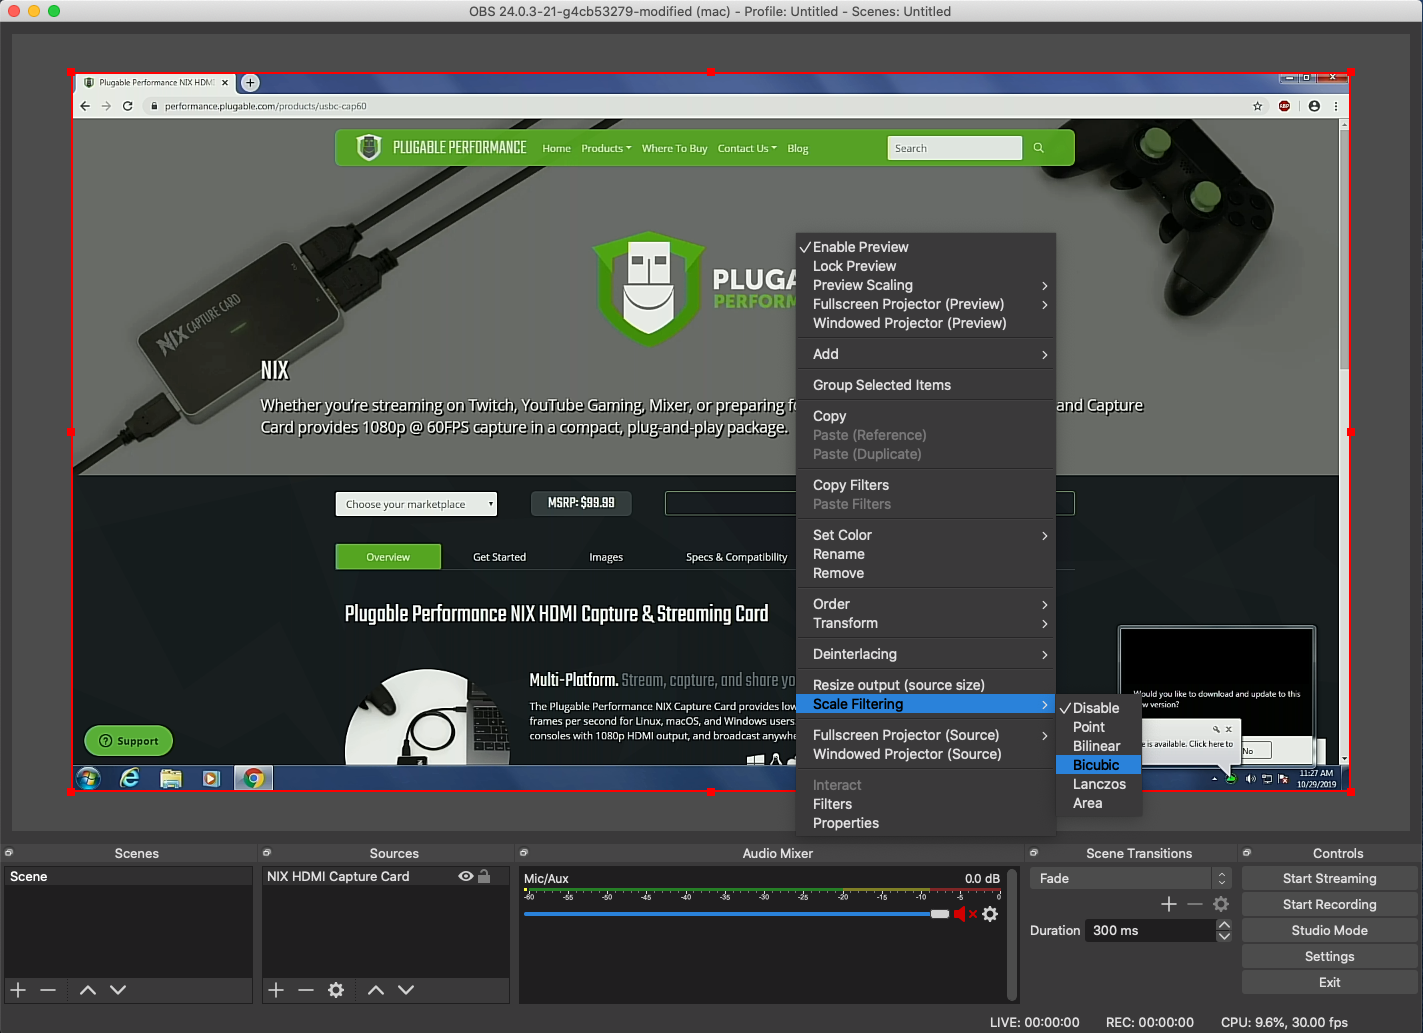
- After the image has been properly sized to your preview canvas, you may also want to right-click the capture preview again, then go to Scale Filtering and choose Bicubic or Lanczos to make the preview a little sharper. This will have some impact on CPU performance, so it may be best to leave this disabled on lower-performance systems
- Right-click the video capture preview and choose Transform then Fit To Screen
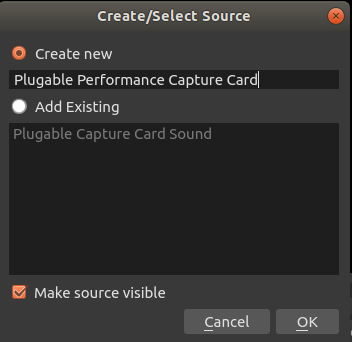
- In OBS, go to the Sources frame and click the + icon
- Select Audio Input Capture
- Name the entry whatever you would like, then click OK
- In the window that appears, change the Device dropdown to FHD Capture and click OK
- You will now have two entries for the NIX Capture Card in OBS, one for audio and one for video
- In the main OBS window you'll now find audio settings for the NIX capture card (named whatever you chose in the last step) in the OBS mixer

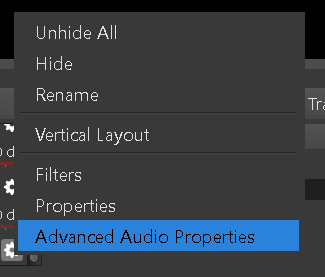
- On the right side of the mixer, there will be a gear/cog icon , click it and select Advanced Audio Properties
- In the Advanced Audio Properties window, look for row for the NIX Caputure Card and set the Sync Offset value to 470
- Ensure that the device you intend to capture from is plugged into the Inport of the NIX capture card
Congratulations, your capture card is now ready for use in your streaming software!
Linux
- With the device already connected, please open OBS on the PC you are planning on streaming from
- Once OBS is open look for the Sources panel in the bottom left of OBS
- Click the + button at the bottom left of the panel and select Video Capture Device
- Once Video Capture Device is selected a separate window will open allowing you set a name for the device
Input any name you wish, then click OK - Another window will appear, this shows detailed video settings for video capture characteristics of the NIX Capture Card
Once these settings are correctly set, click OK (the device should read as 'FHD Capture') - In the Sources panel, click the + button again, and choose Audio Input Capture (Pulse Audio) and click OK
- A small window will appear allowing you to name the device, choose whichever name you wish.
- In the window that appears for Audio Input Capture properties, select FHD Capture Digital Stereo (IEC958), then click OK
- You will now have two entries for the NIX Capture Card in OBS, one for audio and one for video
- In the main OBS window you'll now find audio settings for the NIX capture card (named whatever you chose in the last step) in the OBS mixer
- On the right side of the mixer, there will be a gear/cog icon , click it and select Advanced Audio Properties
- In the Advanced Audio Properties window, look for row for the NIX Caputure Card and set the Sync Offset value to 470

The capture card is now configured for use in OBS.
